Deleting Users, Image Sets or Projects
This guide provides instructions for Administrators on how to remove users and image sets from projects as well as deleting users, image sets and projects completely.
Removing Users from a Project
Administrators have the capability to remove labellers or arbitrators from projects when necessary. This section outlines the steps to do so.
Step 1 Log in as Admin: Access the Administrator account using your credentials.
Step 2 Navigate to the 'Projects' Tab: Go to the projects where all projects are listed and choose the project from which a user needs to be removed.
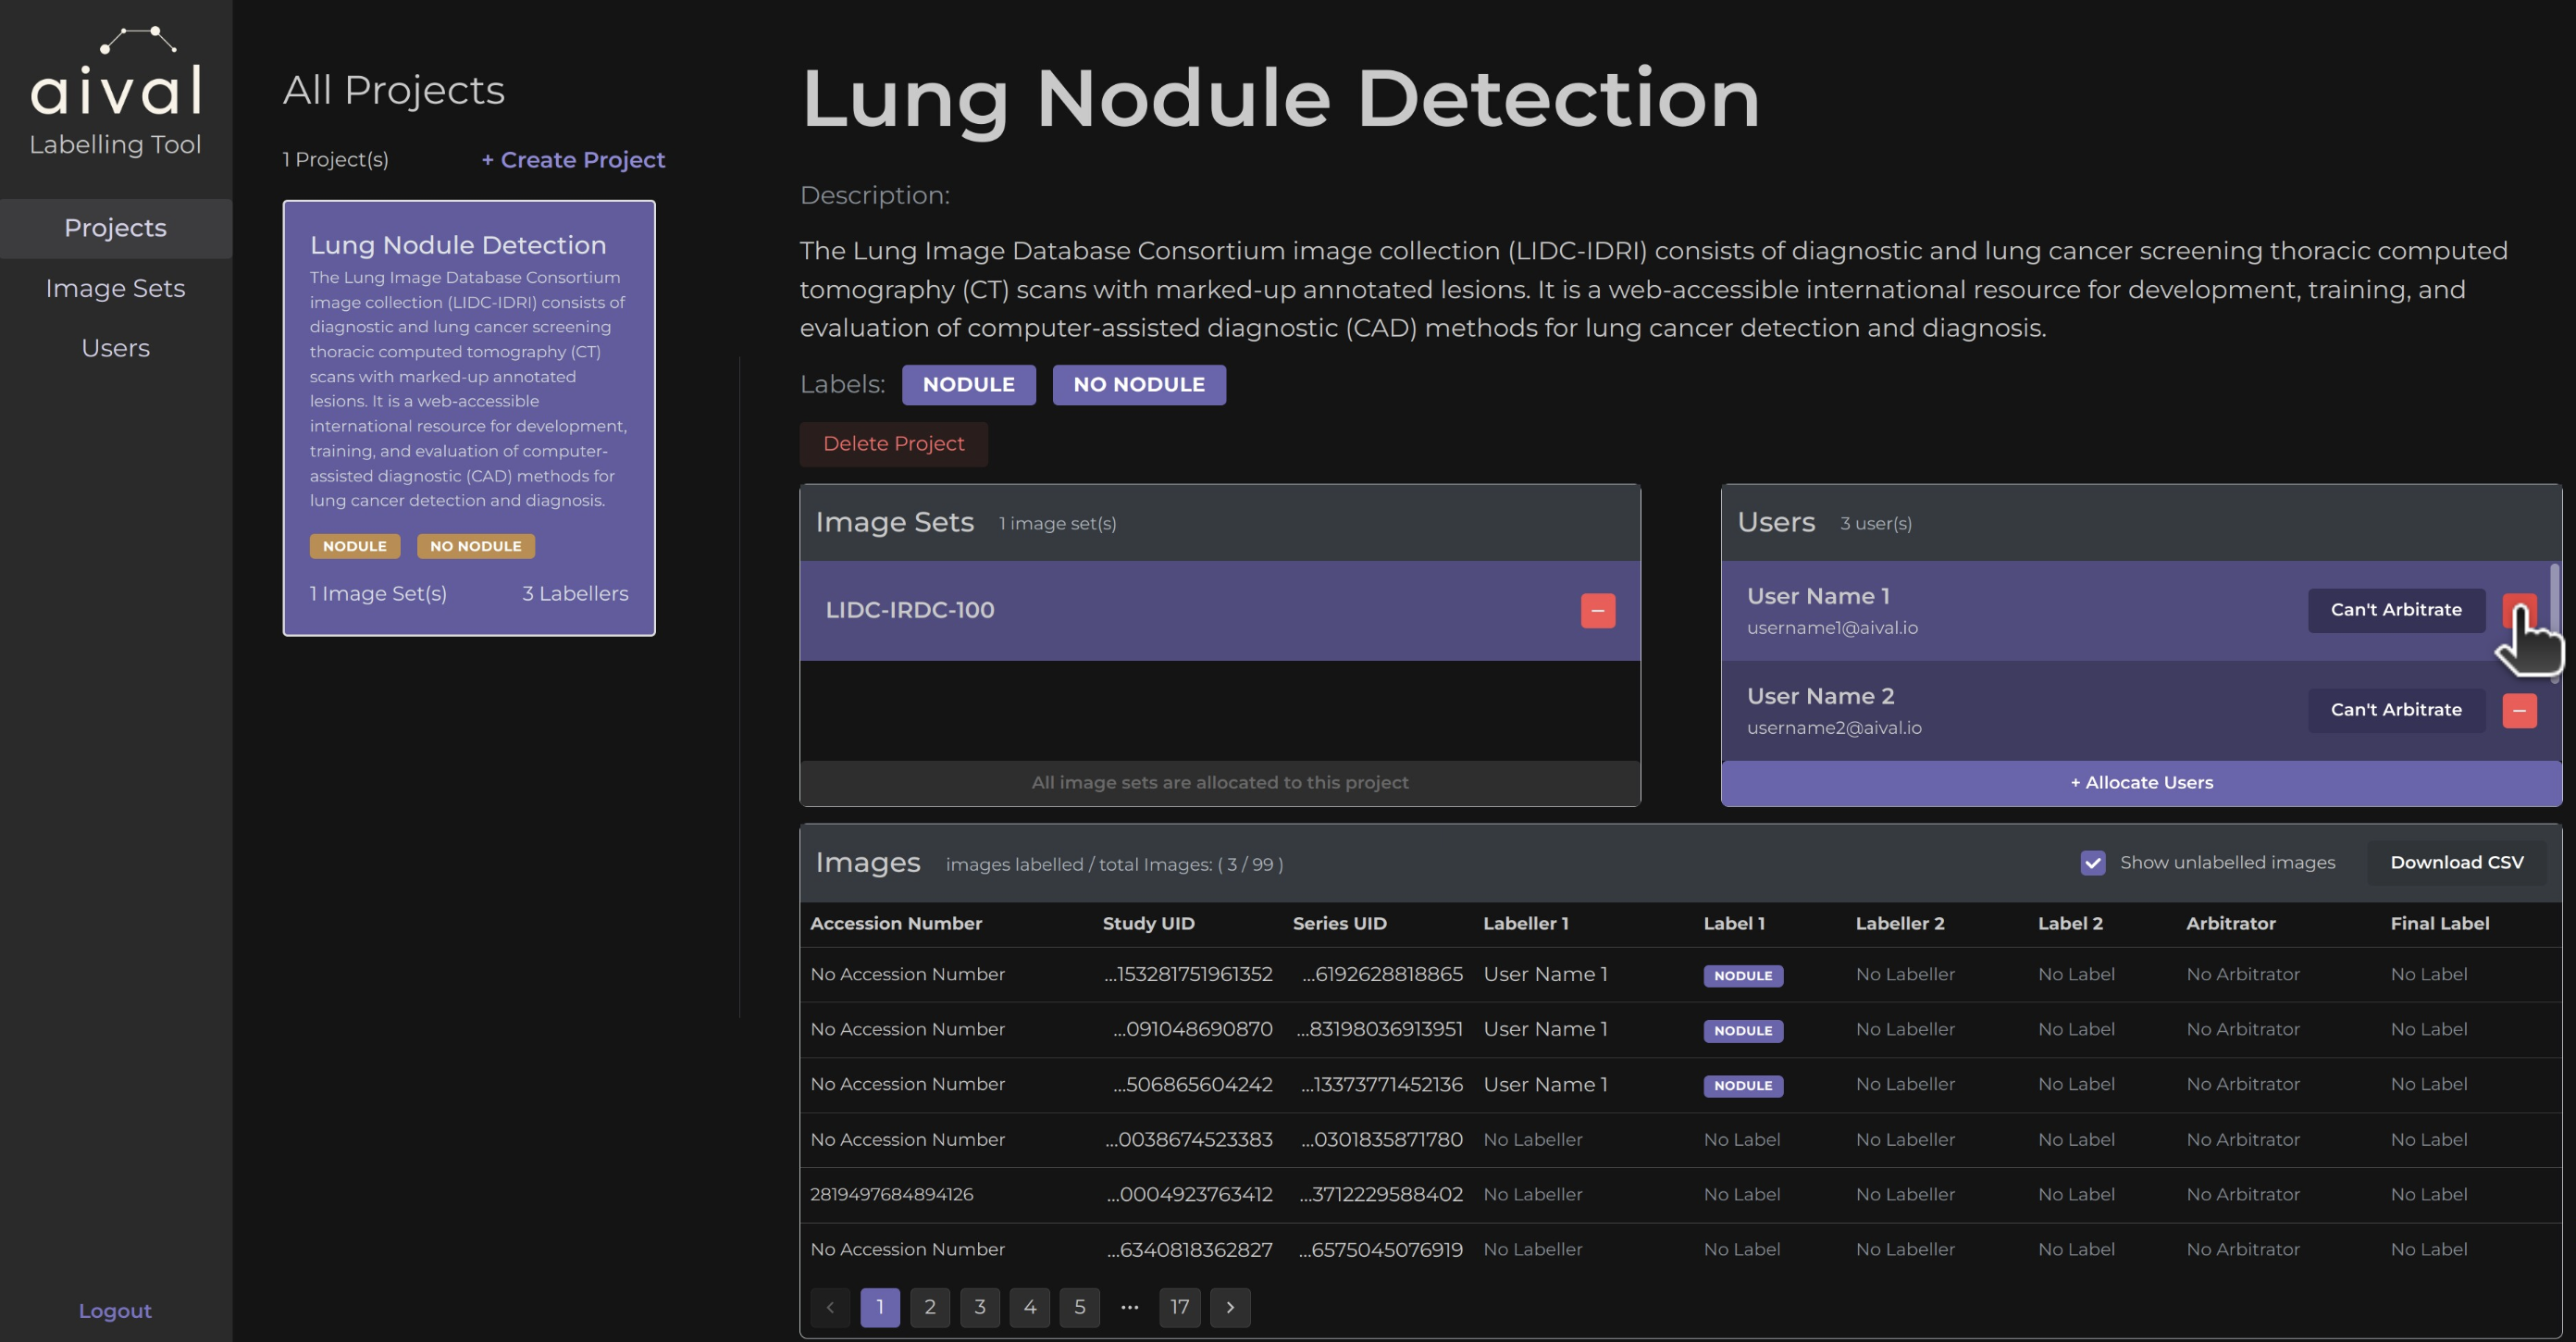
Step 3 Remove User: Click on the associated red minus icon next to the user's name within the project Users section. Confirm the action if prompted.
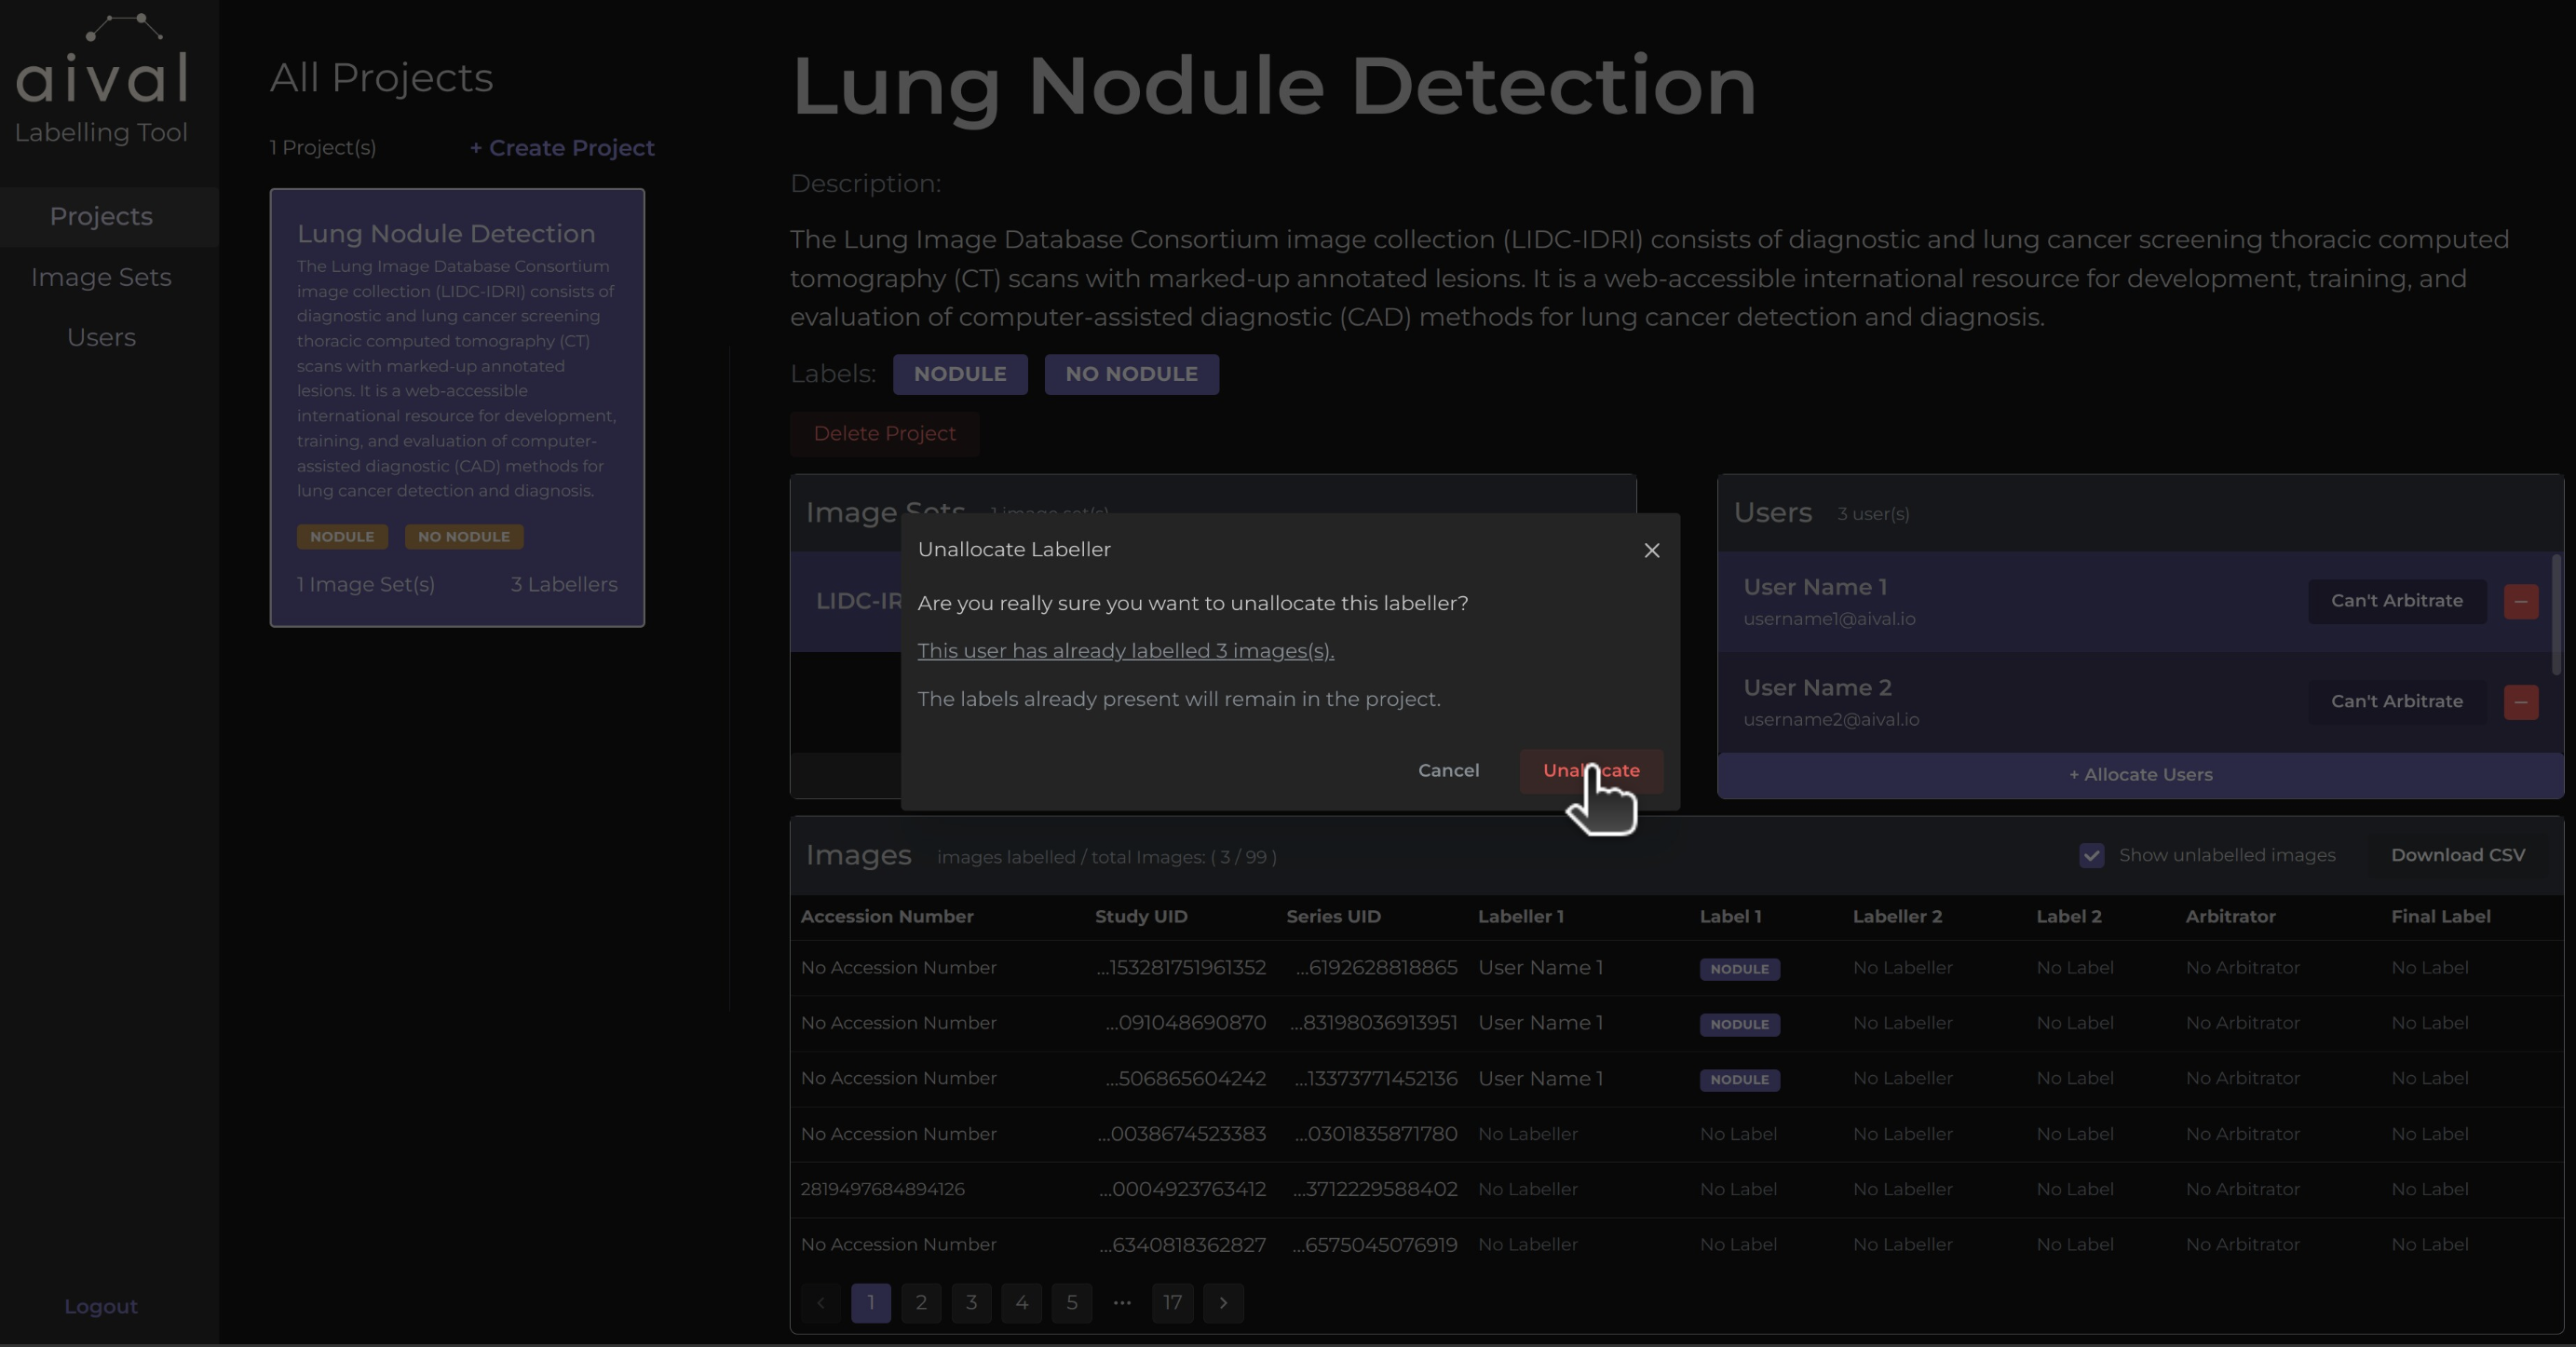
If the labeller has already labelled images, you will be prompted with an additional warning message stating that the labeller will be removed from the project and they will no longer have access to the project. However, their labels will remain within the project and only accessible to the Administrator(s).
What Happens Next
The user will no longer have access to the project. Any images sets from the project that were assigned to the user will be unassigned and returned to the pool for reassignment. The user's contribution history to the project will remain for record-keeping. If you want to re-allocate the deleted user back into the project, you may the system will recall the labels that user has already labelled.
If the user you are removing from a project is an arbitrator then any further discrepancies between the remaining labellers will be indicated in the project table but no longer arbitrated unless a labeller is assigned as the new arbitrator for the project. The steps to do that can be found on this page.
Deleting Users from the User's Registry
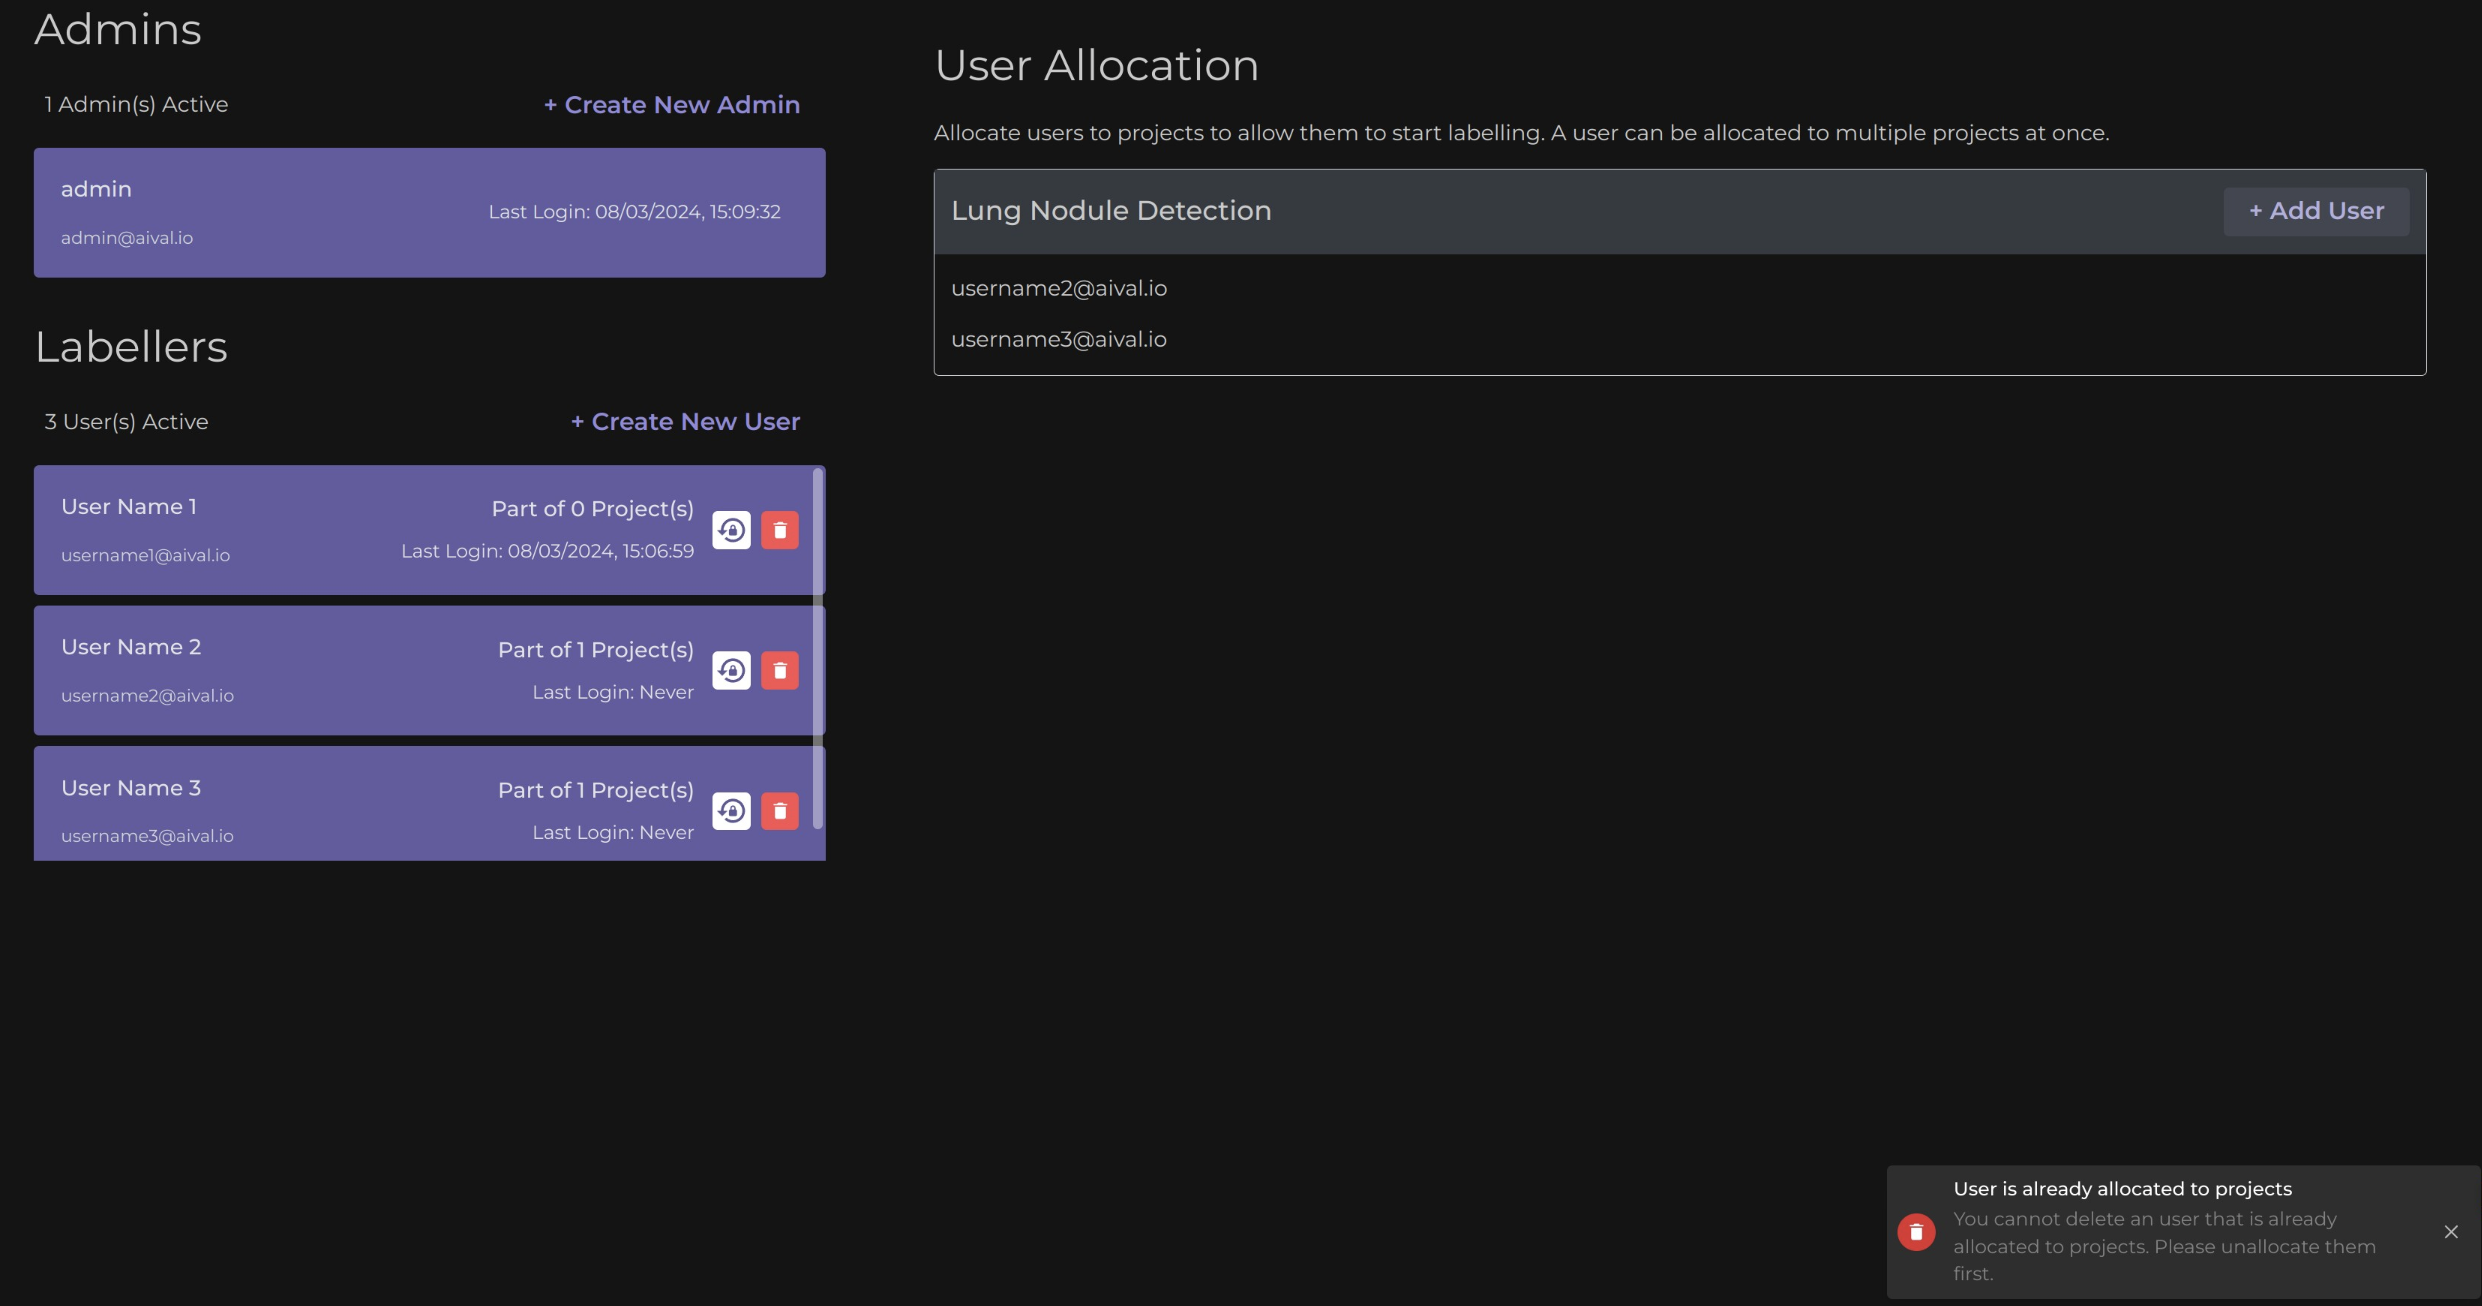
Administrators can also permanently delete Labellers or Arbitrators from the User's registry when necessary. However, you will only be able to permanently delete a user if they have been unallocated from all projects. Below is the guide to do just that:
Step 1 Log in as Administrator: Access the administrator account using your credentials.
Step 2 Navigate to the 'Users' Tab: Go to the 'Overview' section of the page, where all the created users will be listed. From this page you will be able to see if the user is still allocated to a project, if the labeller is still allocated a project and try to delete them, the following pop up will appear.
Step 3 Delete User: Once you have made sure the user you would like to permanently delete has no allocated projects then click on the associated red bin icon next to the user's name. Confirm the action if prompted. In this example will delete 'User Name 1', which has been unallocated from all projects.
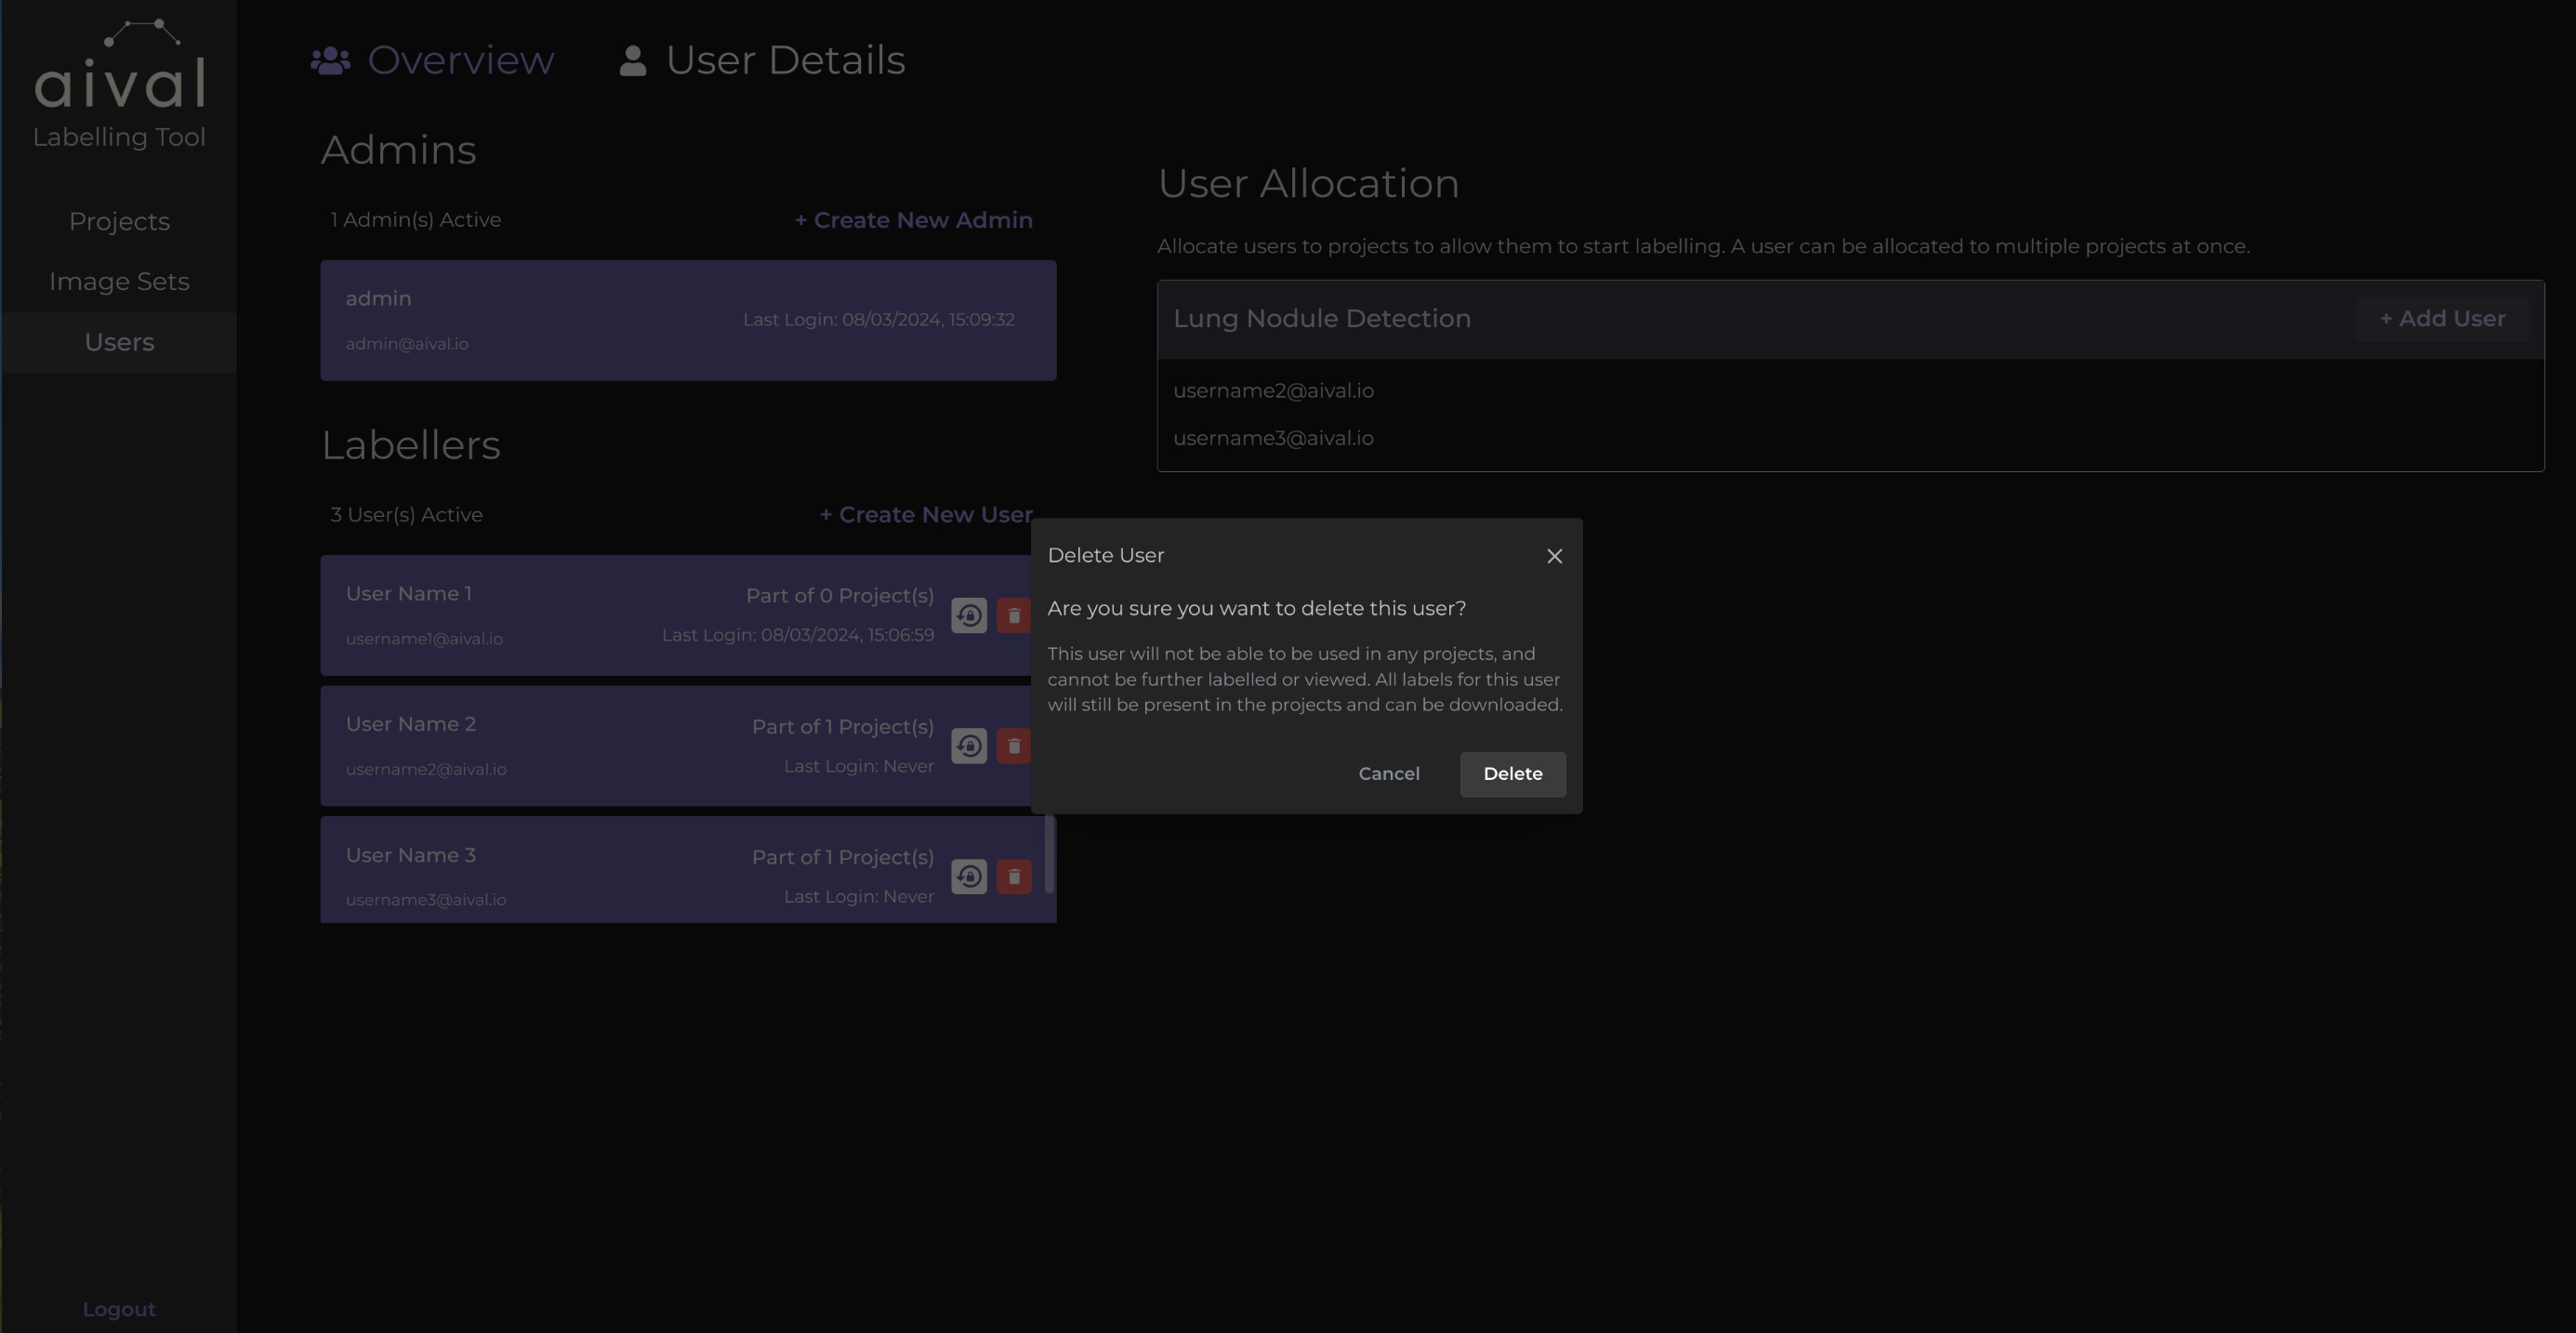
The labels created by the deleted Labeller will be retained in the project's table and can still be downloaded via the CSV file, even after their removal from the project.
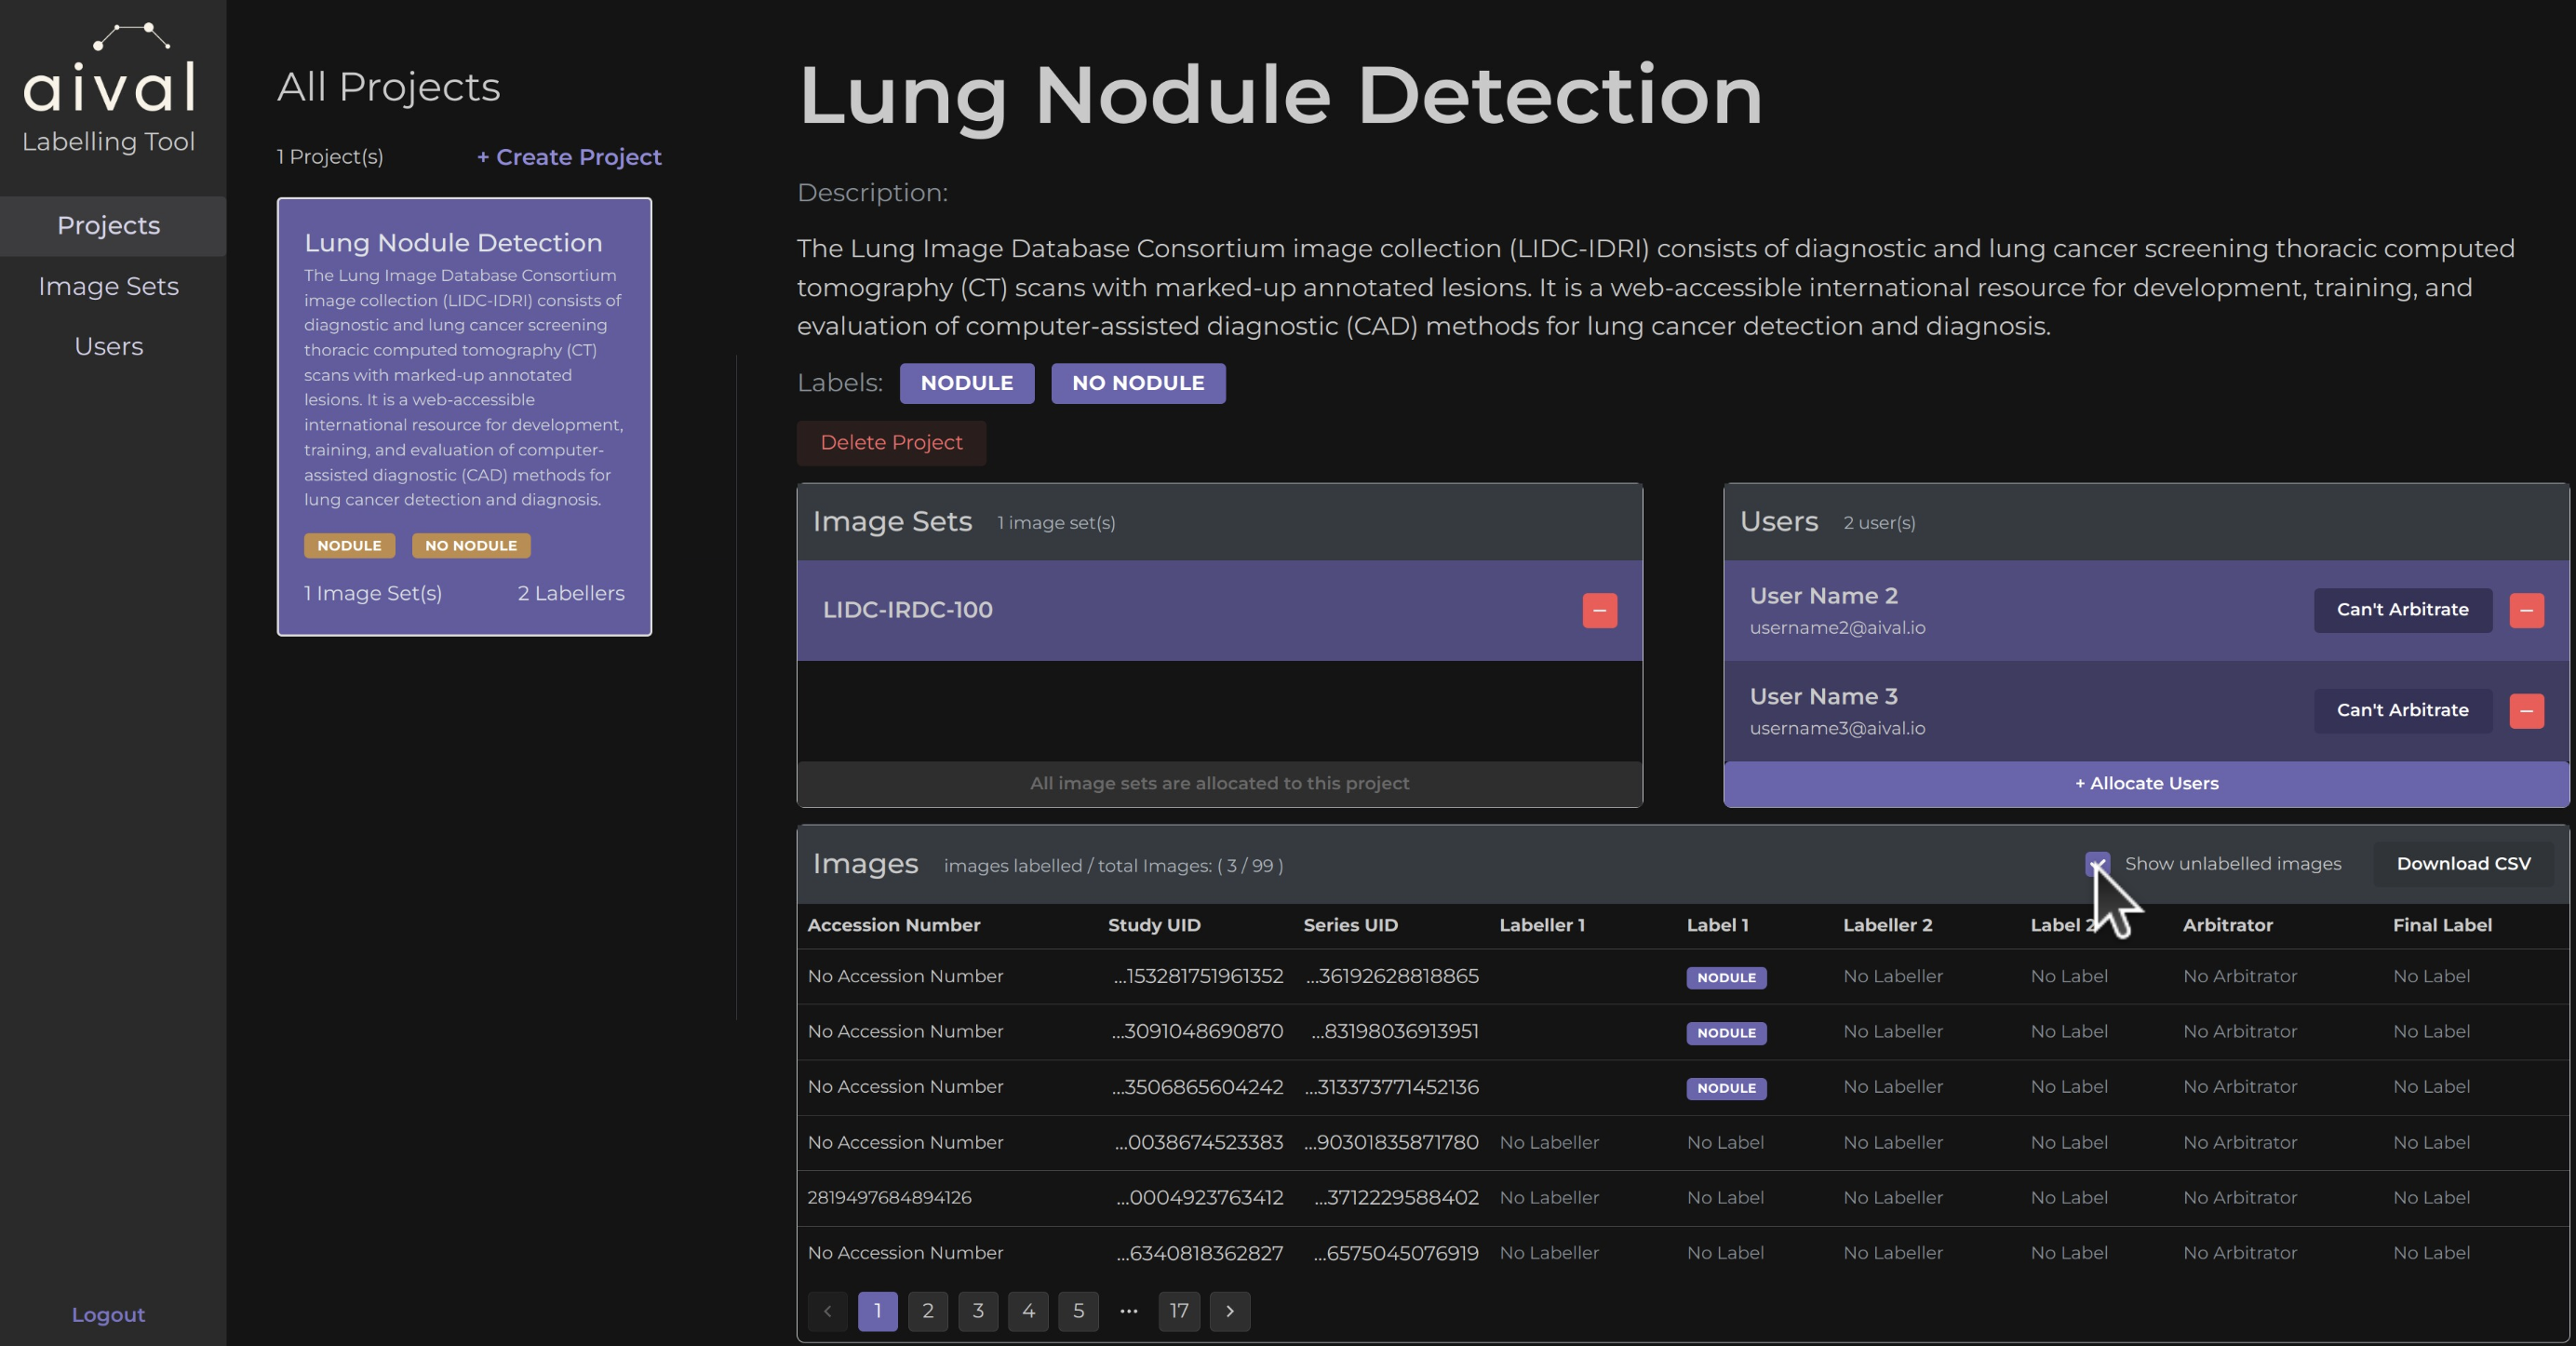
What Happens Next
The user will no longer have access to their account. Any projects that were assigned to the user will be unassigned. The user's contribution history to those projects will remain for record-keeping.
Again, if the user you are deleting is an arbitrator for certain projects then any further discrepancies between the labellers that remain for those projects will be indicated but no ties will be broken.
As a best practice, it's important to inform your users in advance that they will be deleted from all projects. This notification allows them to prepare and ensure they have enough time to export their work avoiding any loss of information.
Removing an Image Set from a Project
Image sets can also be removed from a project if needed. Below is the guide to do just that:
Step 1 Log in as Admin: Access the administrator account using your credentials.
Step 2 Navigate to the 'Projects' Tab: Locate the project you would like to have an image set removed from by clicking on that project.
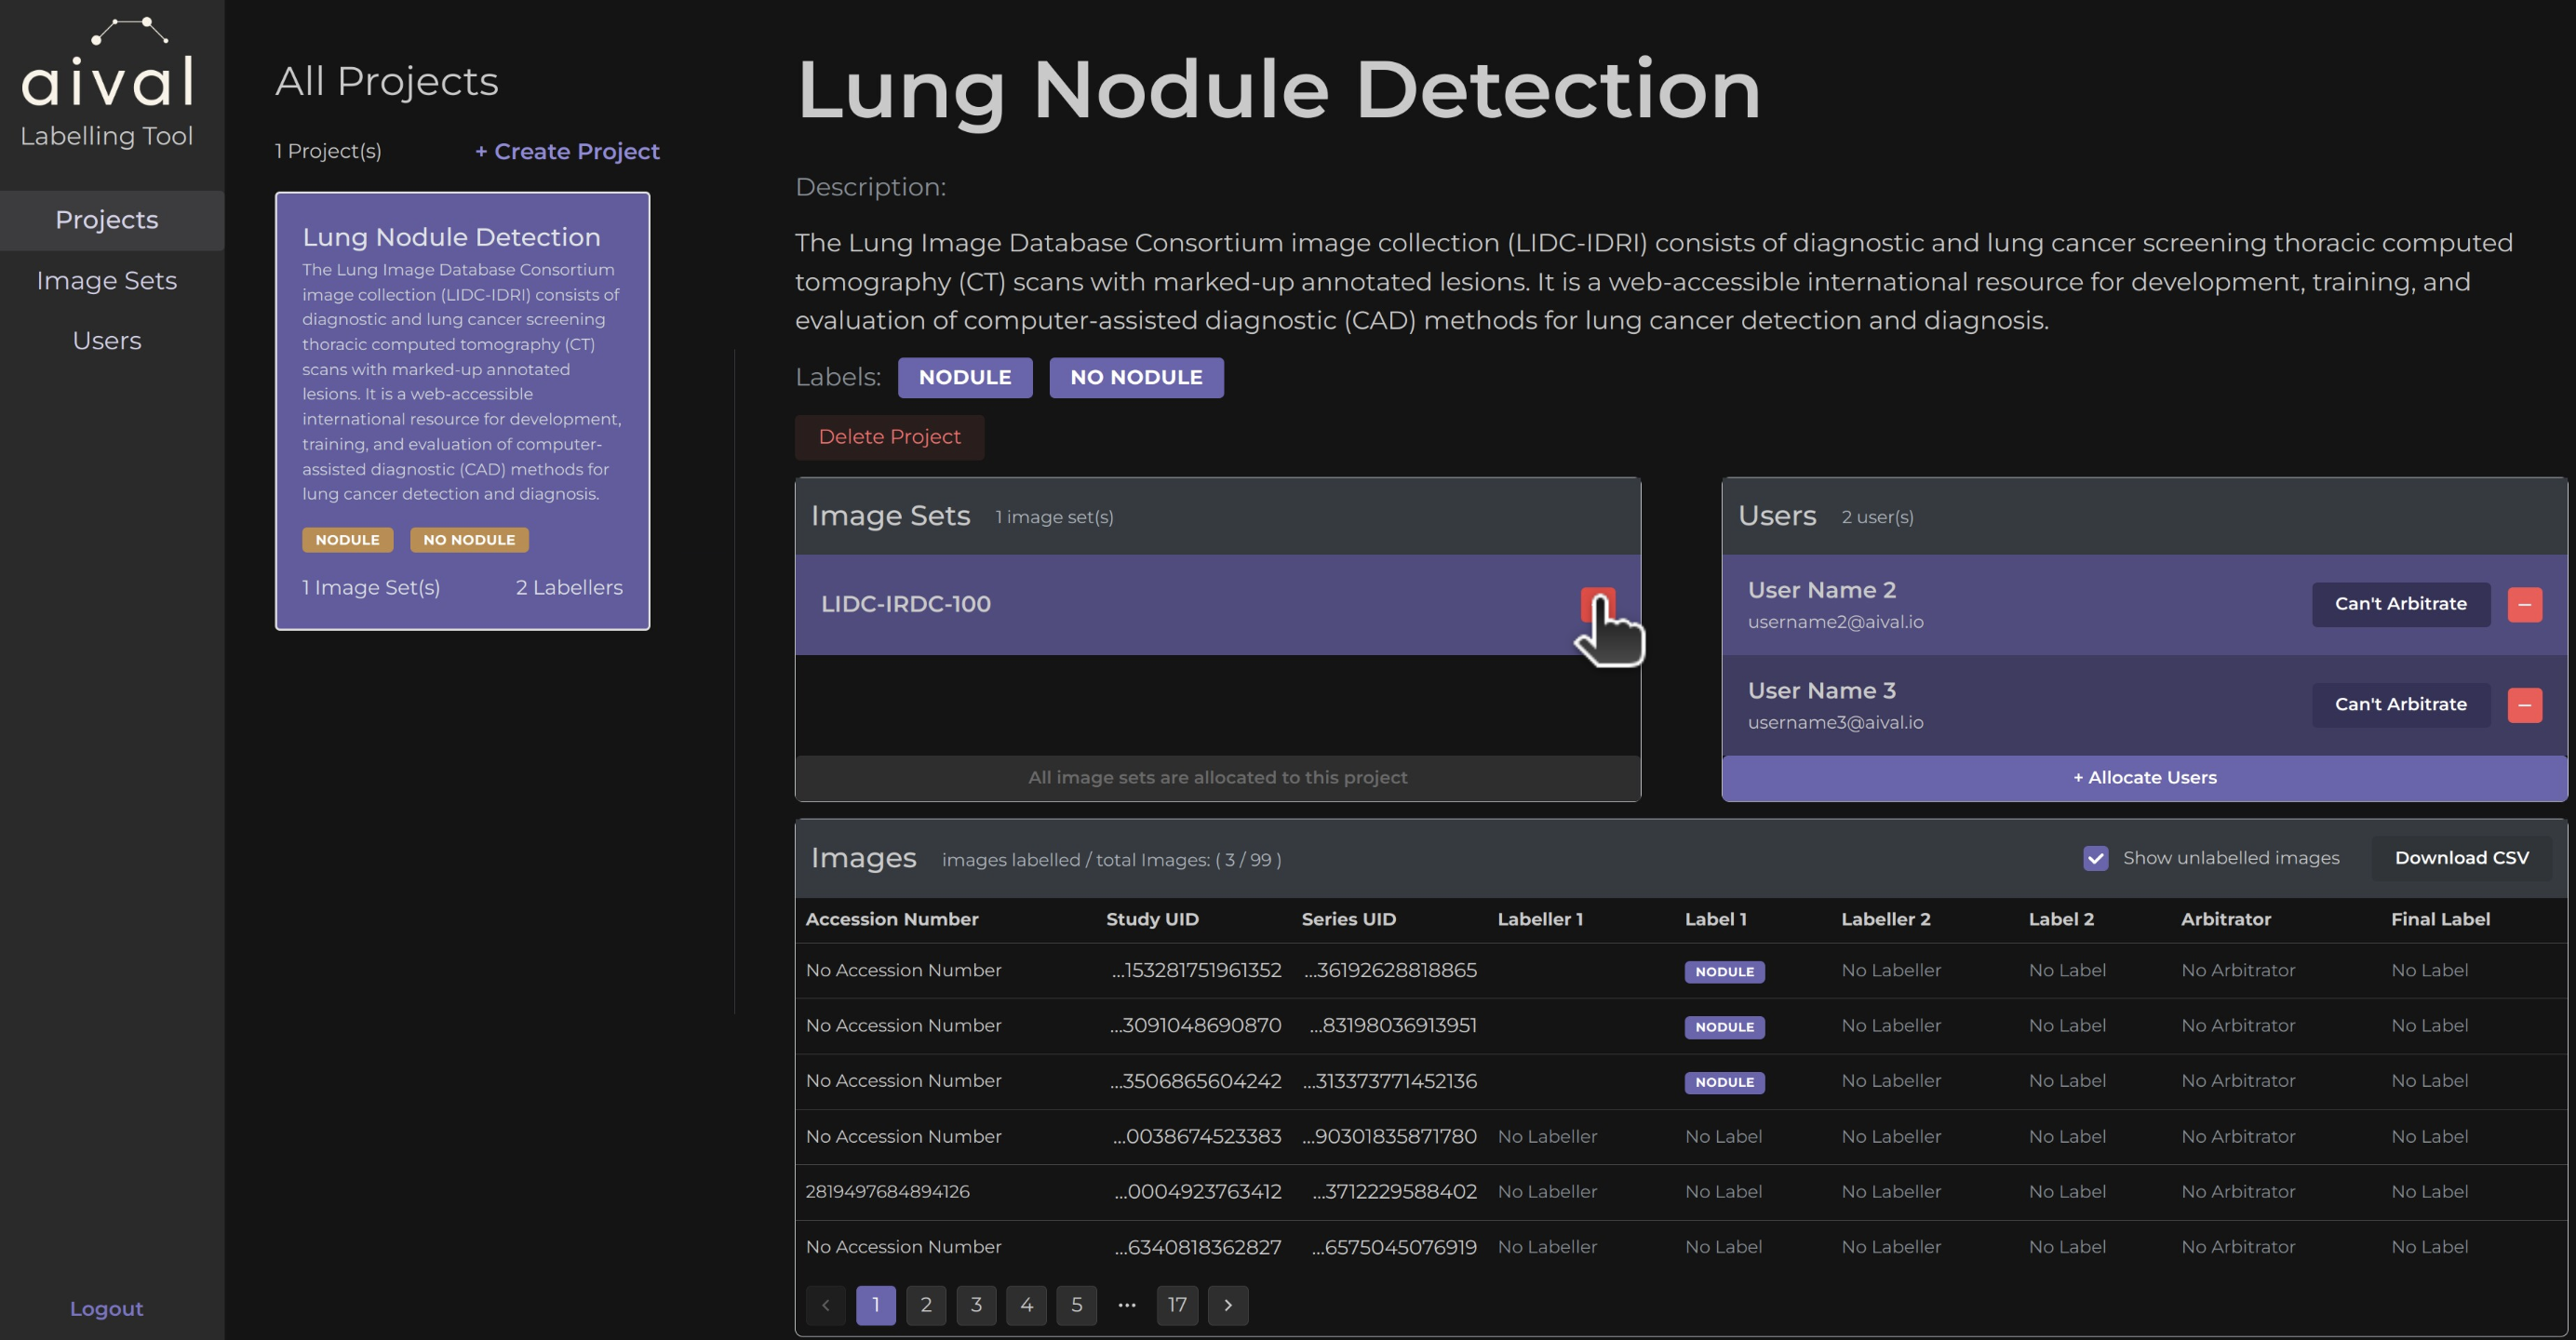
Step 3 Remove the Image Set: In the image set section of the project click on the associated red minus icon next to the image set's name. Confirm the action if prompted.
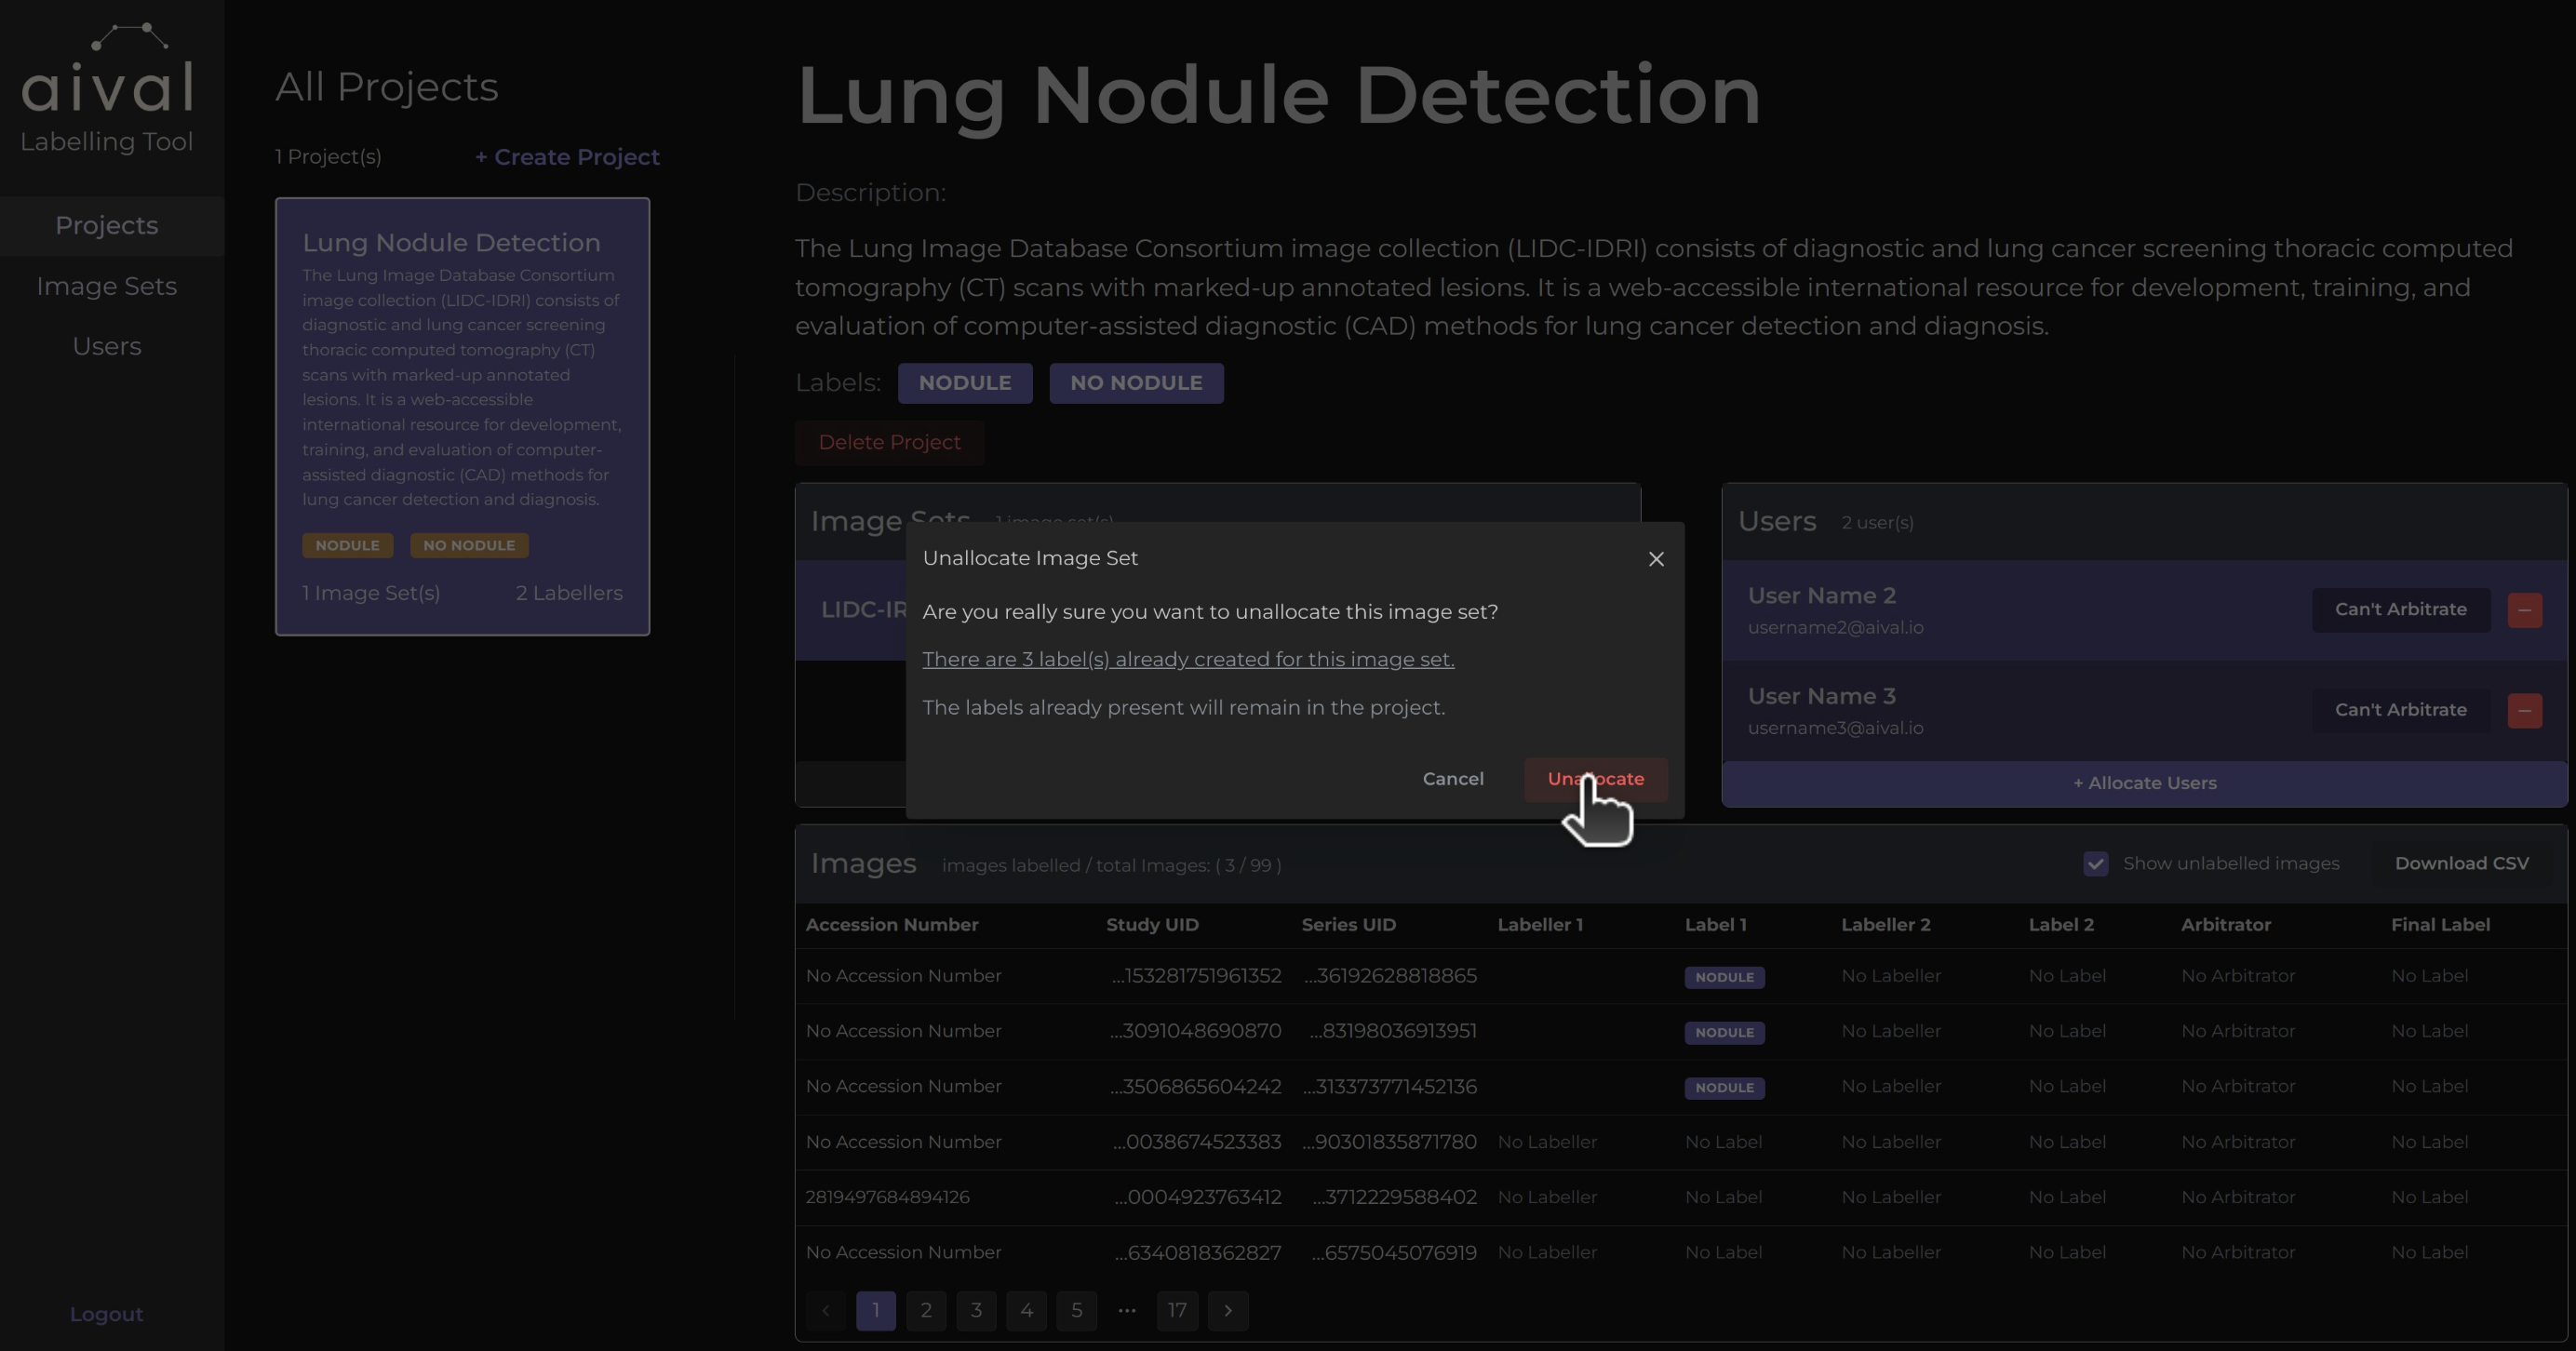
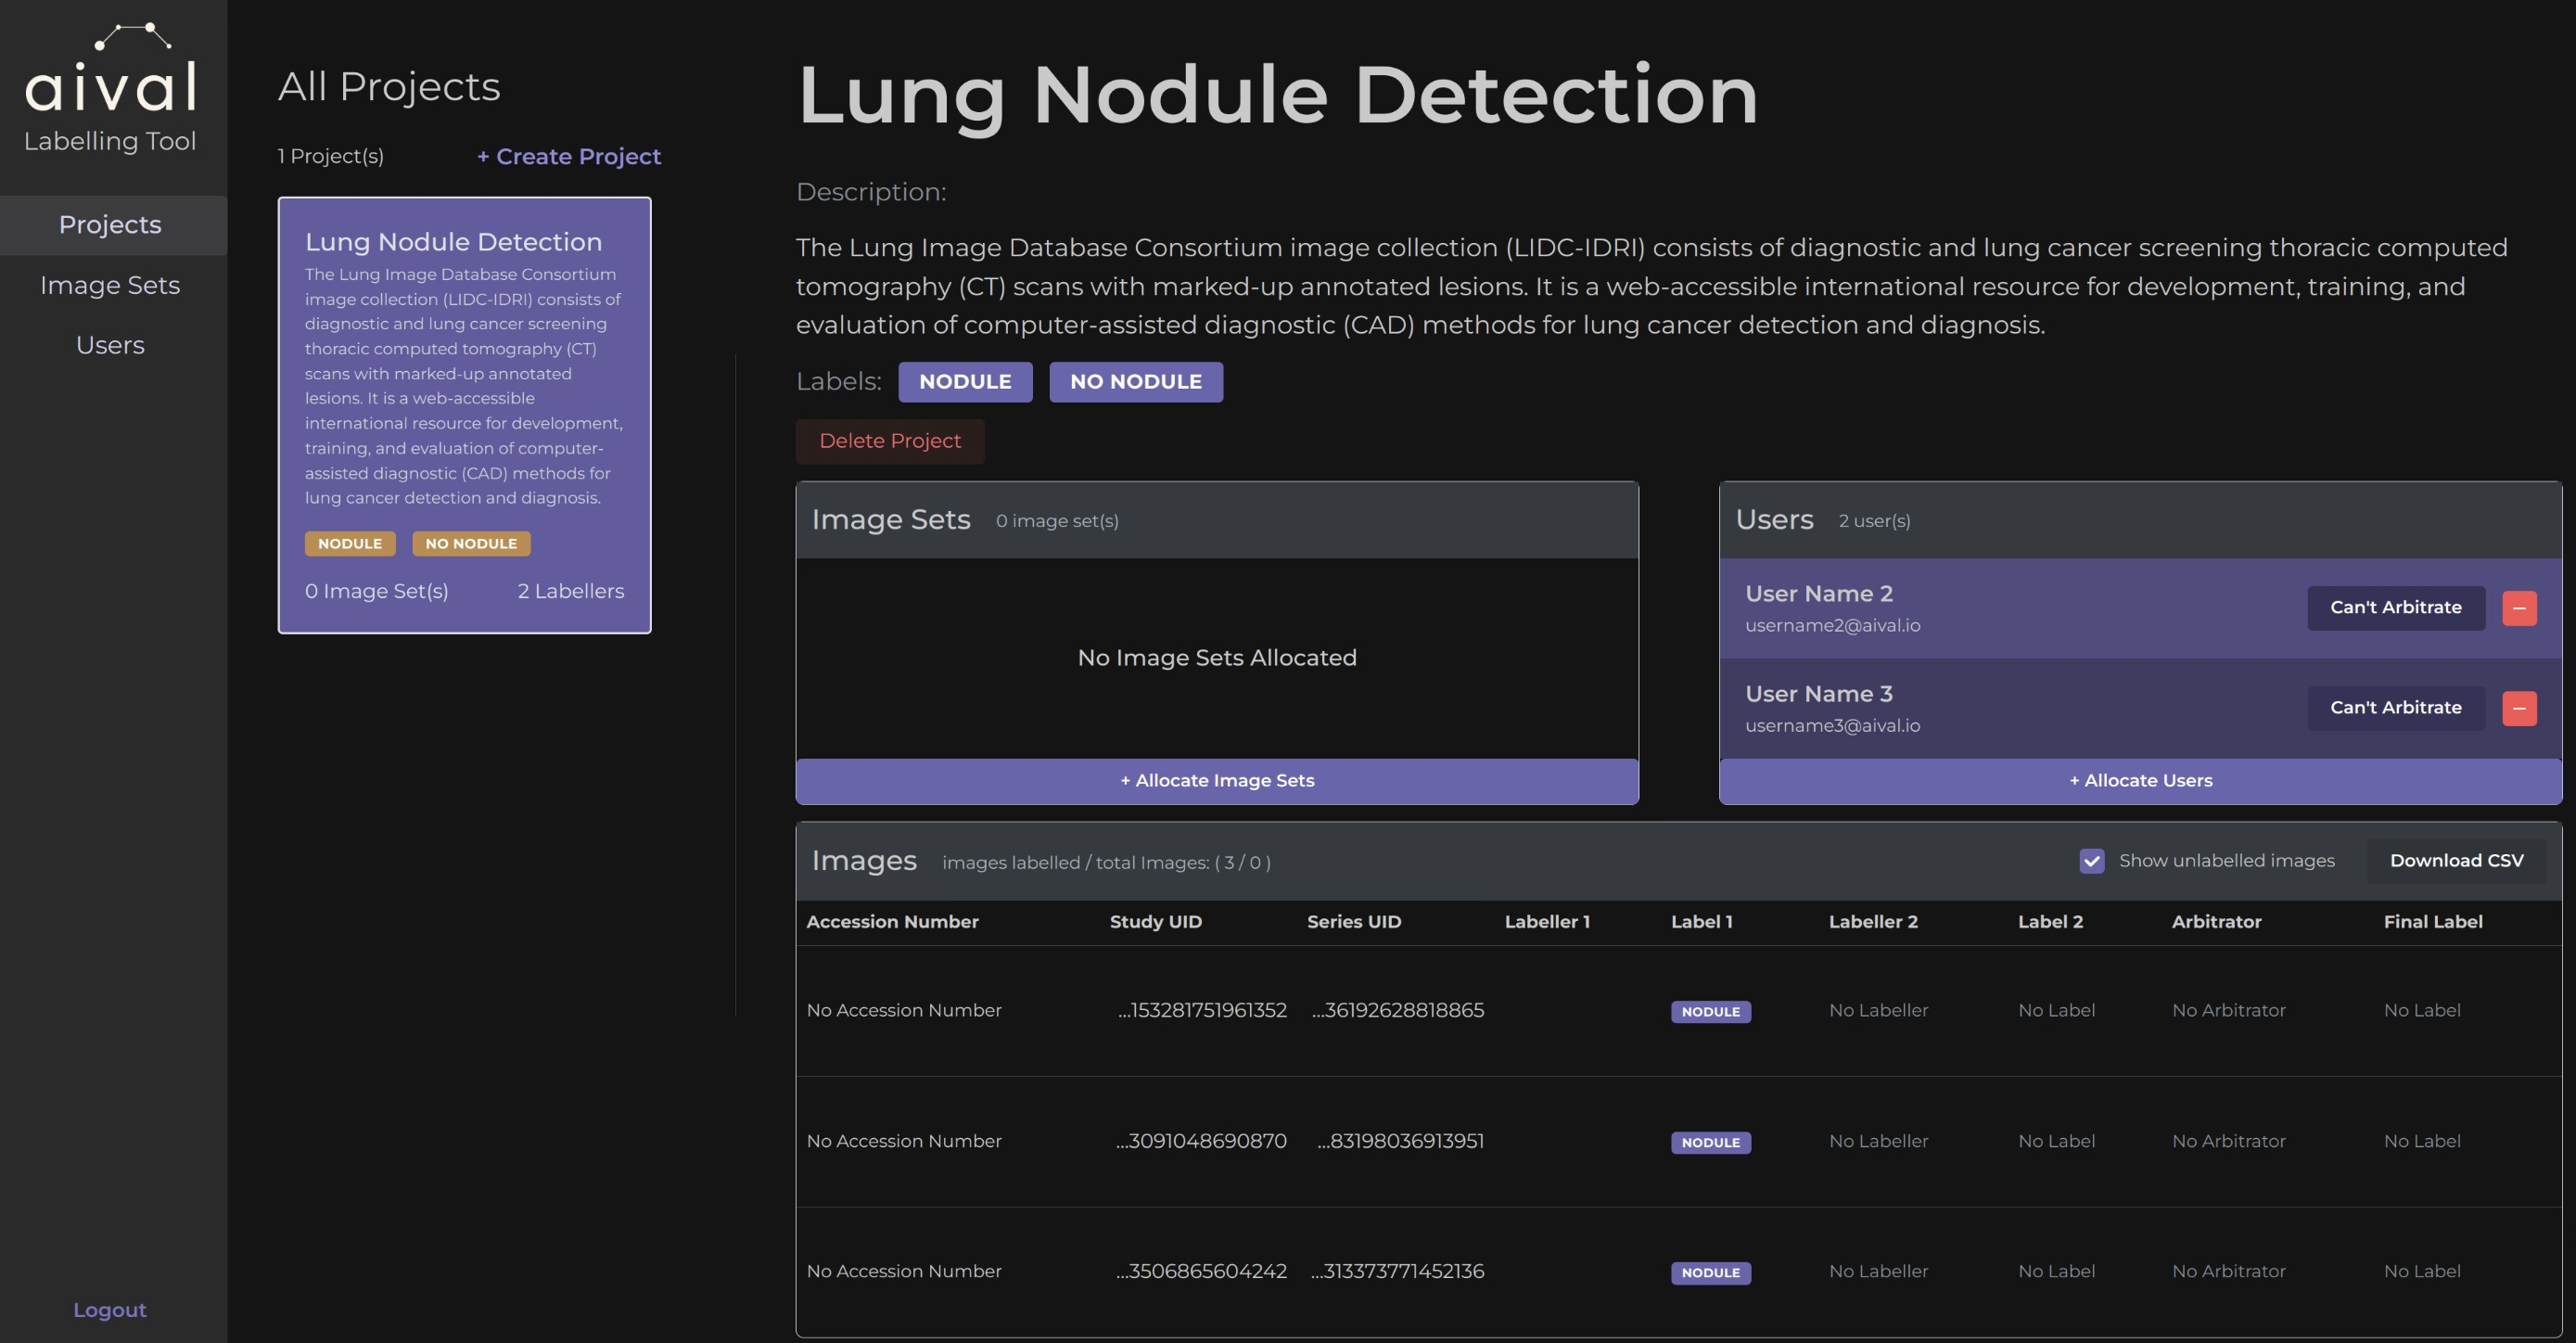
What Happens Next
Removing an image set from a project, would simply indicate that any images from that the image set will be removed for labelling. In other words, whatever has been labelled for that image set will remain in the project, but any unlabelled images will be removed. Therefore it's best to let the users know so that they can download their work and can expect image counts for that project to change.
Deleting an Image Set
Image sets can also be deleted from the image set registry if needed. An Administrator will only be able to permanently delete an image set from the registry if it is no longer been allocated to any projects.
Step 1 Log in as Admin: Access the administrator account using your credentials.
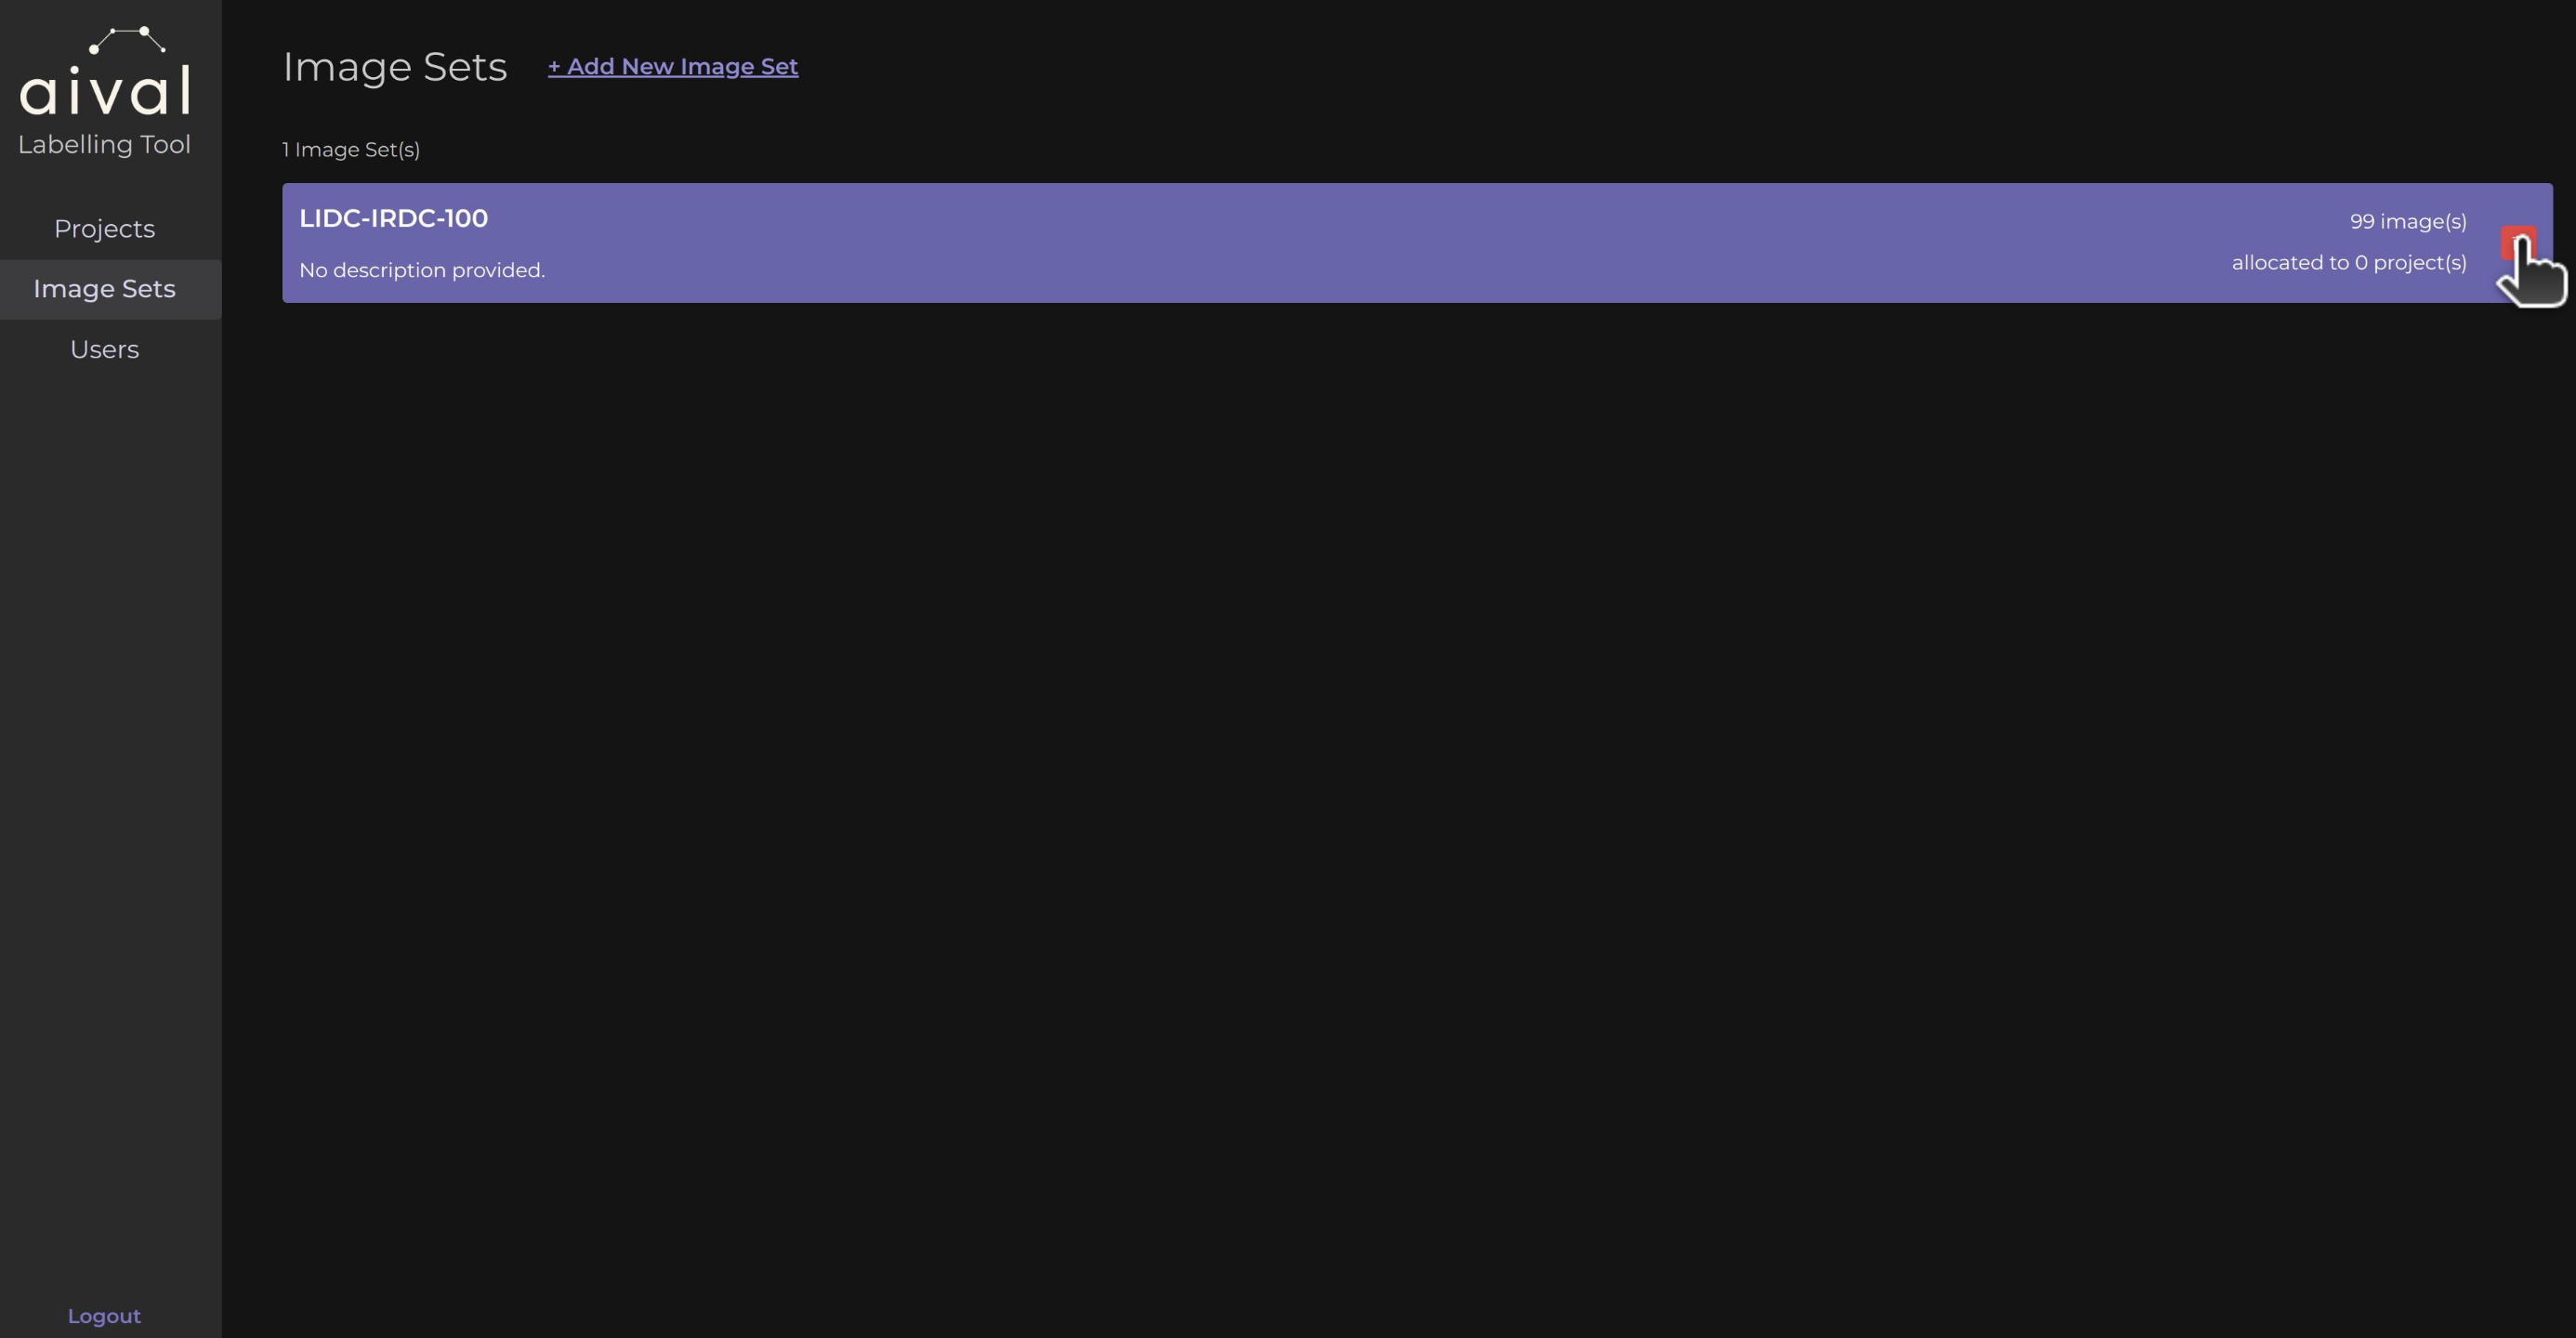
Step 2 Navigate to the 'Image Sets' Tab: Select the image set you wish to delete, ensuring it is not allocated to any projects, indicated by an allocation count of 0.
Step 3 Delete the Image Set: Click on the associated red bin icon on the right hand side of the image set at hand. Confirm the action if prompted.
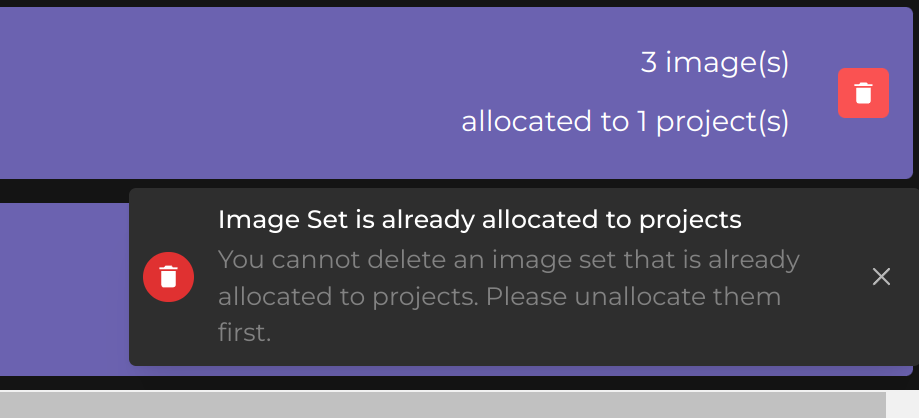
If the image set you desire to delete is being used in 1 or more projects, you will need to manually remove it from each project before you will be able to delete the image set permanently.
What Happens Next
Completely deleting an image set from the registry will mean that no project currently had been assigned to it and that it will no longer be available to be assigned in the future to a project unless the exact same image set is re-uploaded and allocated back to a project. However, any labels associated to a project that had images from the deleted image set will no longer be stored.
Please make sure all parties are notified well in advance when you decided to do this such that Labellers and Administrators can have the time to save their work.
Deleting Projects
Administrators can delete entire projects. This section explains the process and implications.
Below is a structured guide on how to delete an individual project:
Step 1 Log in as Admin: Access the administrator account using your credentials.
Step 2 Navigate to the 'Projects' Tab: Select the project you would like to delete by clicking on it.
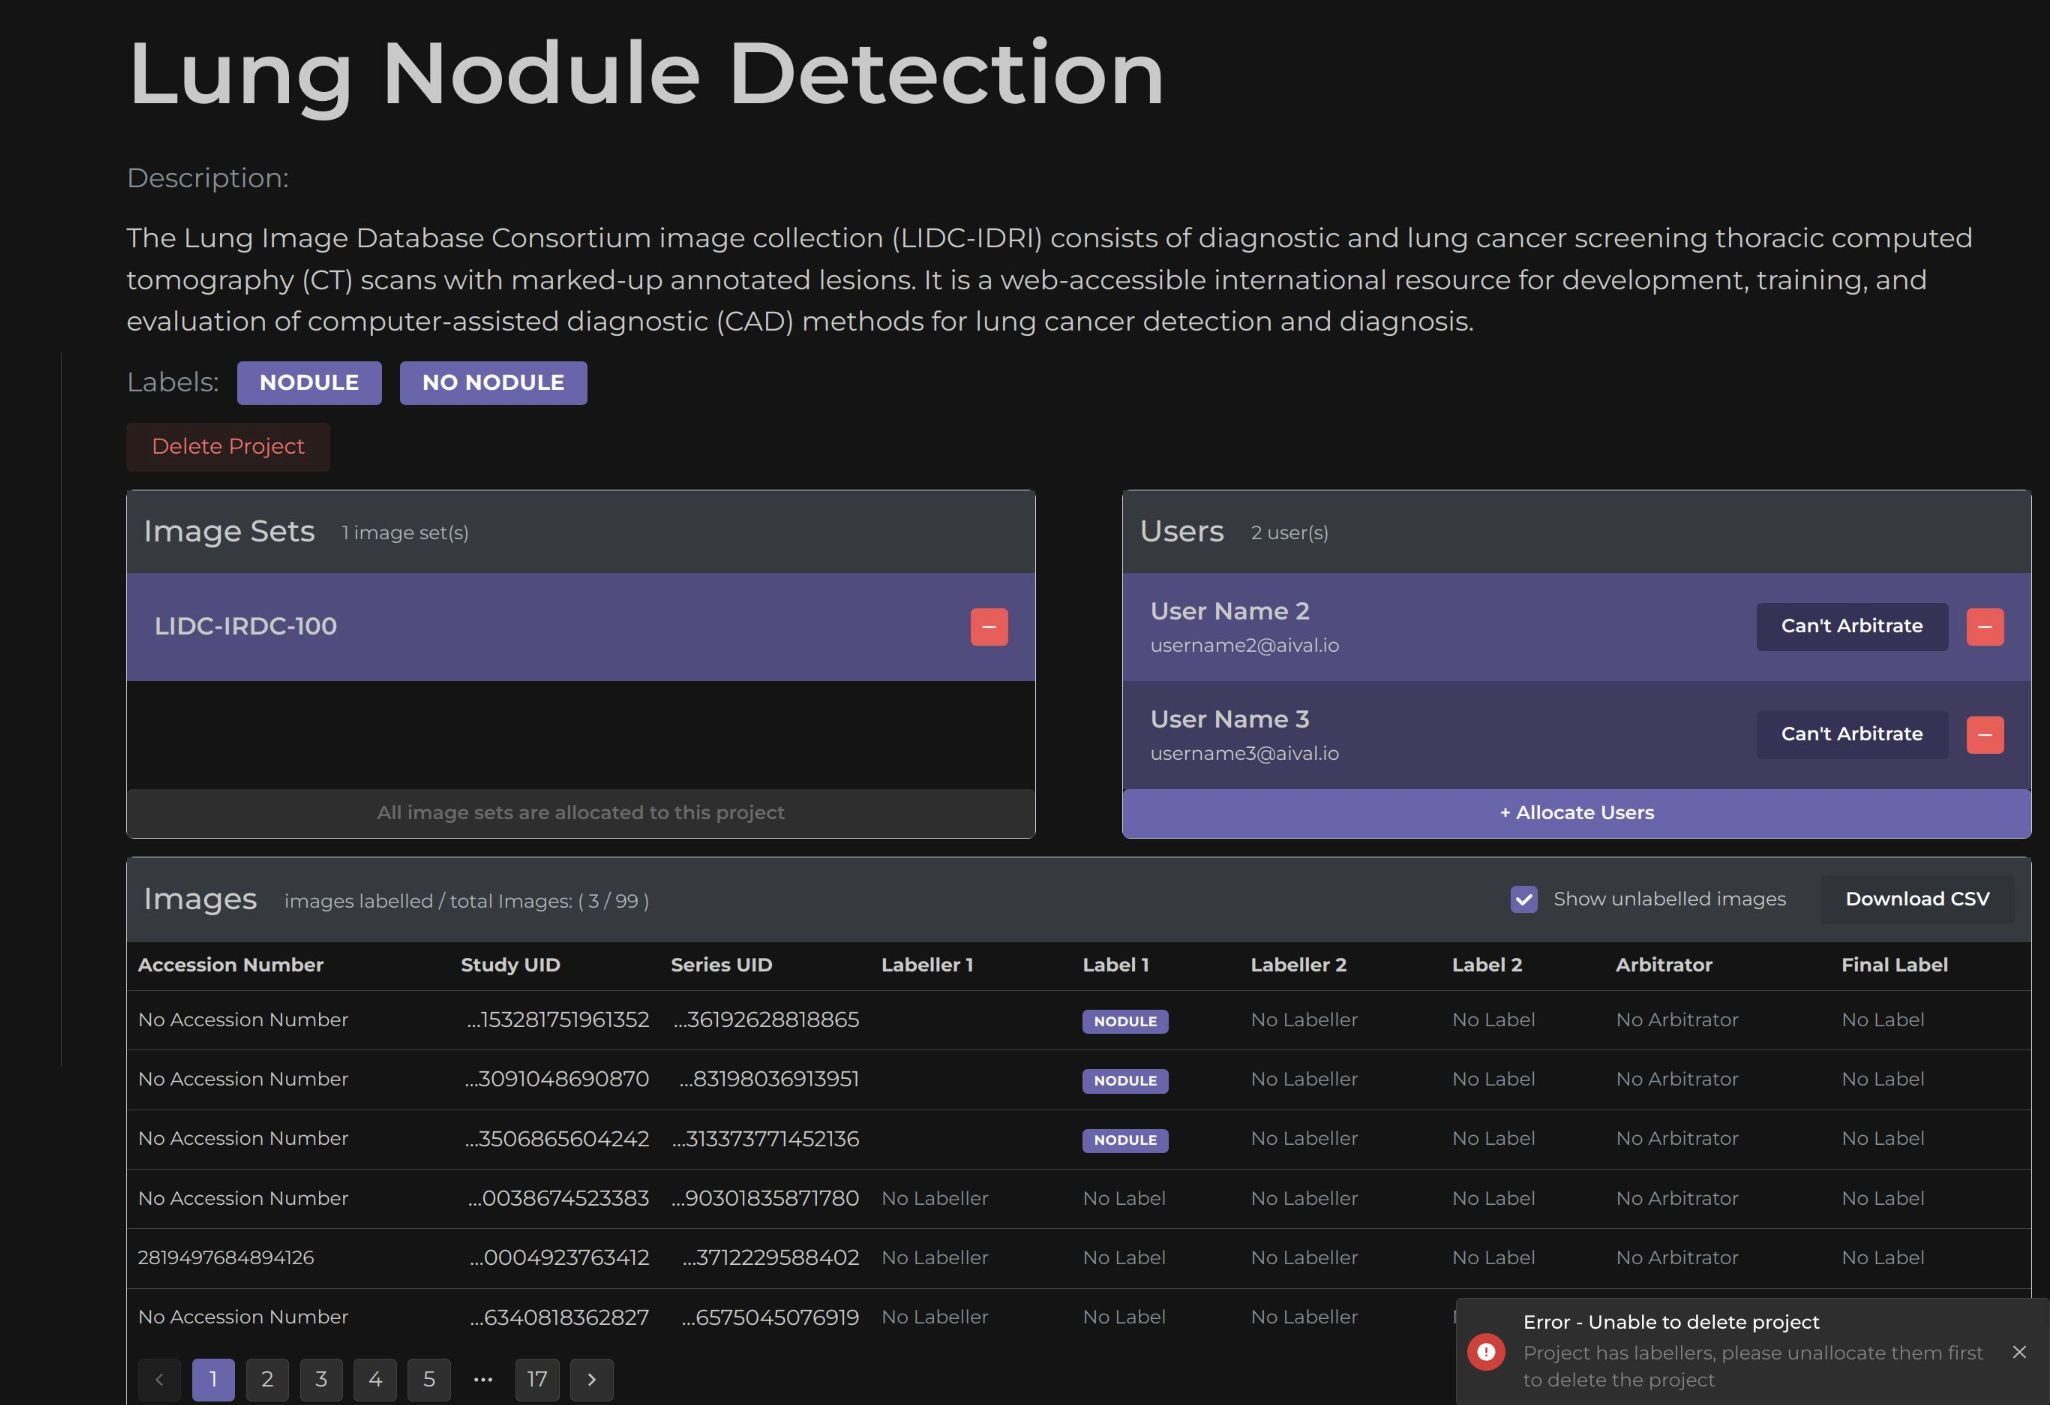
Step 3 Delete Project: Click on the associated red 'Delete Project' button located below the project's title.
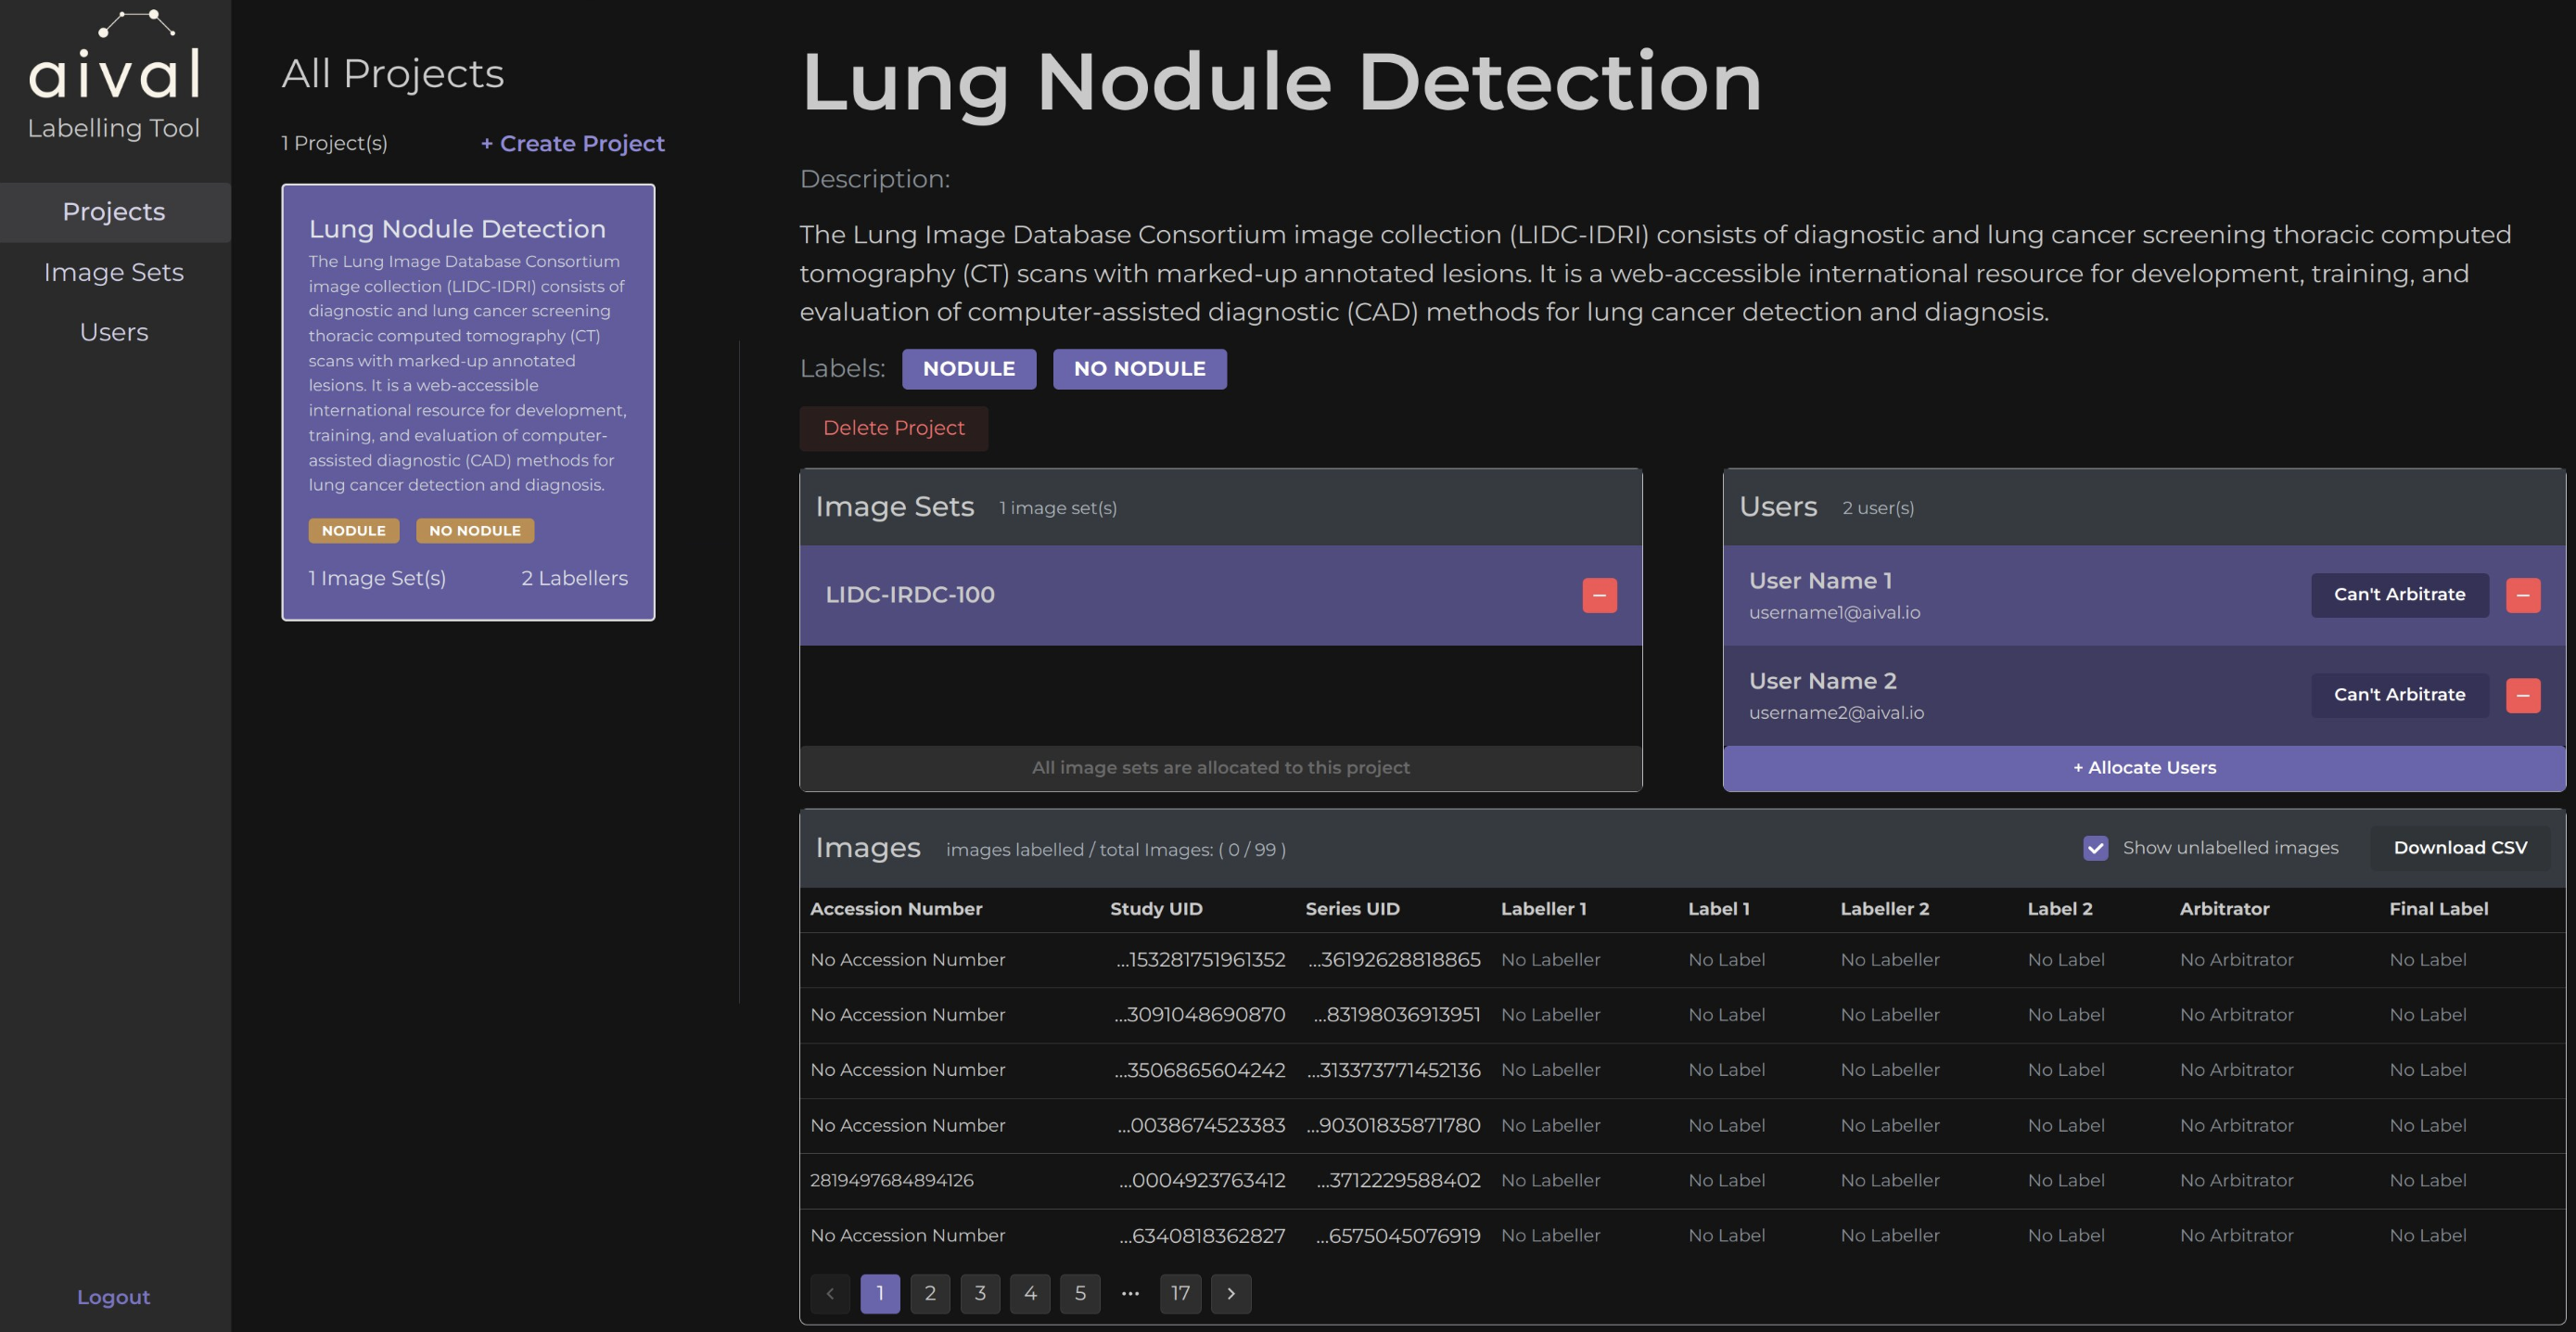
Step 4 Confirm Deletion: All labellers and image sets must be unallocated before you're able to delete the project. Then a confirmation prompt will appear. Confirm to proceed with the deletion.
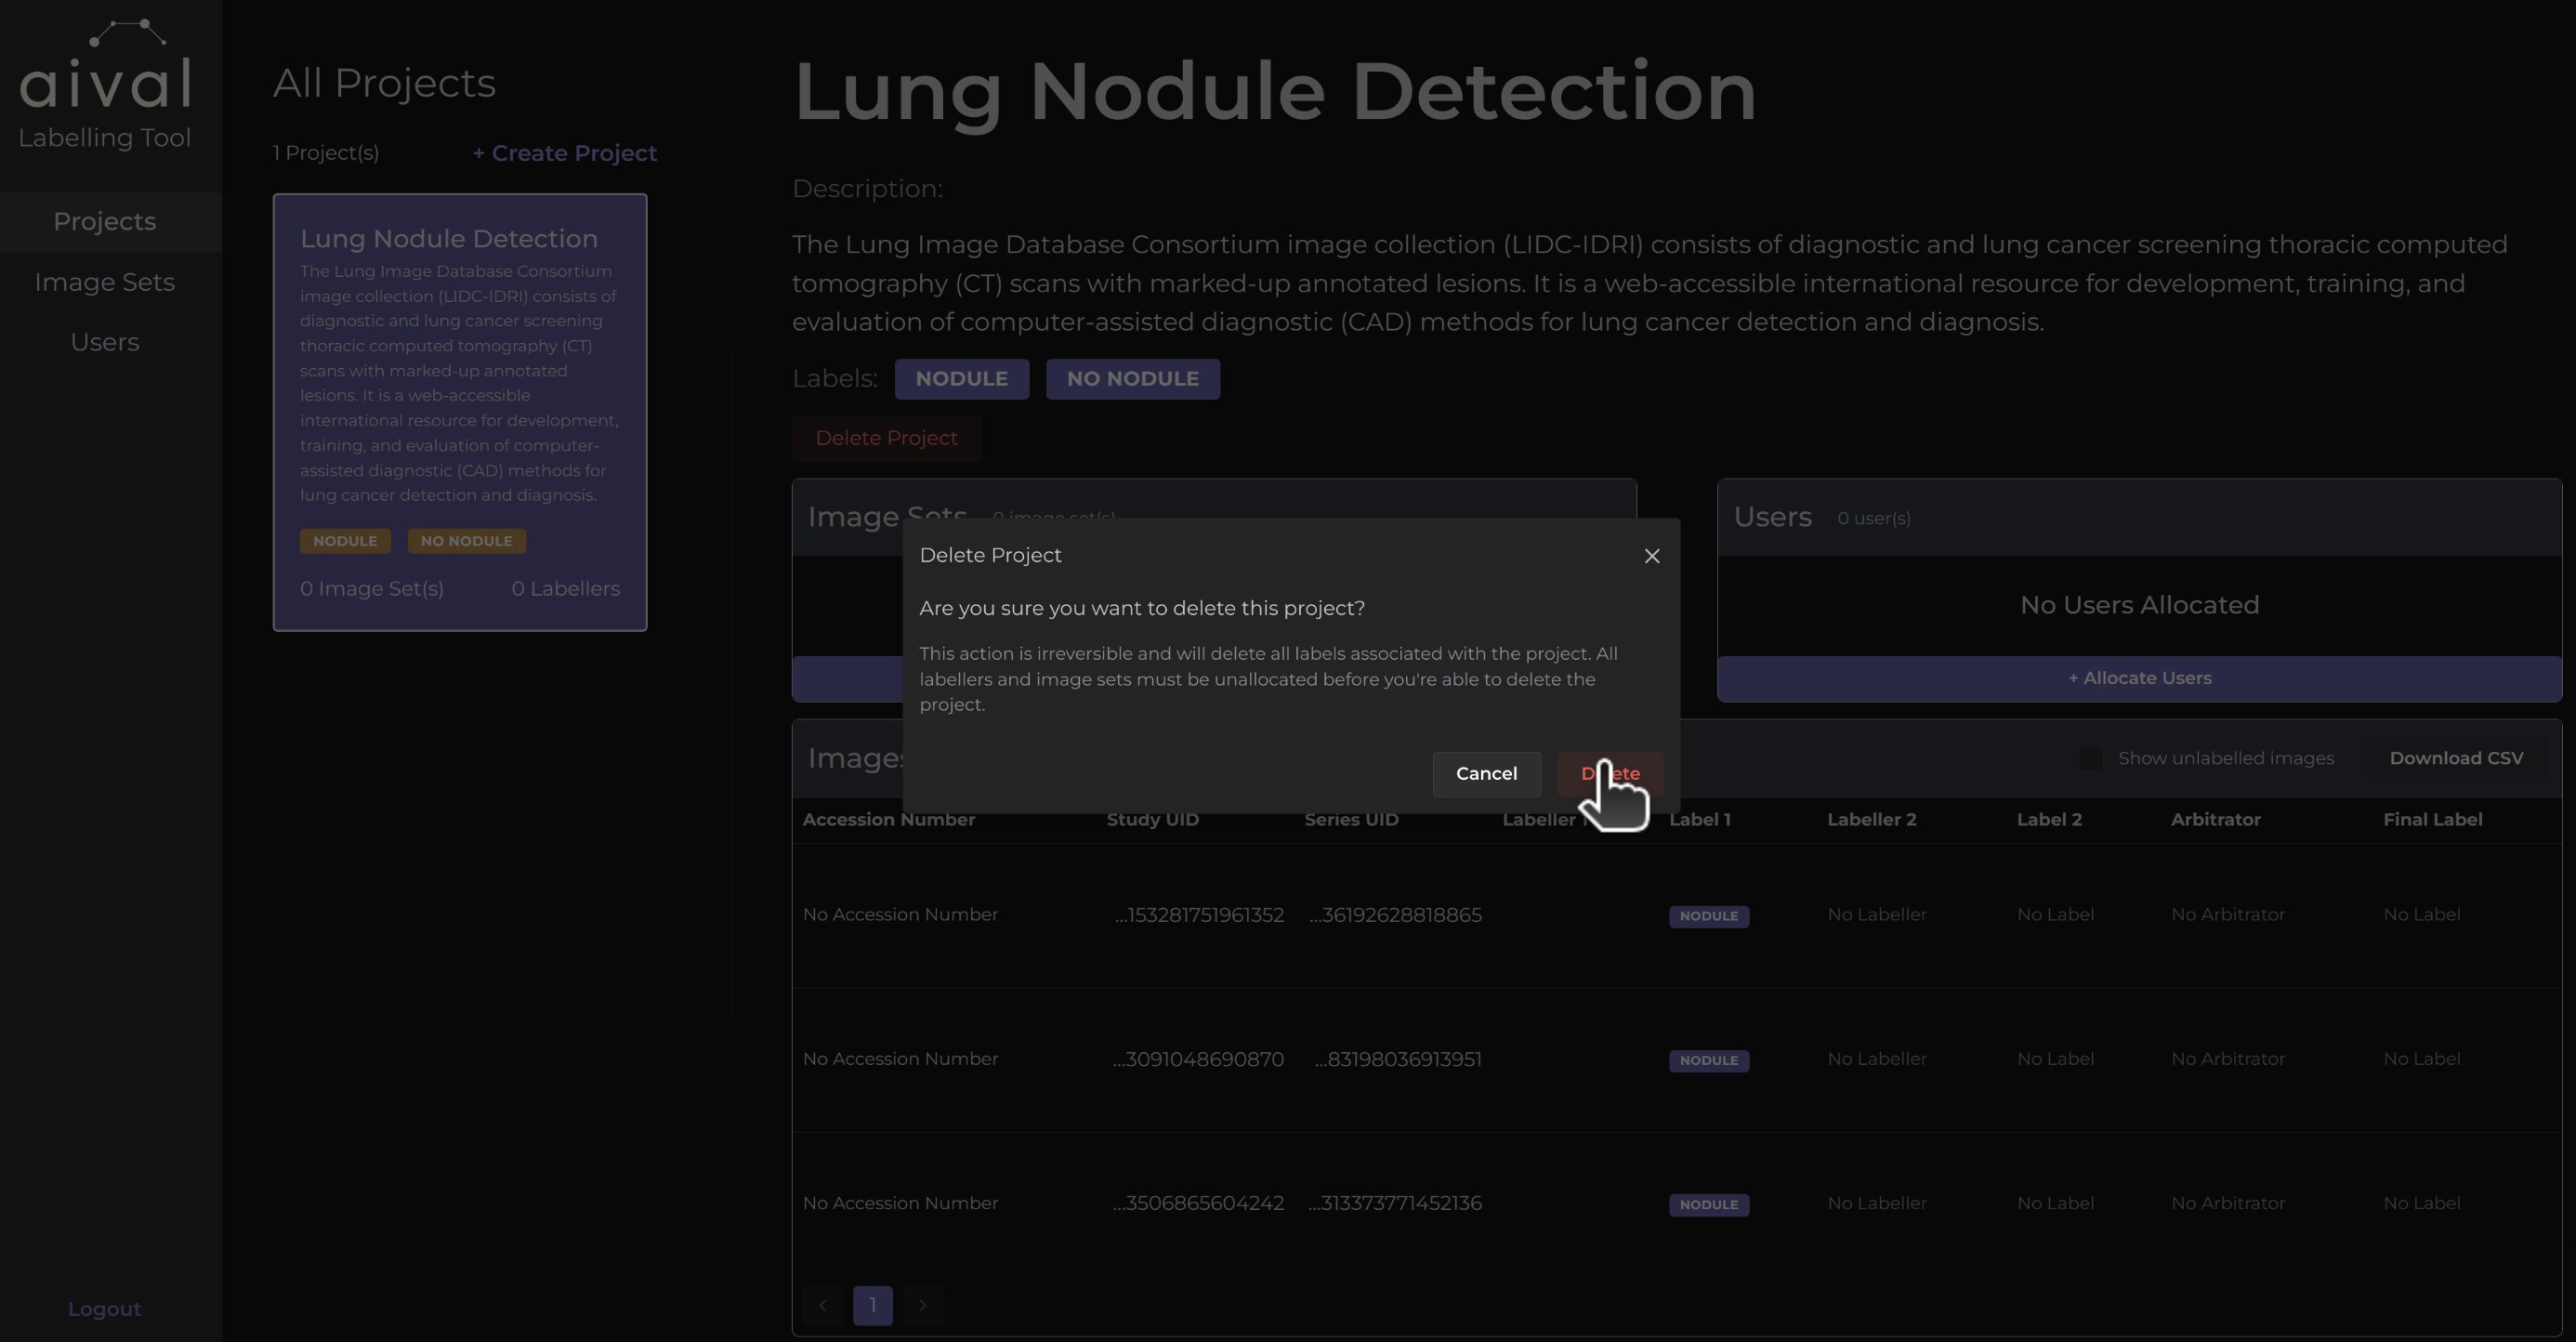
If the project still contains at least one image set or labeller then the following pop up will appear on your screen.
What Happens Next
All data associated with the project, including labels and user contributions, will be permanently removed. Users assigned to the project will lose access immediately. The action is irreversible; ensure all necessary data is backed up or exported before deletion.
As a best practice, it's important to inform your users well in advance if a project is slated for deletion. This courtesy notice allows them to prepare and ensure they have enough time to export their work, such as downloading CSV files of their data, to avoid any loss of information.