Adding an Arbitrator to a Project
What is an Arbitrator?
Arbitrators are Labeller accounts endowed with the authority to settle disagreements in the labelling process of images in a project. Arbitrators are allocated images within a project just like a Labeller account. However their account focuses on images those that have yet to be labelled or images that have been labelled differently by two or more Labellers. This enables them to either cast the deciding vote upfront or to intervene in situations where discrepancies arise among the annotations.
How to Add an Arbitrator to a Project?
Follow these steps to add an arbitrator to your project:
If you have not already created the Arbitrator's account, please follow the step by step guide on how to create a user. Once you have created the user there are two ways to add the Arbitrator.
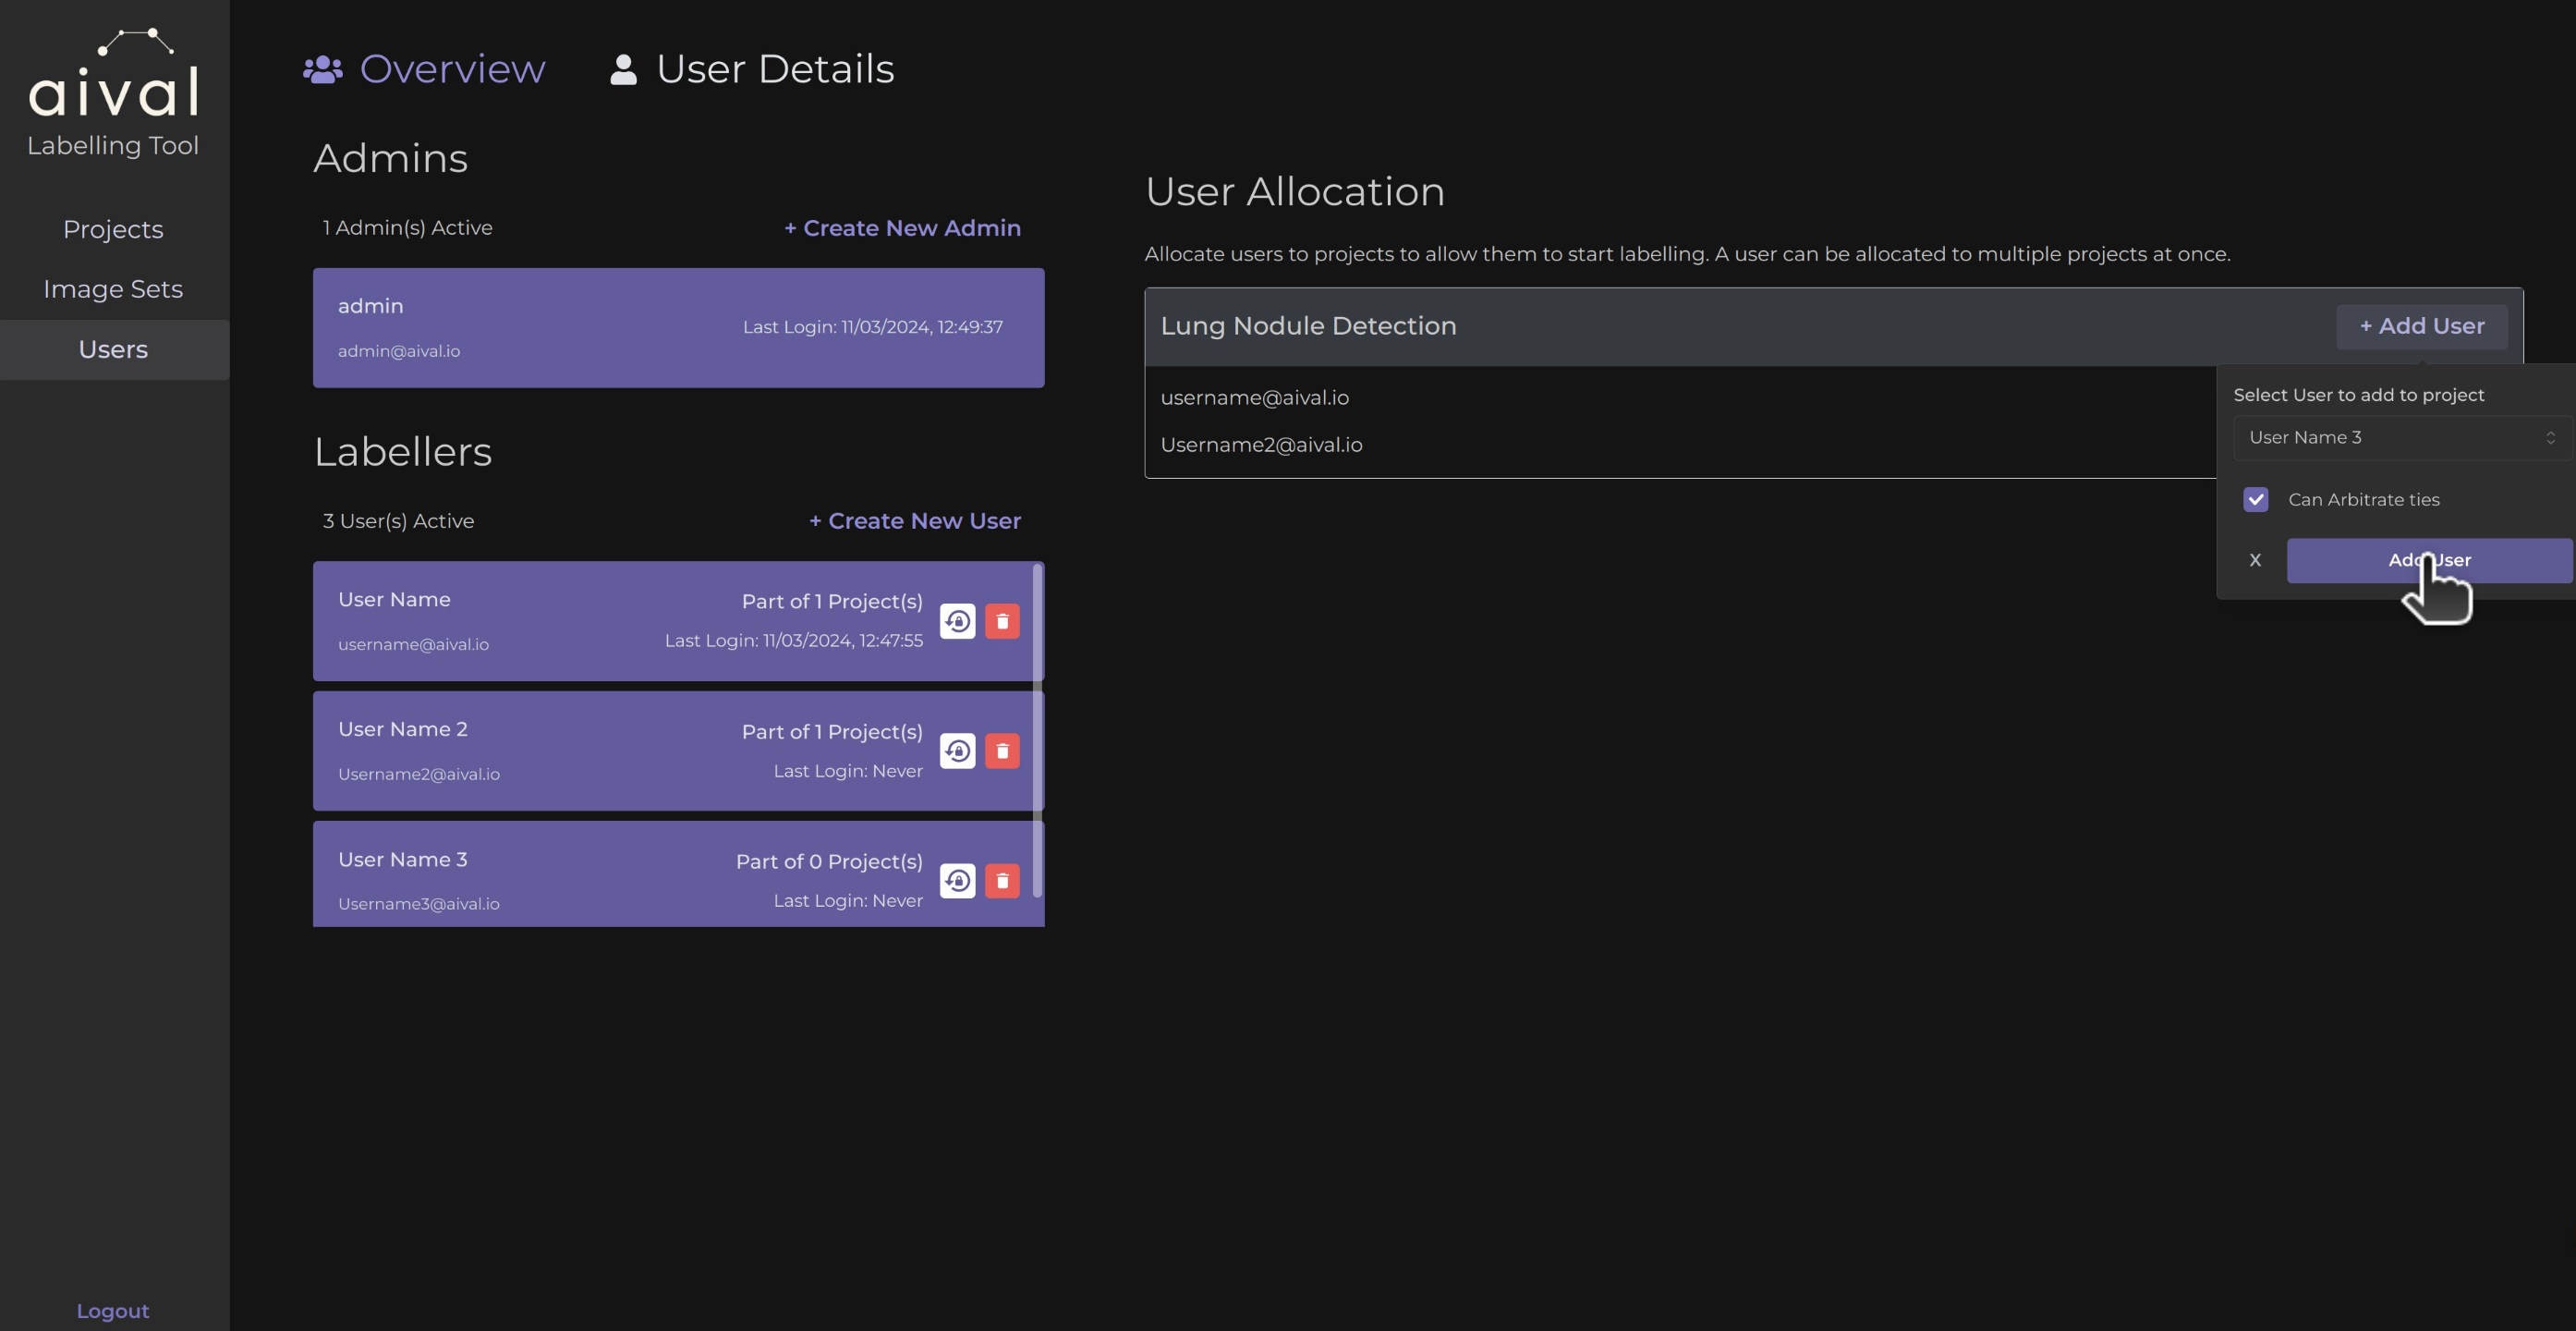
You can assign the arbitrator directly from the 'Users' tab right after you created the user's account. Next, we want to add the user to the project by clicking on 'Add User' on the selected project and ticking the box that says 'Can Arbitrate ties'. Finally, confirm the user, now arbitrator, to the project by click on 'Add User'.

You may also add the existing user directly via the Projects settings, as follows:
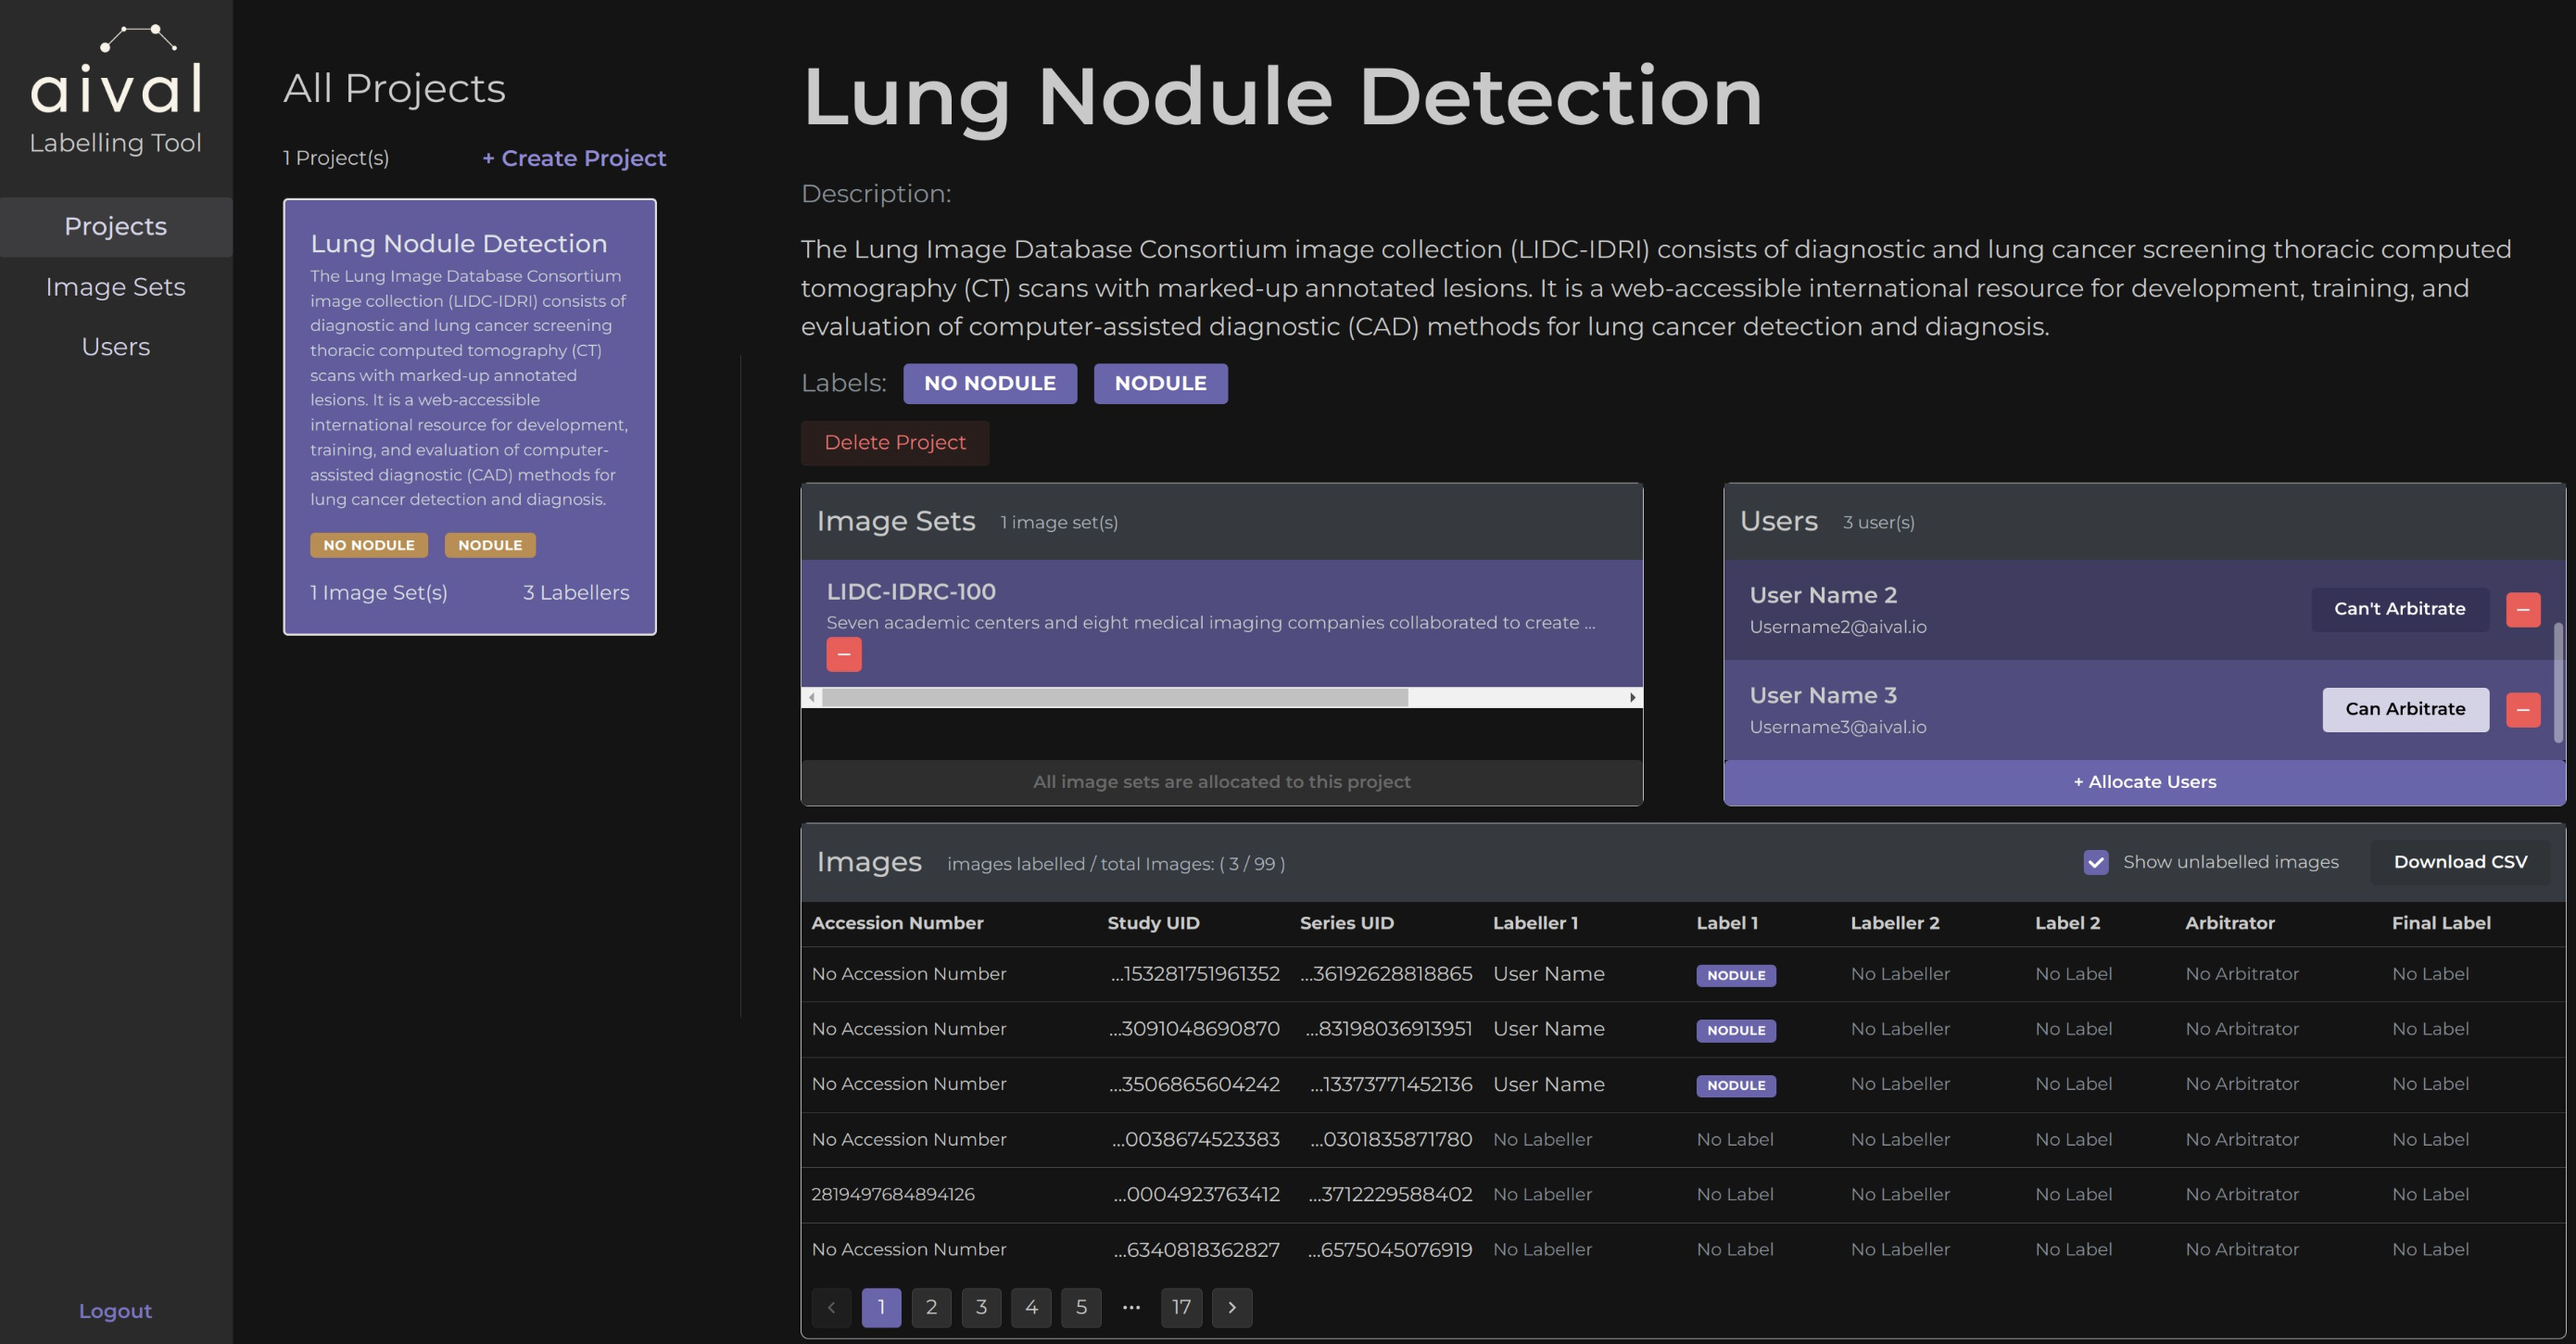
Step 1: Access the Project Settings: Navigate to the 'Projects' tab on the left hand side of the application.
Step 2: Assign an Arbitrator to a Project: Within the Users section you can click on 'Allocate Users' and then select the user you would like to arbitrate the project by ticking the box that says 'Can Arbitrate ties'.

Step 3: Confirm and Save: Click on the button 'Add User'.

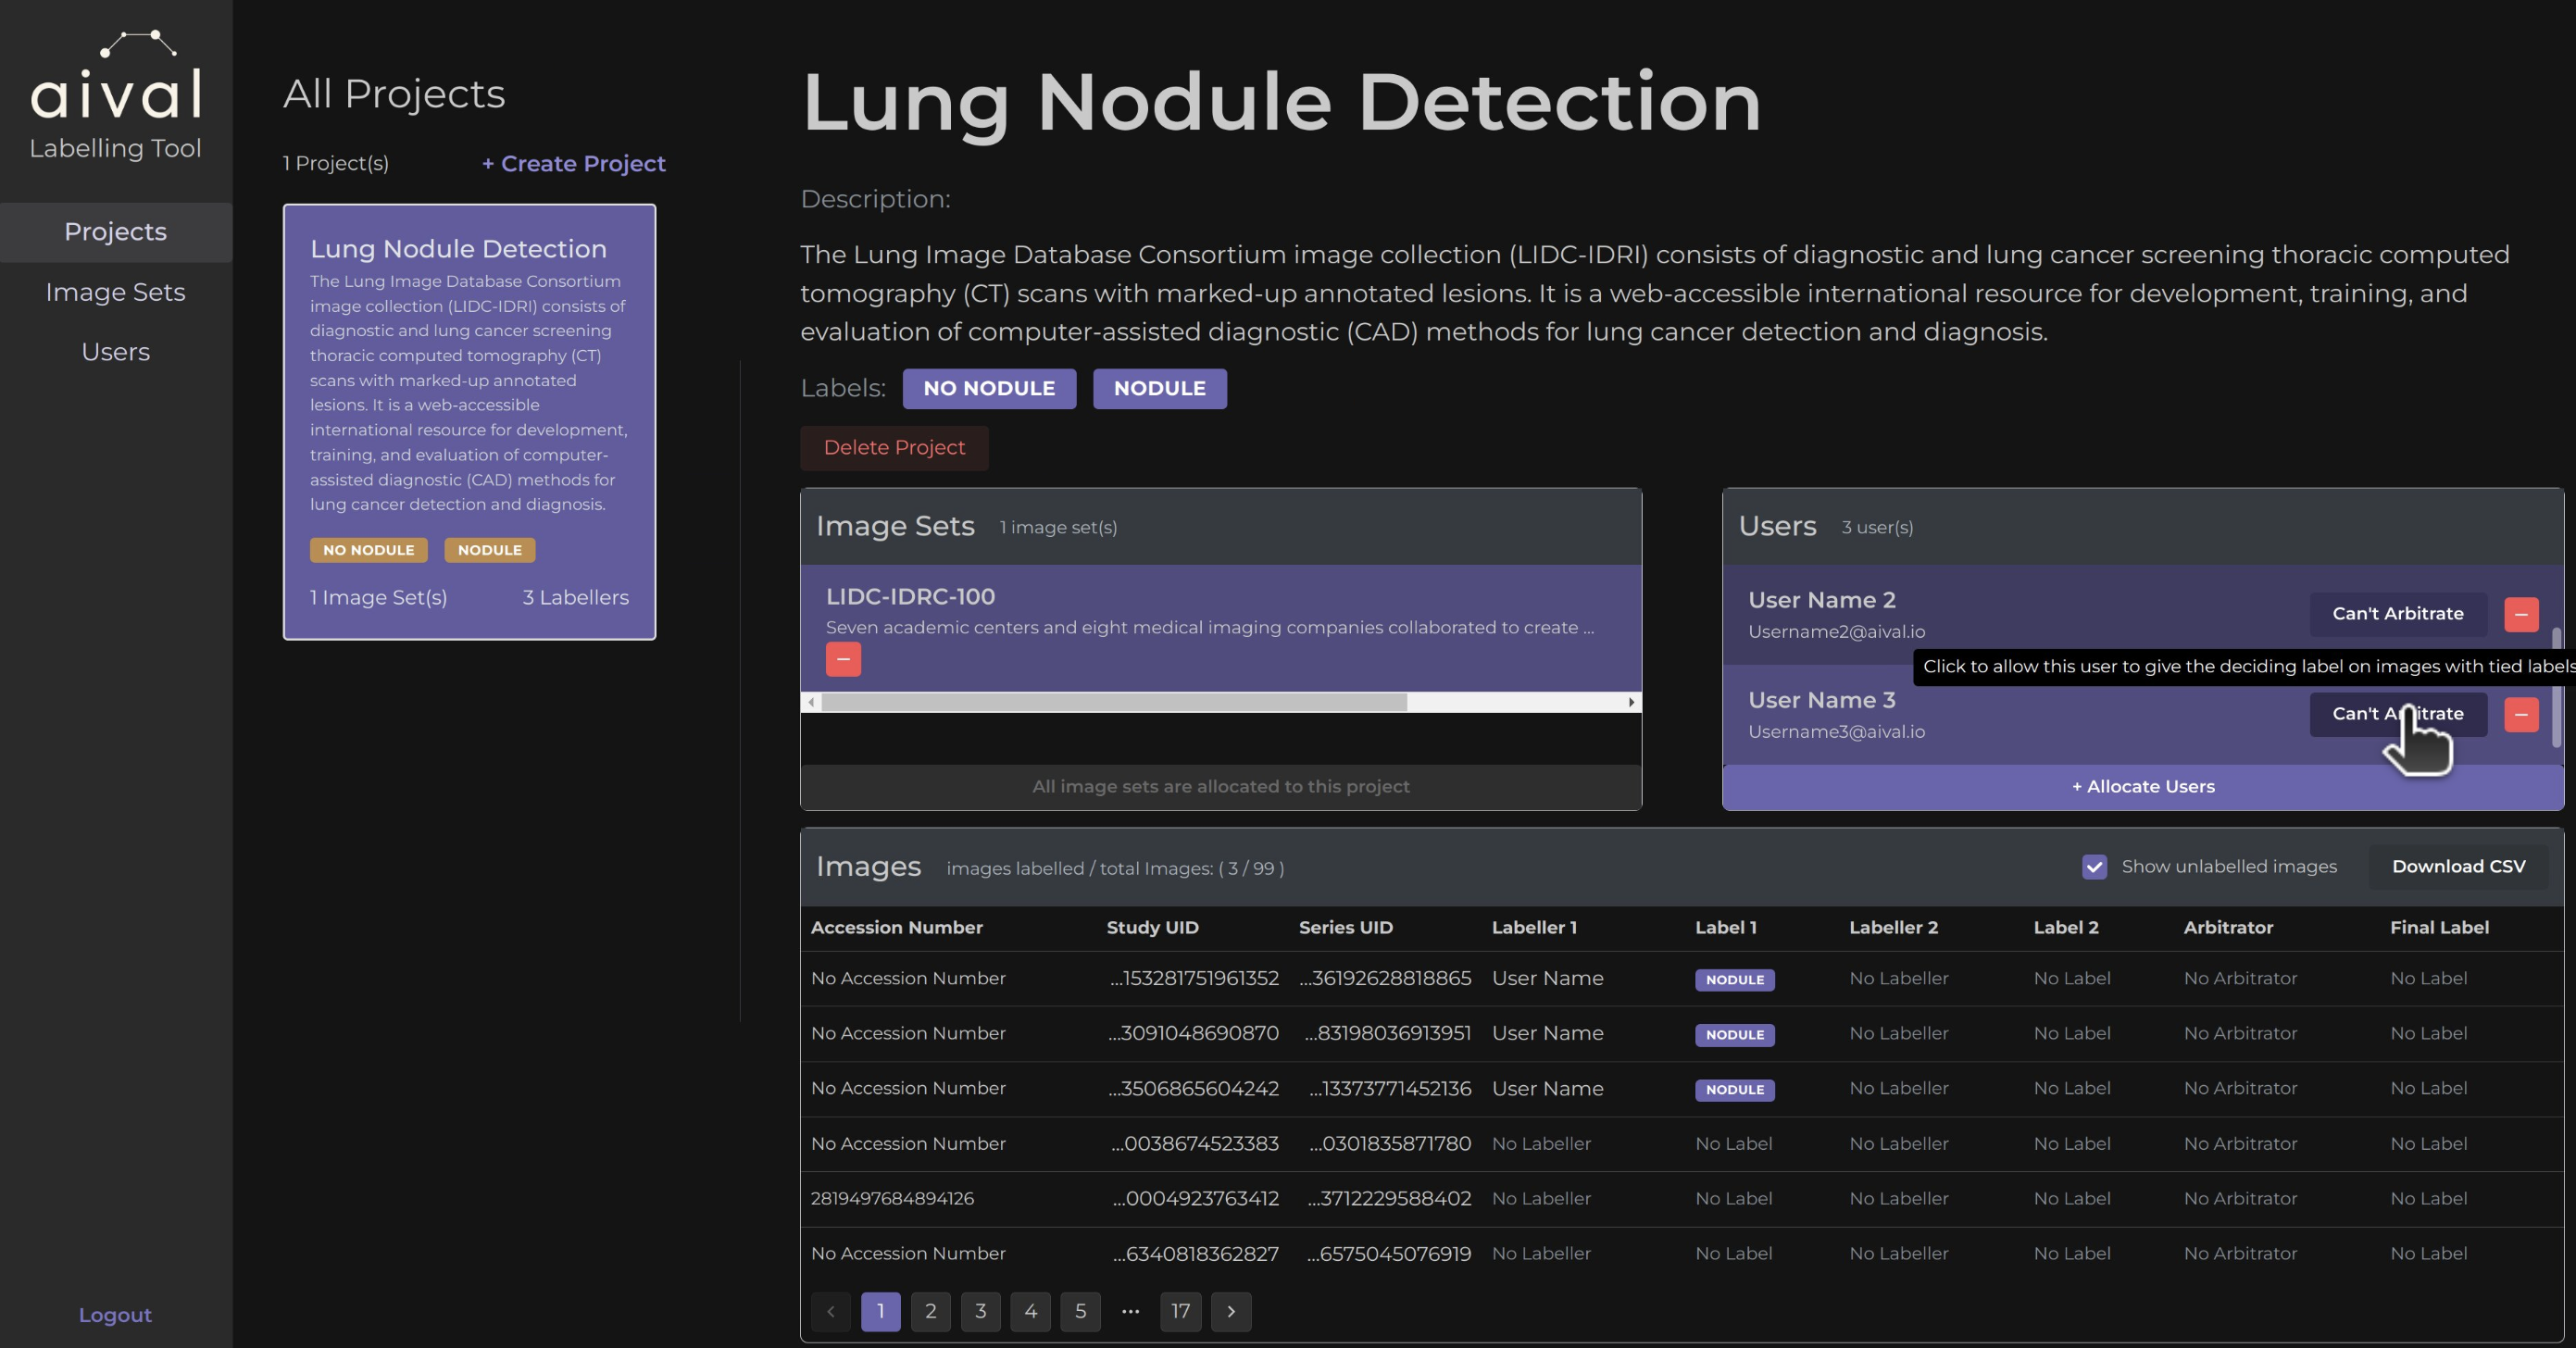
If the user account that you like to arbitrate had already been added to the project you may simply just click on the 'Can't Arbitrate' to toggle the role of that user to 'Can Arbitrate'.
