Assigning Labellers to a Project
This document outlines the step-by-step procedures for both creating users and adding them to projects.
Creating Labellers
Required data needed to create a labeller account:
- Display Name: Full name of the user.
- Email Address: A valid email address for the user.
- Password: A strong password for the user account.
Here are the steps for creating a user that will be stored in the user records to be then assigned to any projects.
Step 1: Navigate to the 'Users' tab : Under the 'Overview' page, you'll find a record of the labellers that exist. If you have not yet created any users yet, then the page will be empty.
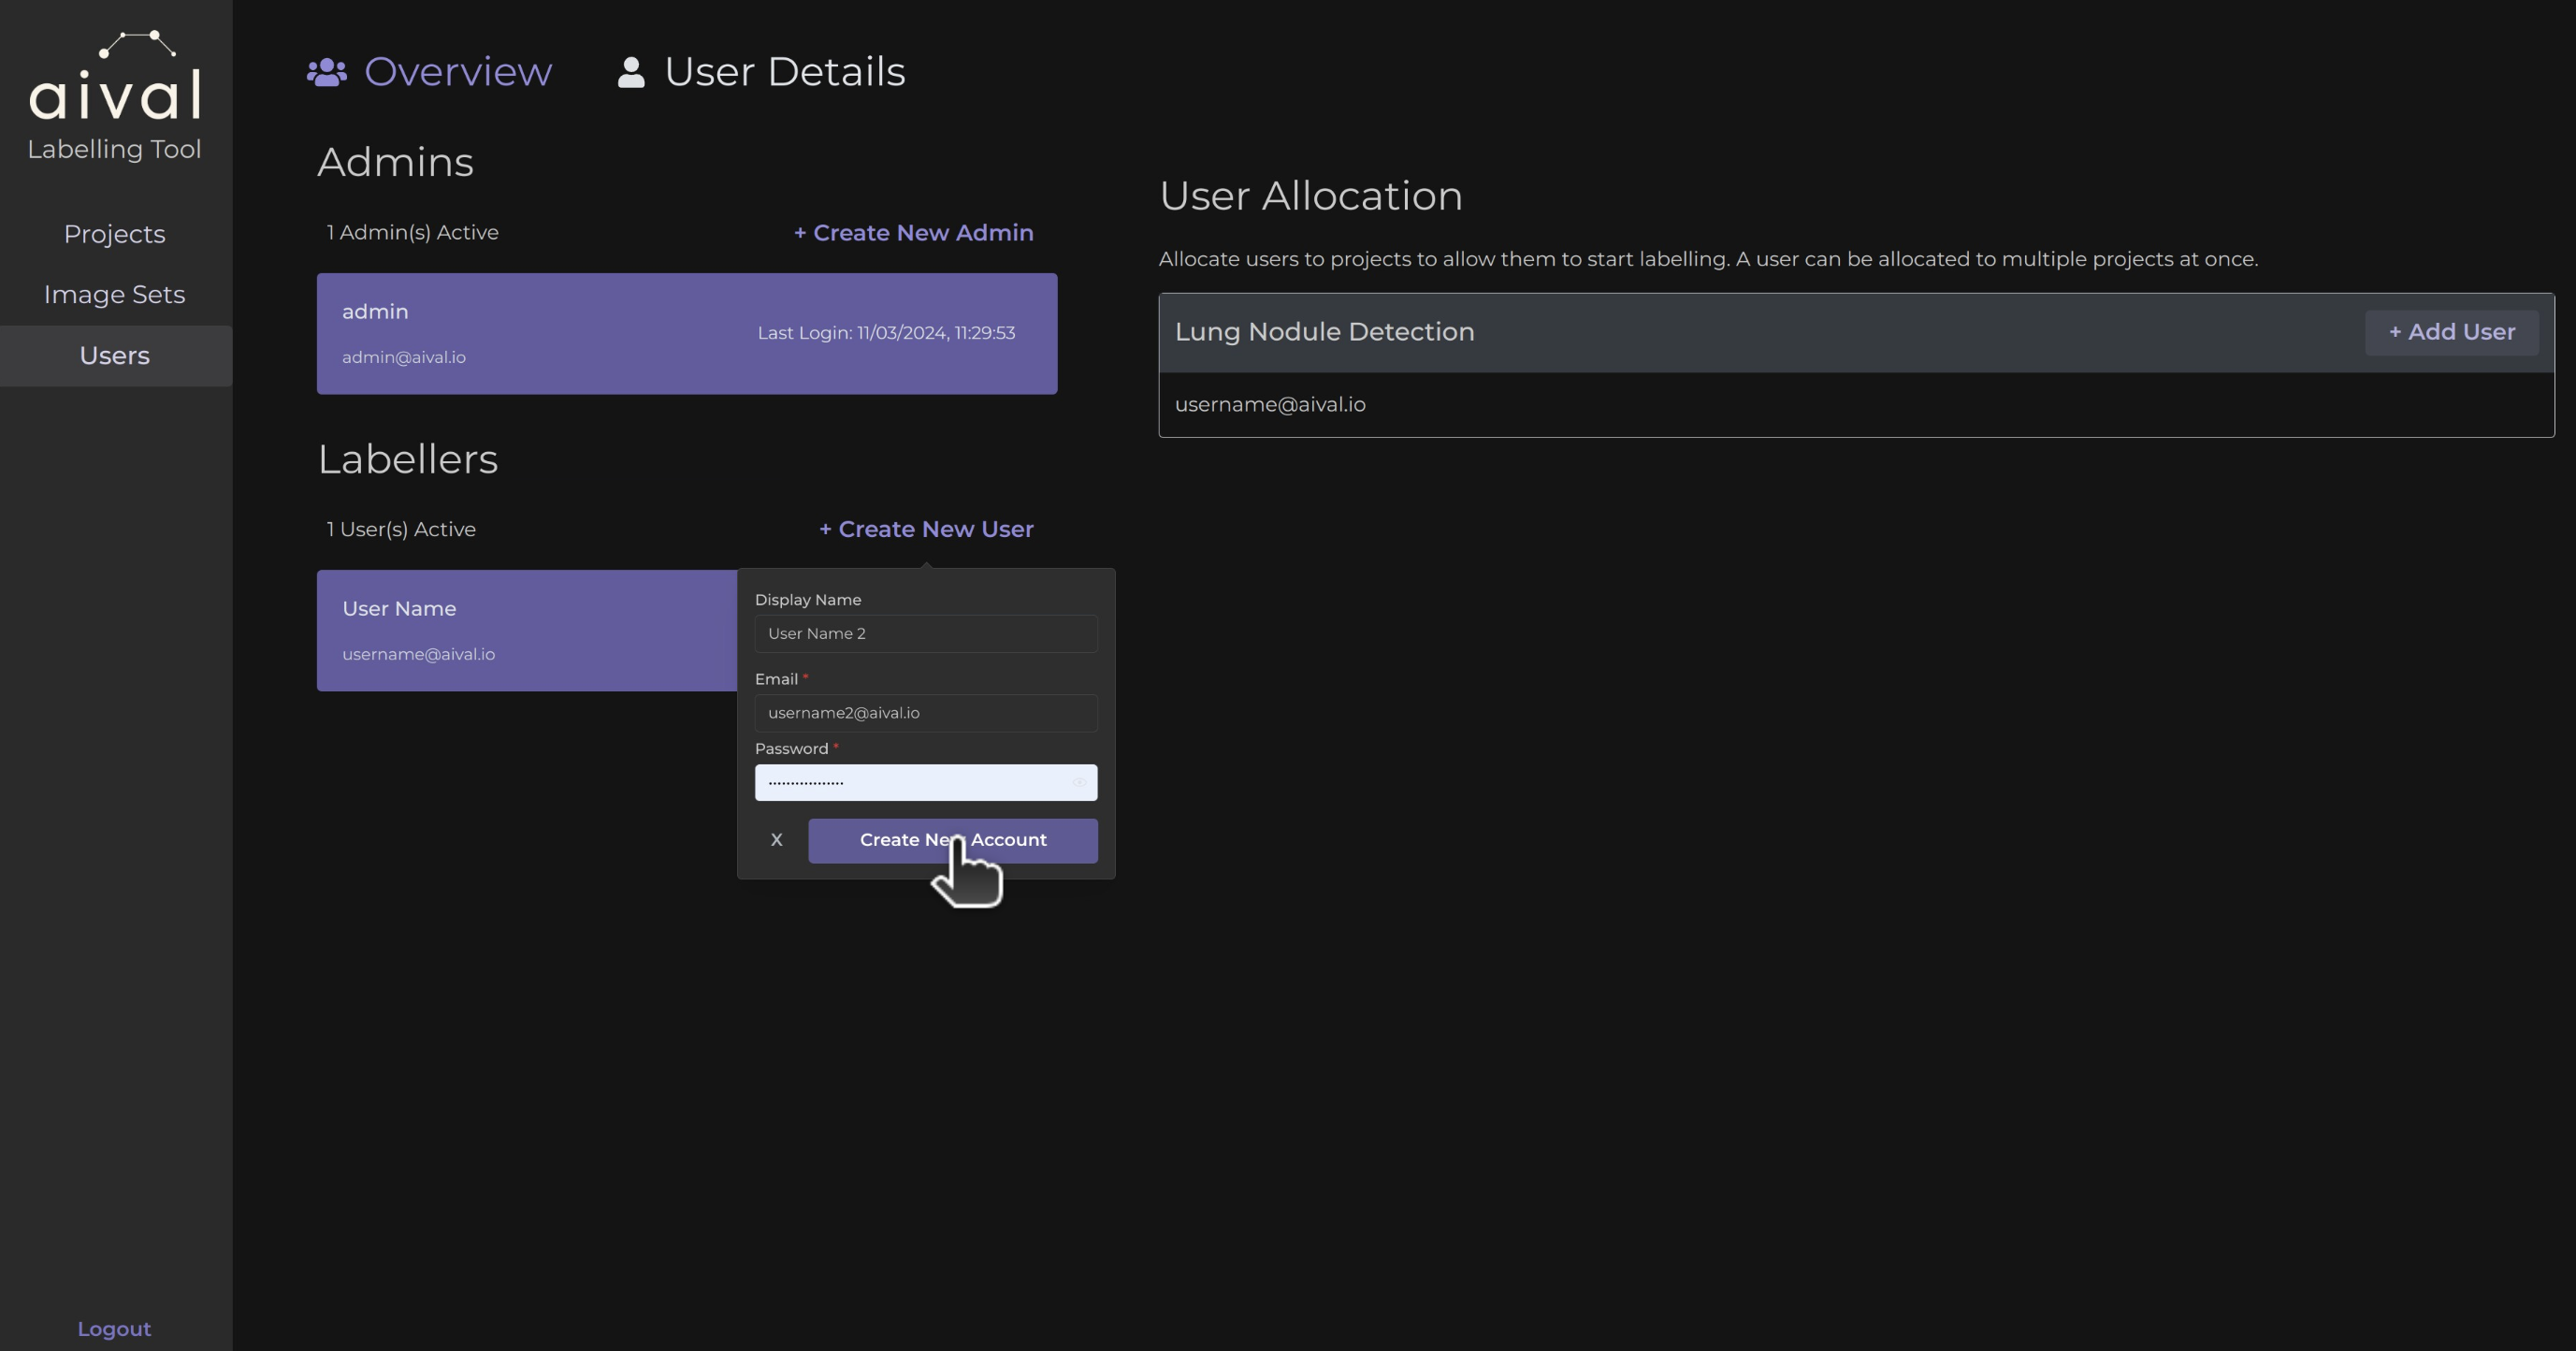
Step 2: Select the button 'Create New User' : A pop up will appear asking you to add a Display Name, the name of the labeller you'd like to add, Email, the email address of the labeller you would like to create and finally Password, a password you create for that user to be able to log into their account.
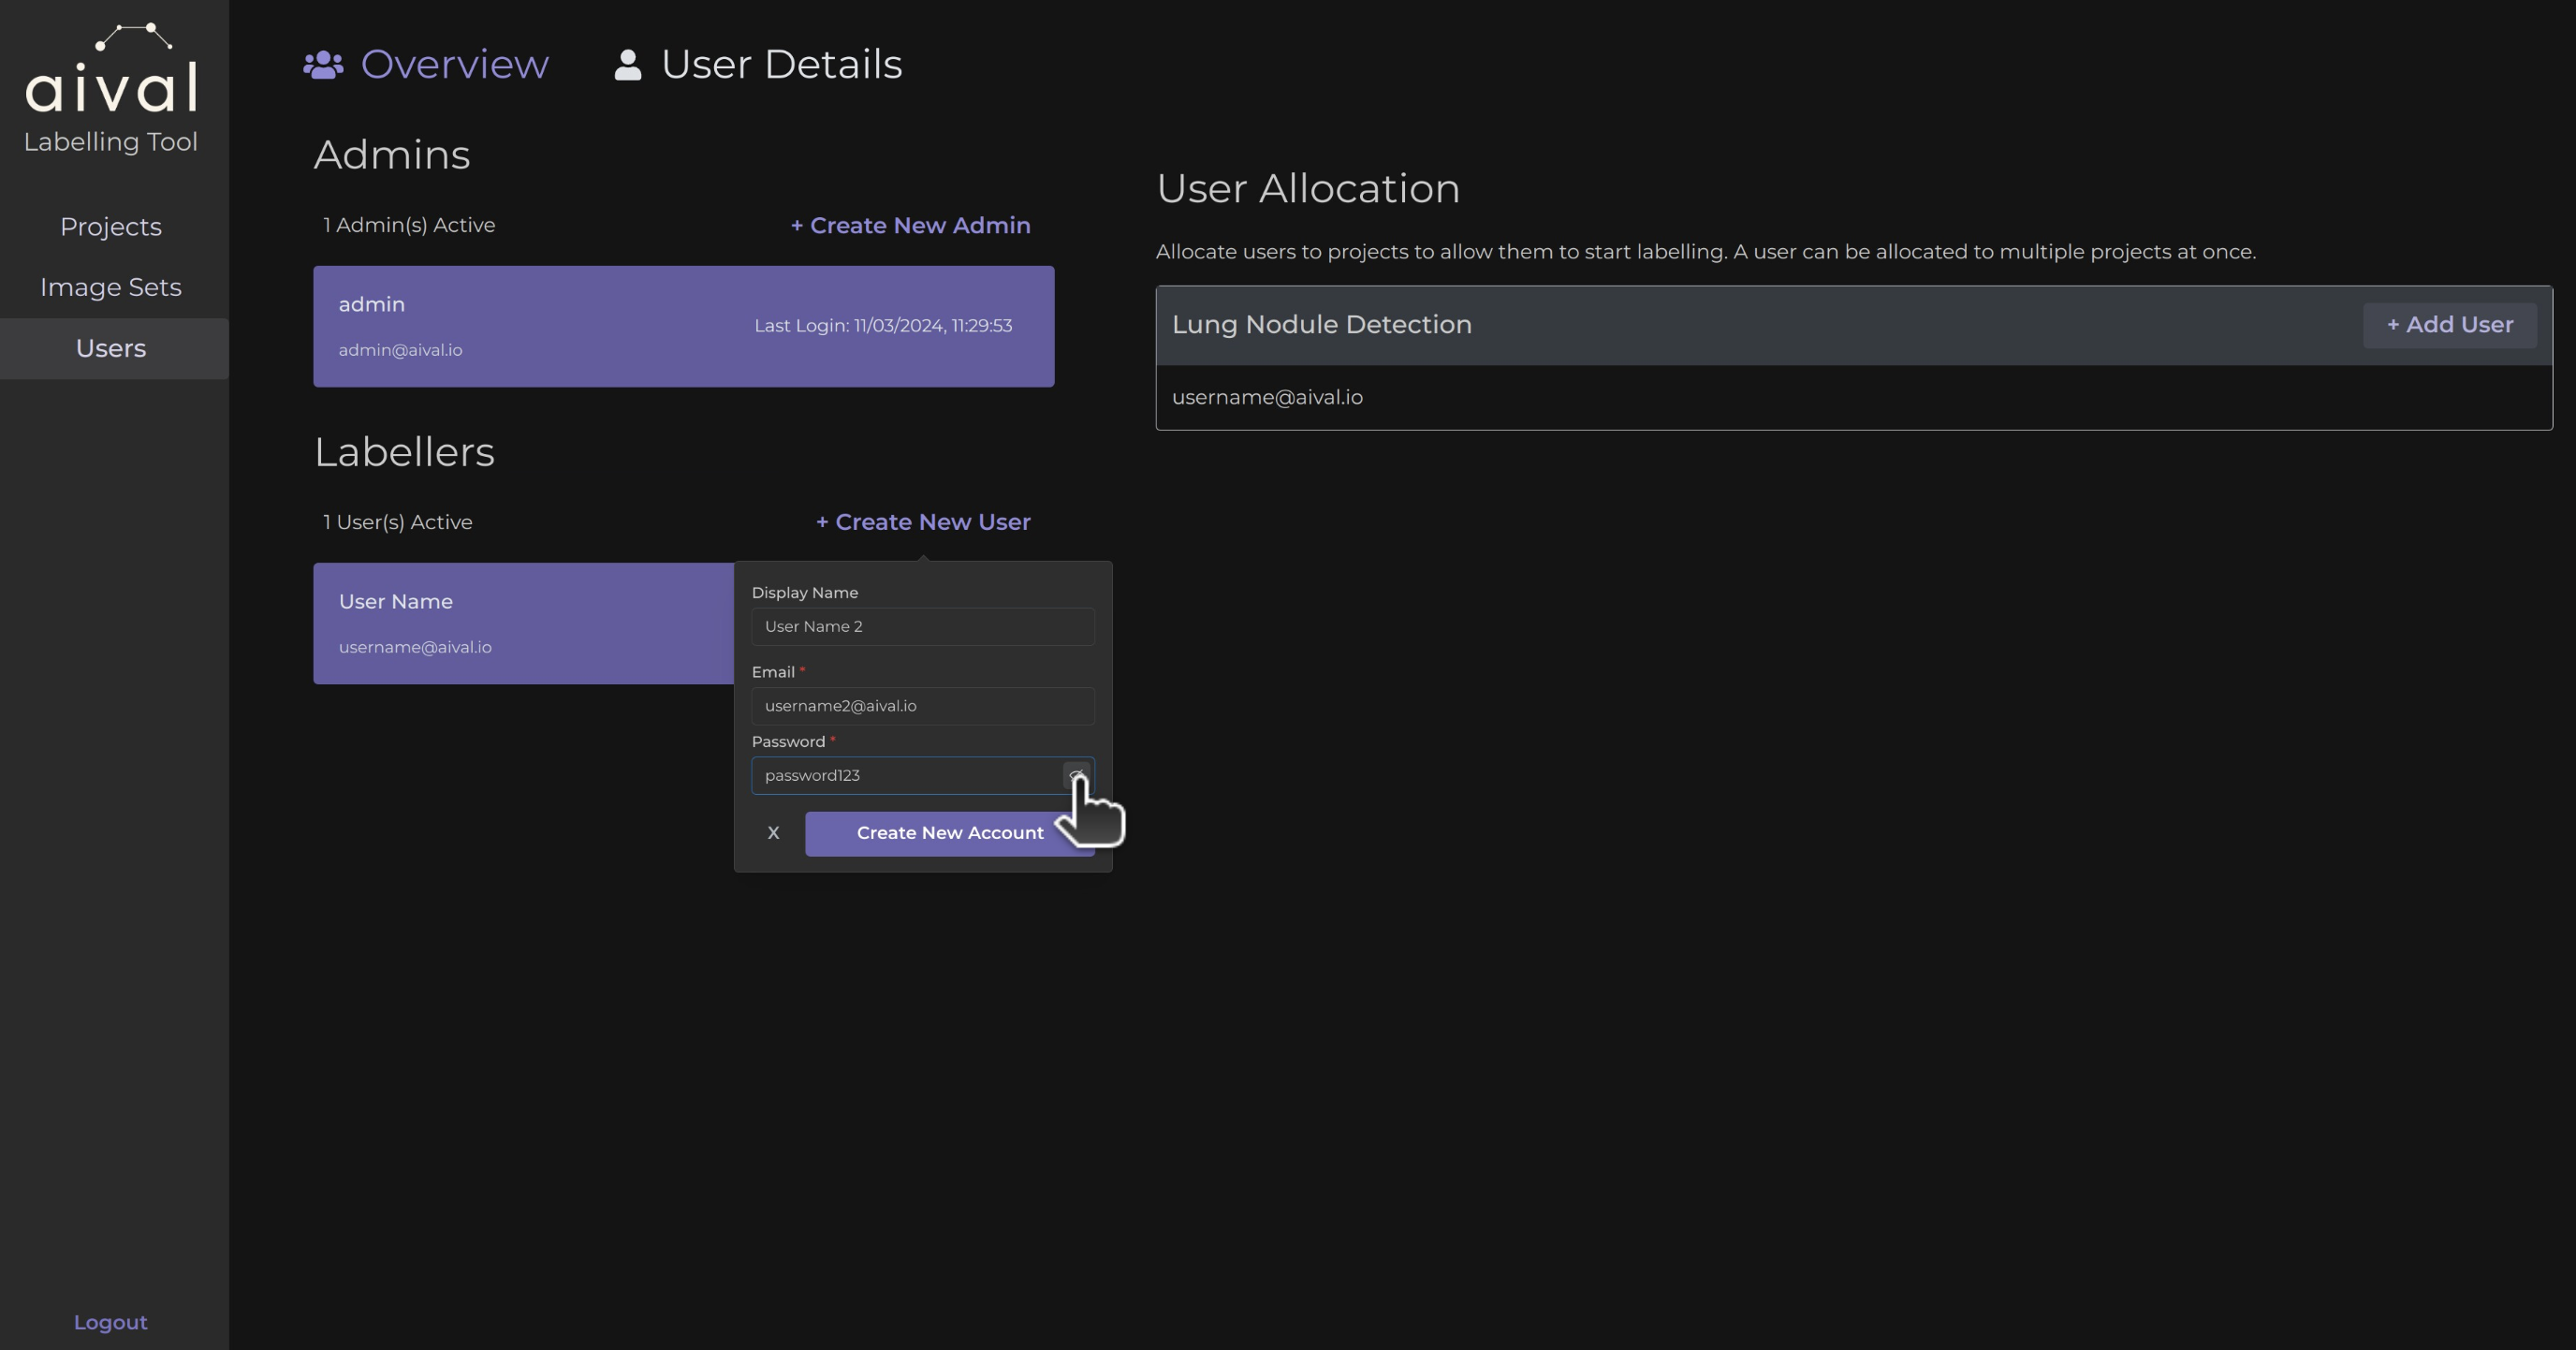
You may click on the little eye icon inside the right hand side of the password input box, this will allow for you to check that you have entered the intended password correctly.
Step 3: Click on 'Create New Account': To confirm the details and submit the form to create the labeller account.
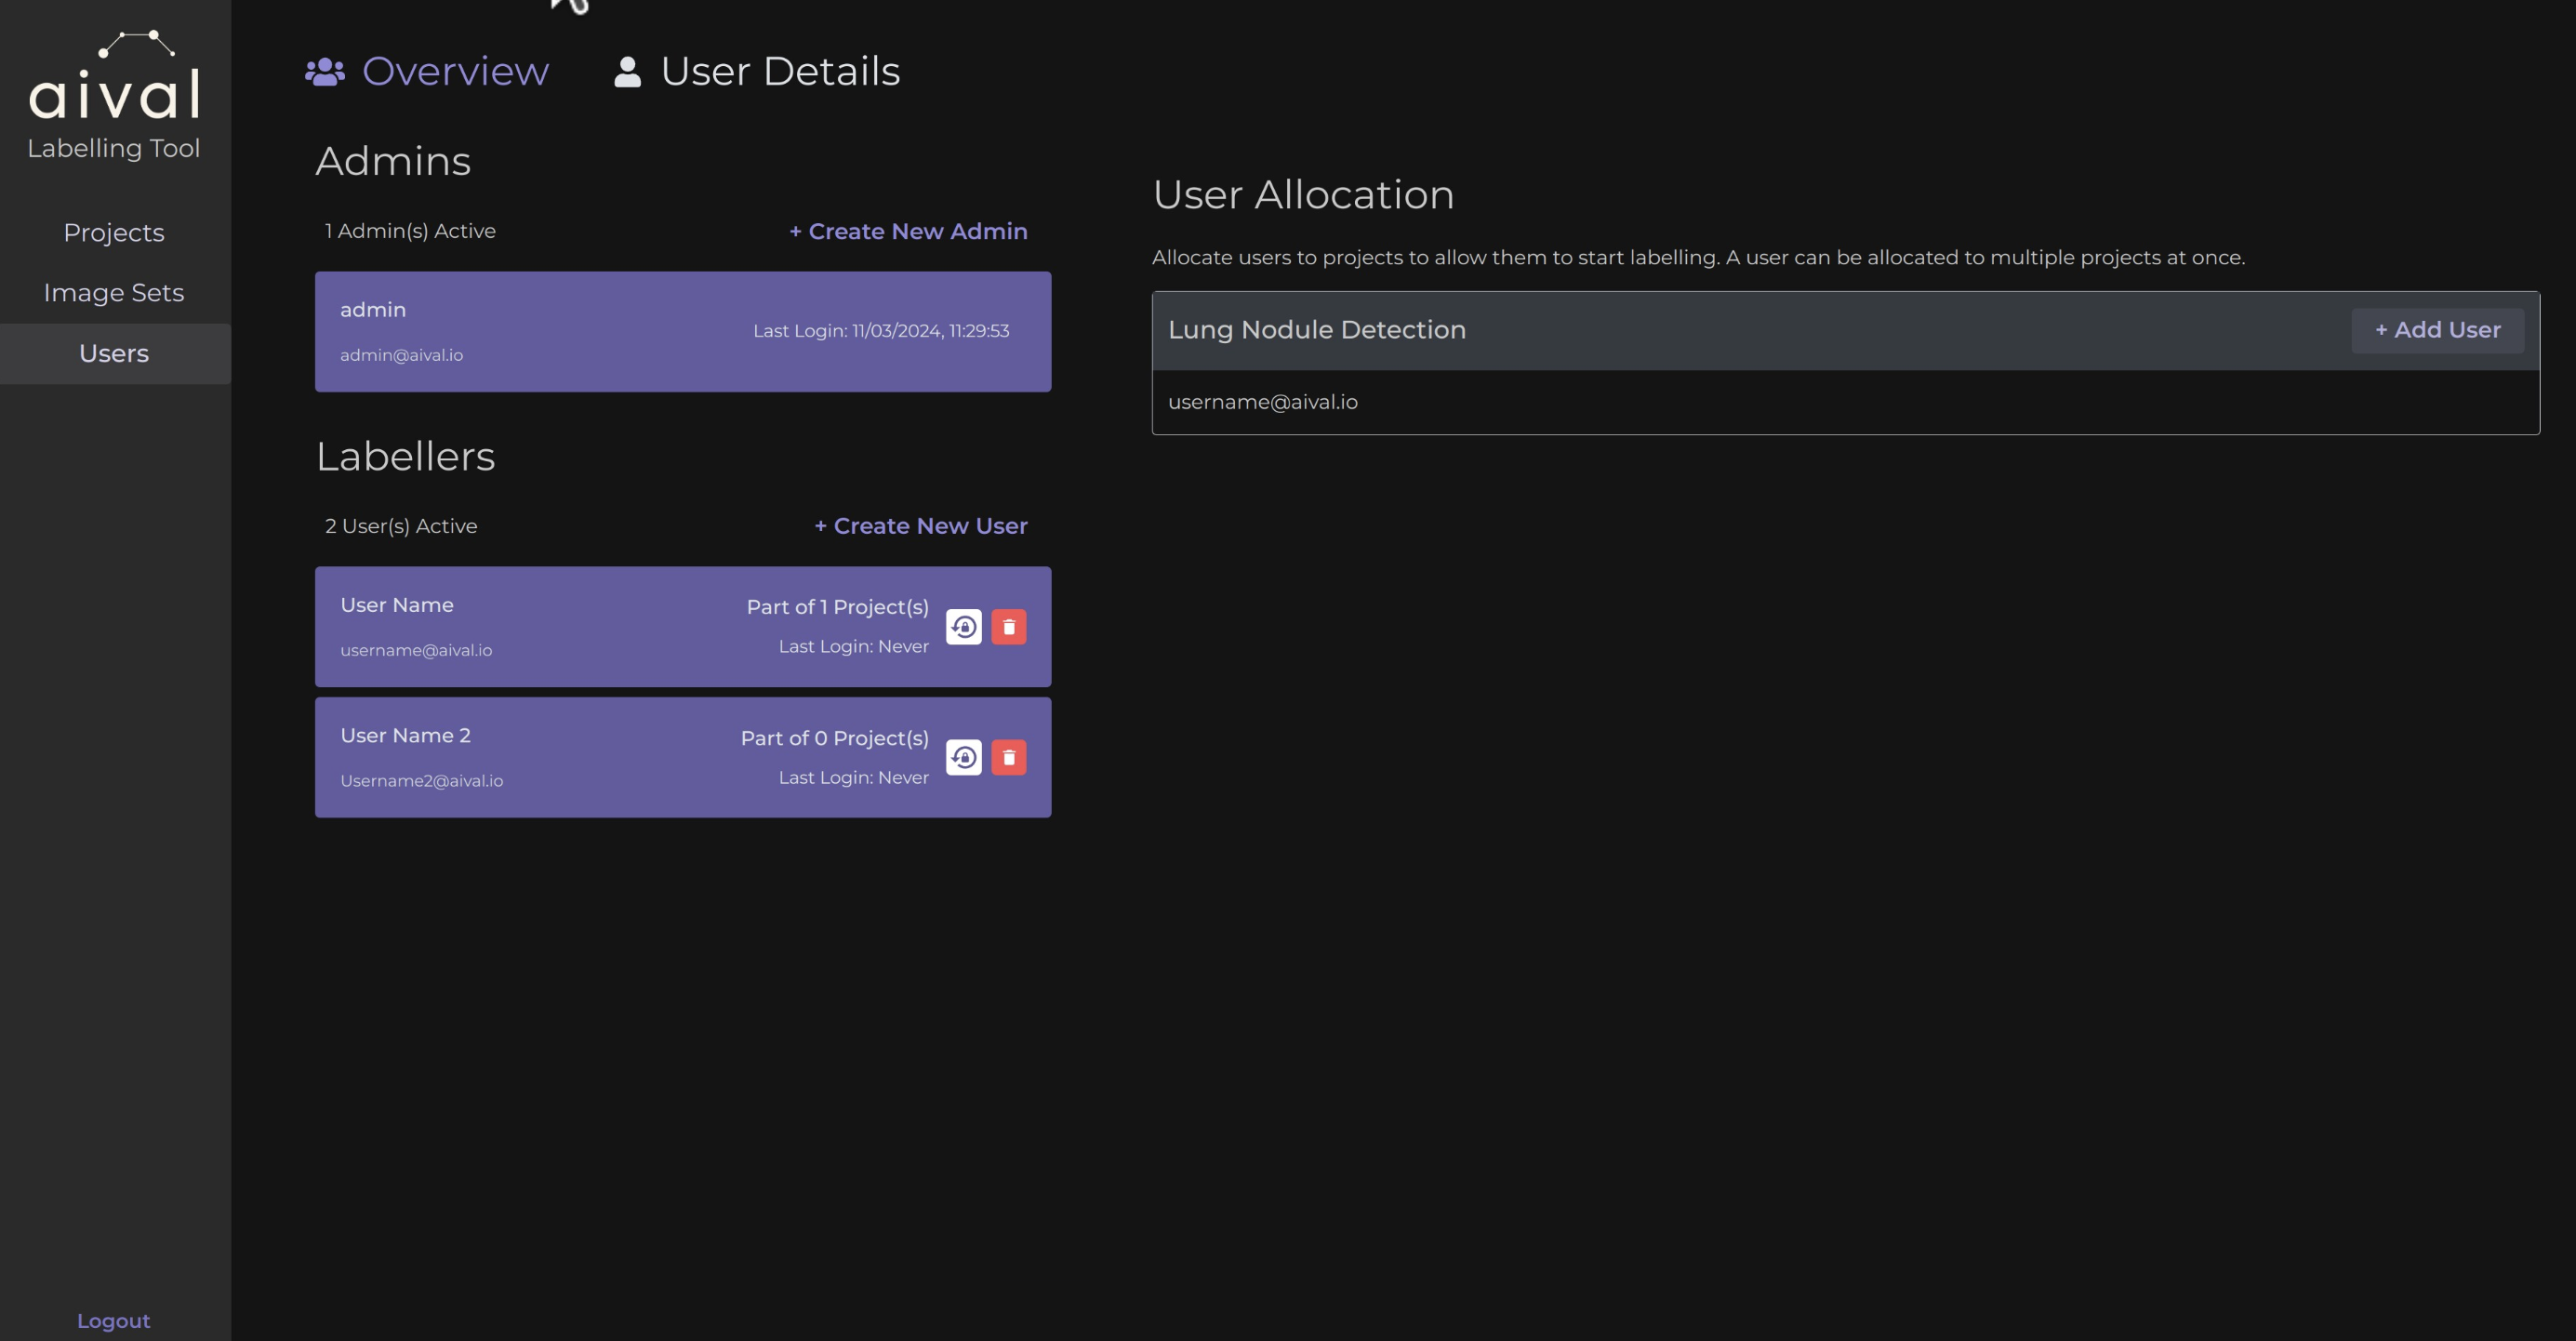
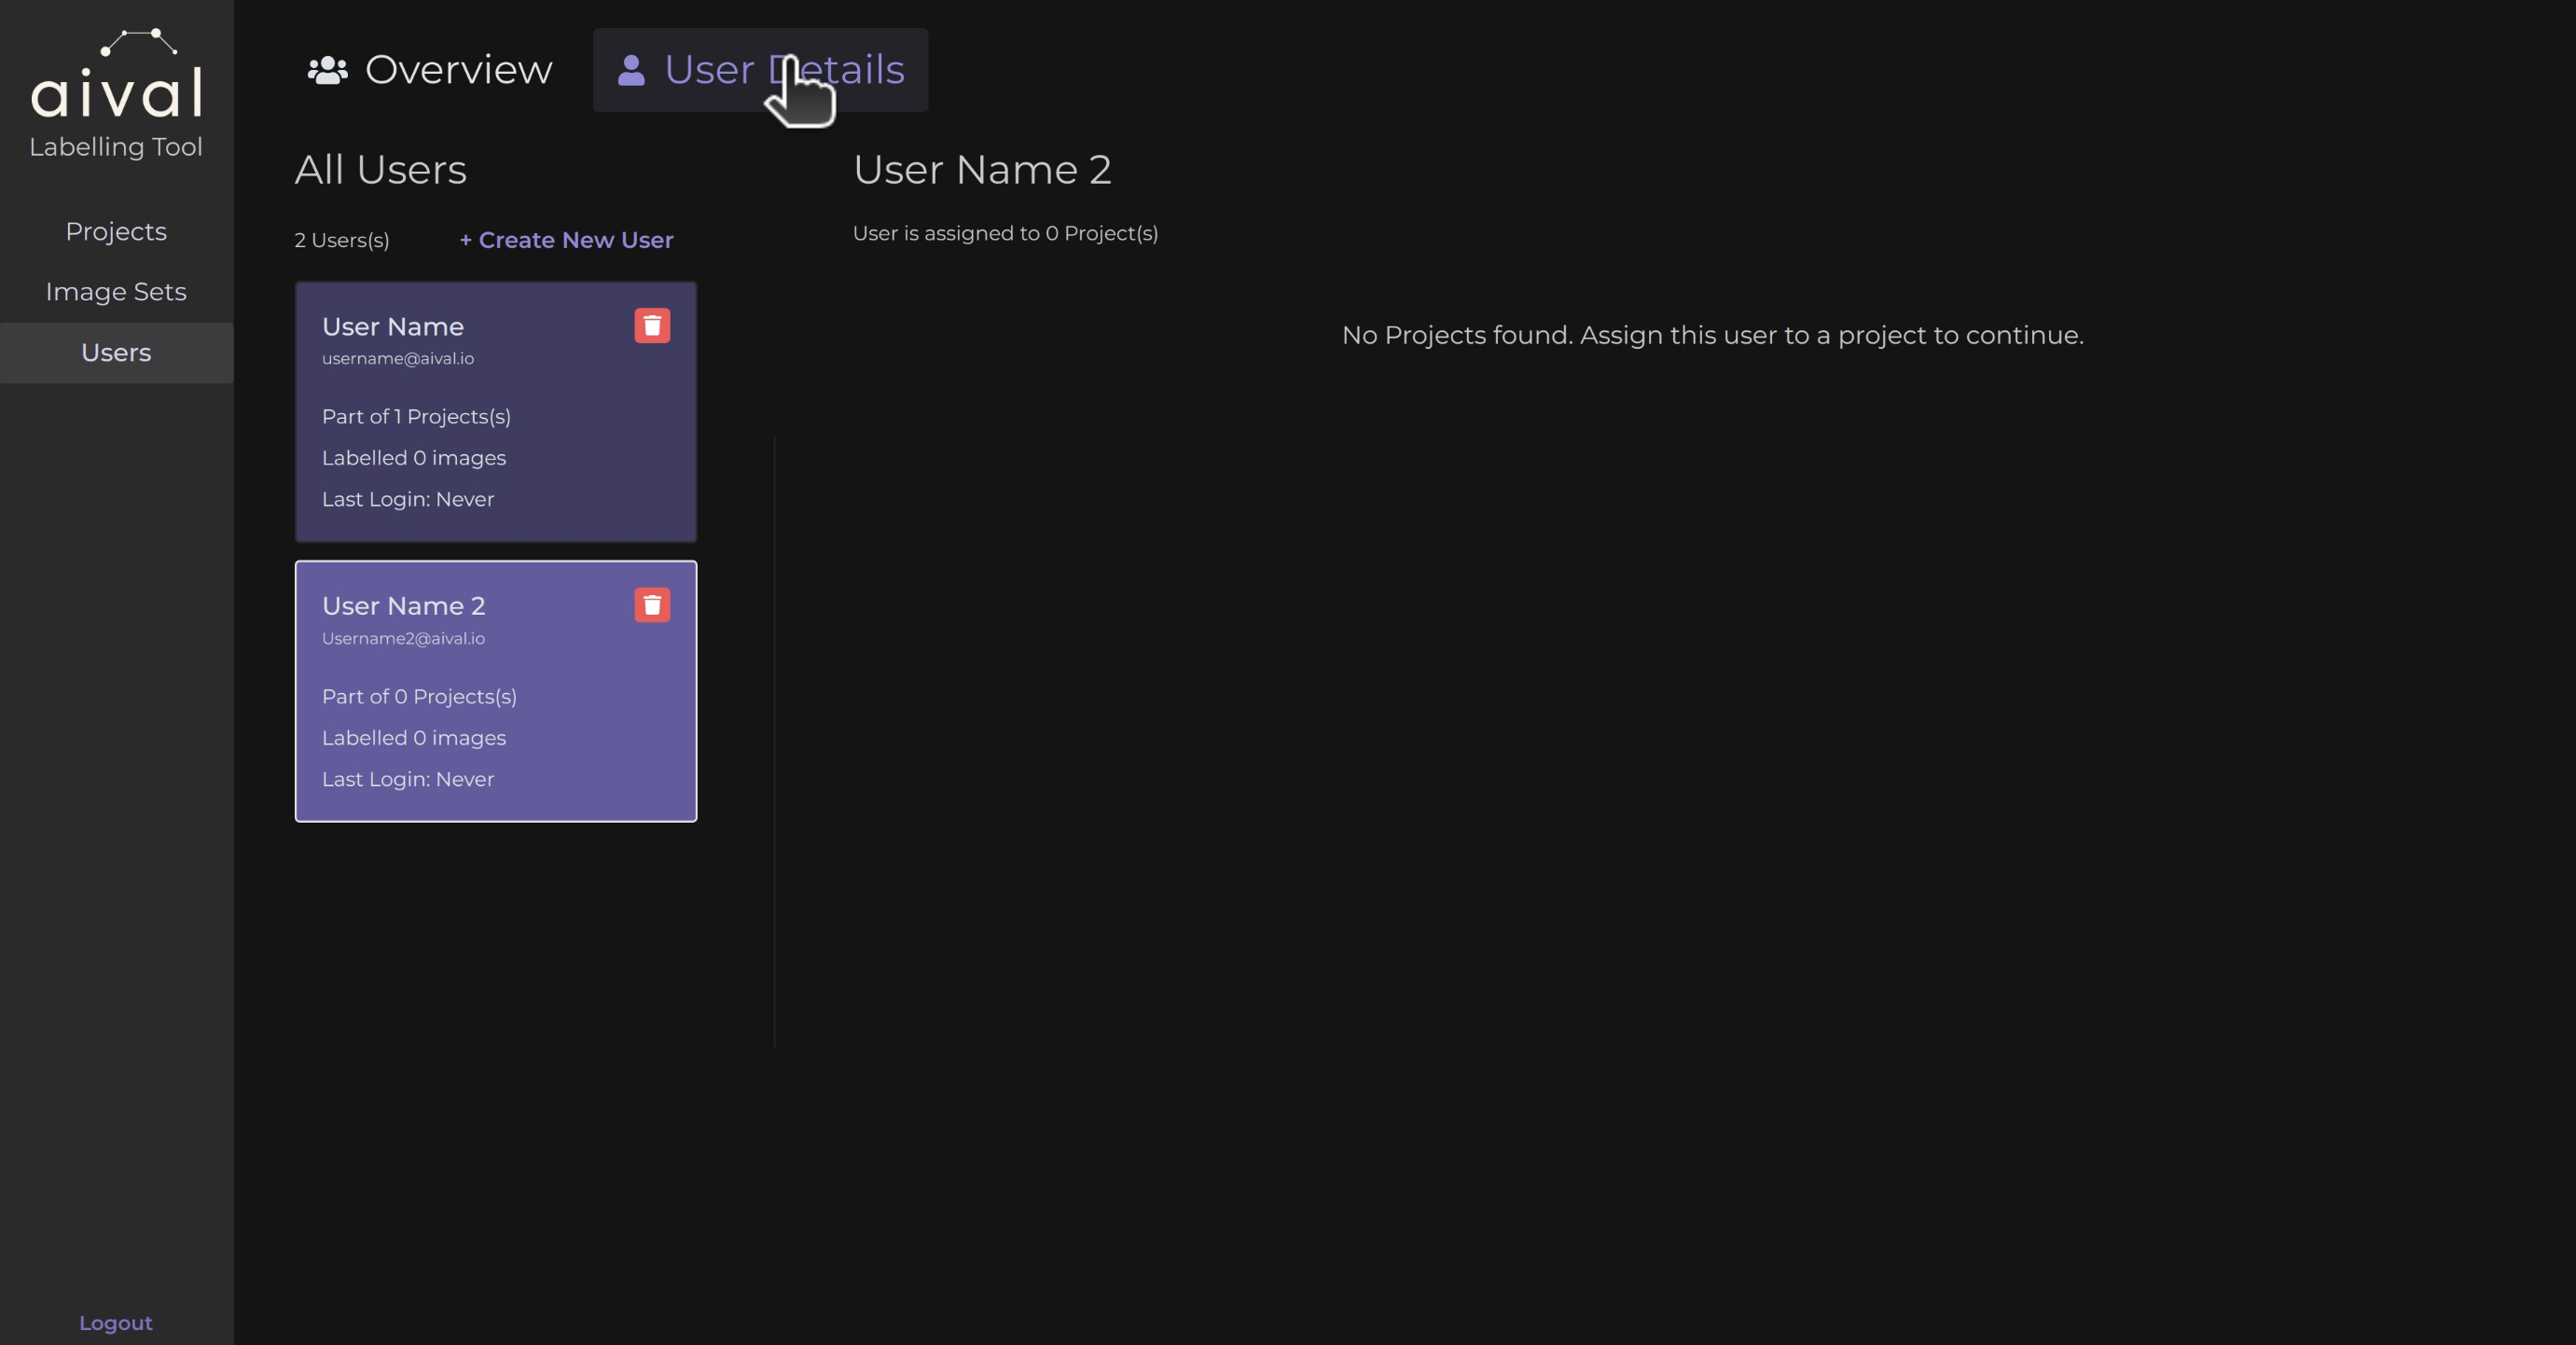
Once a new labeller has successfully been created it will be added to the record and can be also seen in the tab called 'User Details' where you will be able to see details about each user.
Assinging Users to Projects
After we have created a user, here are the steps for assigning them to a project. A single user can be assigned multiple projects. If a project has been created already and you would like to add an existing user to it, then follow these steps:
Step 1: Navigate to the 'Users' tab : The labeller you would like to add to a project should be listed in the user records, under 'All Users'. The project that you have already created should be displayed on the right hand side of the page under 'User Allocations'.
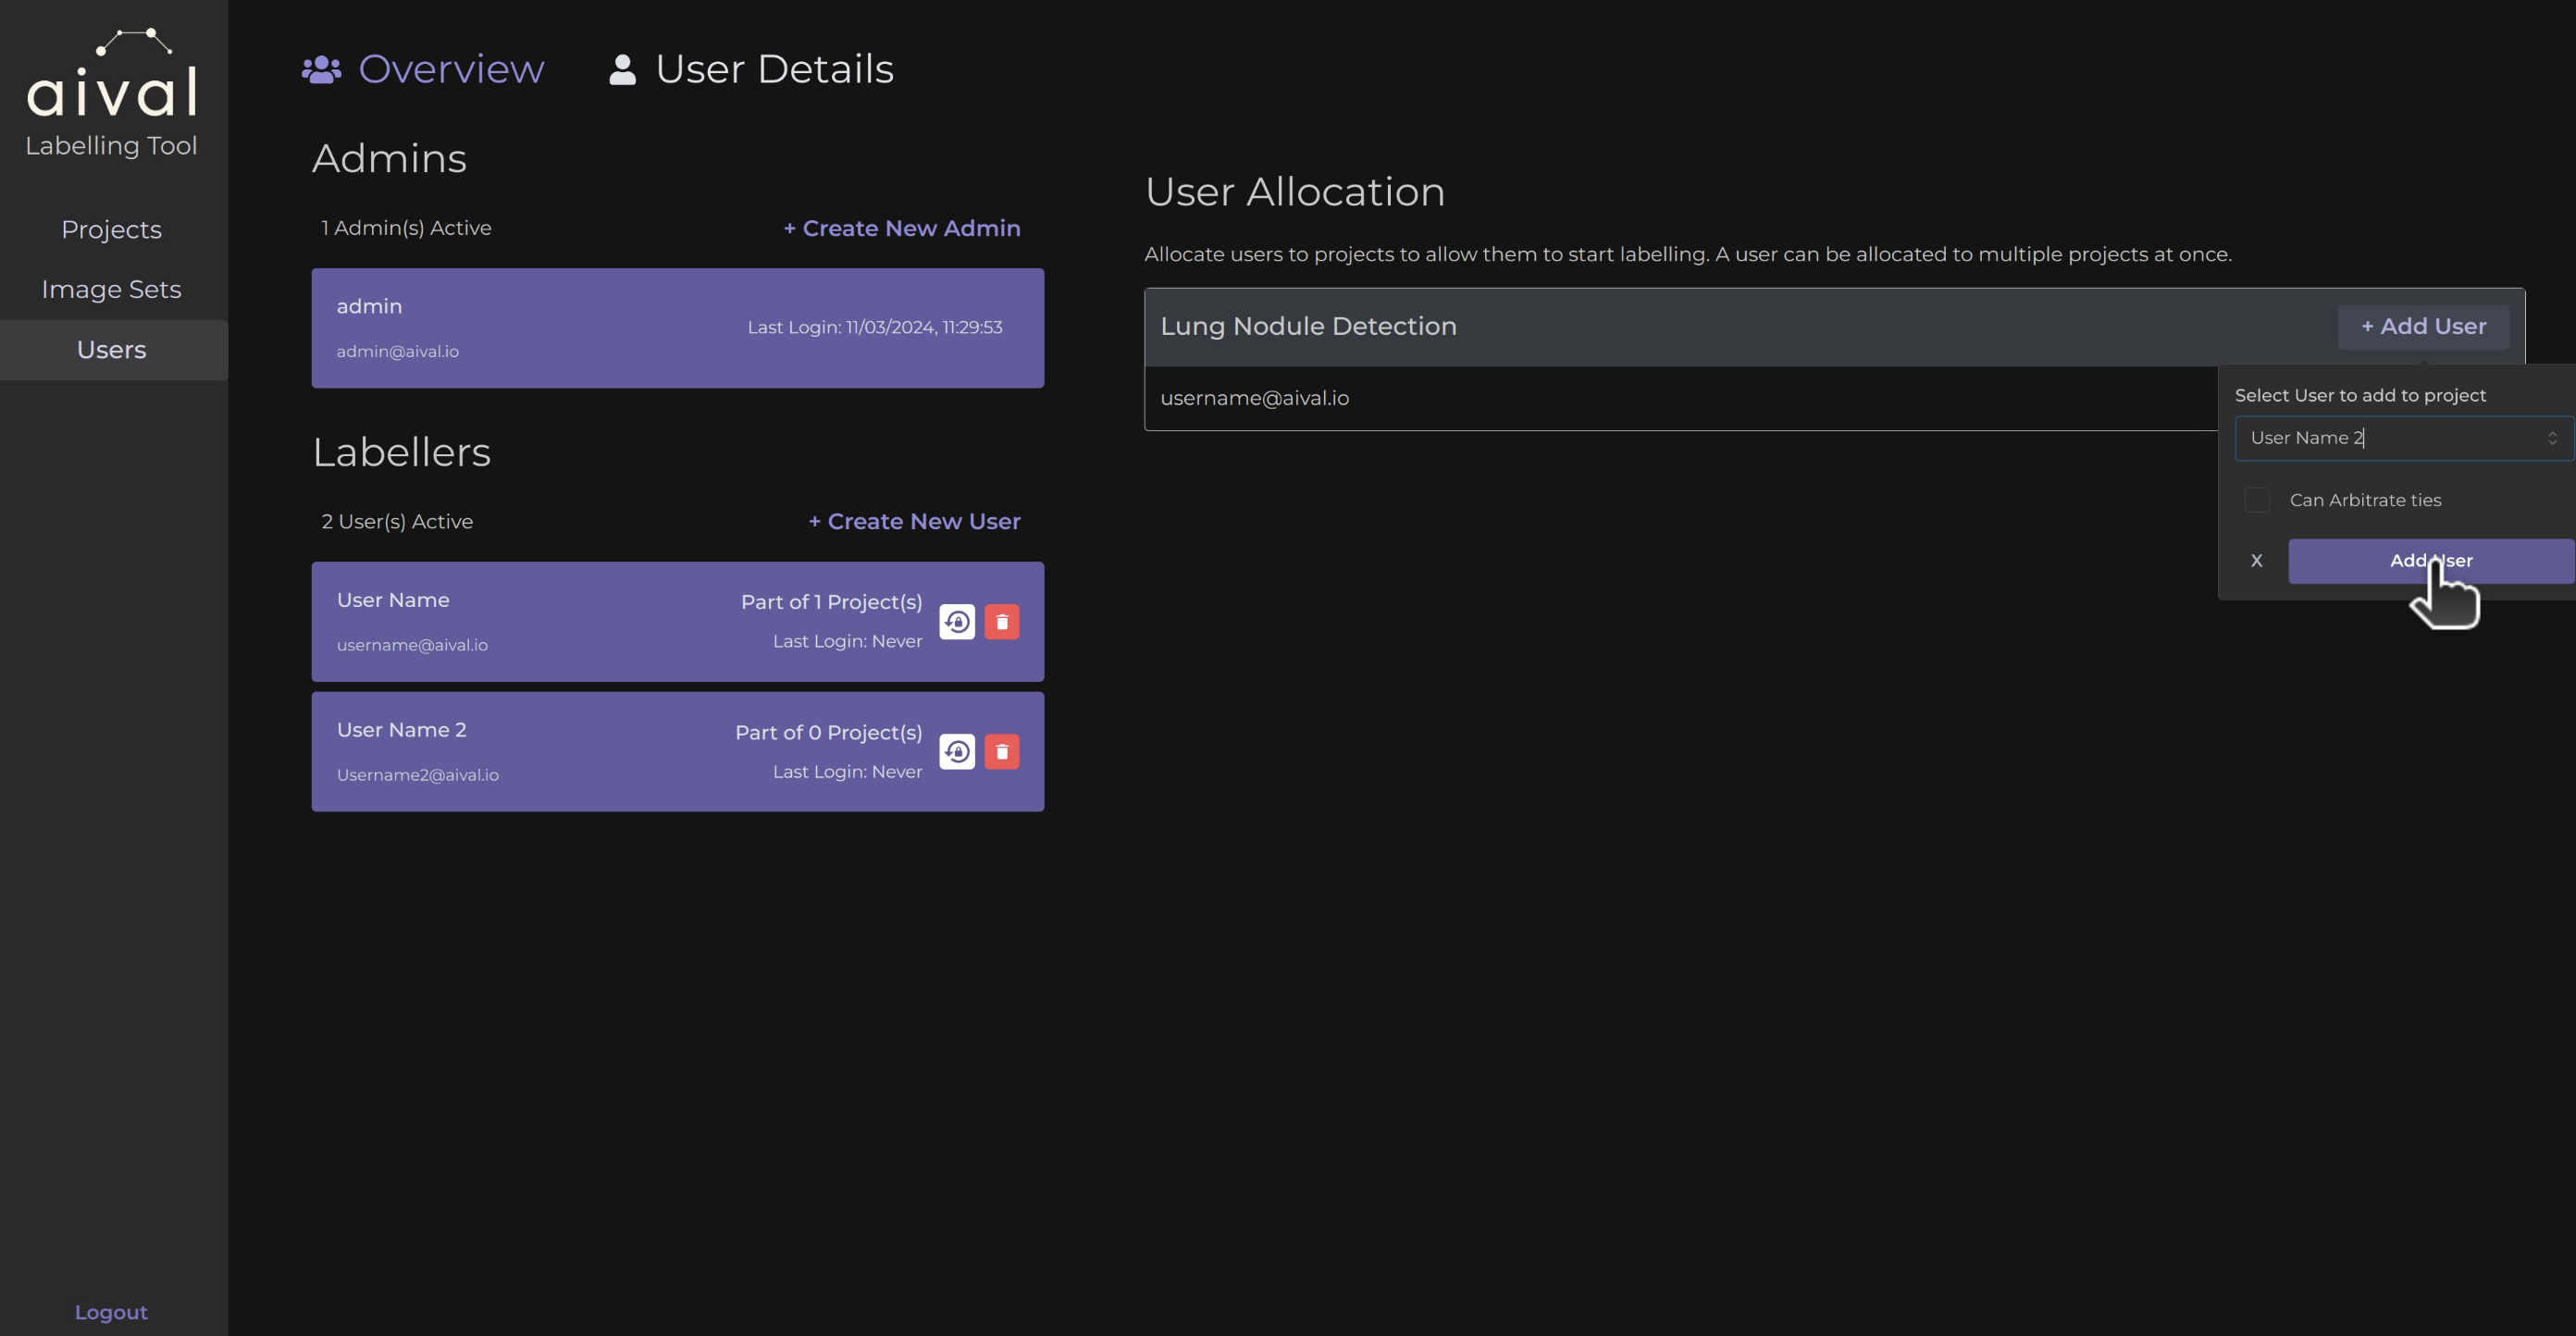
Step 2: Click on the '+ Add User' button: A pop up will appear asking you to select the existing labeller to the project. To indicate that this labeller is not an Arbitrator simply leave that box unmarked.
If your labeller does not appear in the pop up selection when trying to add them to a project, it means either you already have that labeller assigned to the project or you have not properly created the labeller.
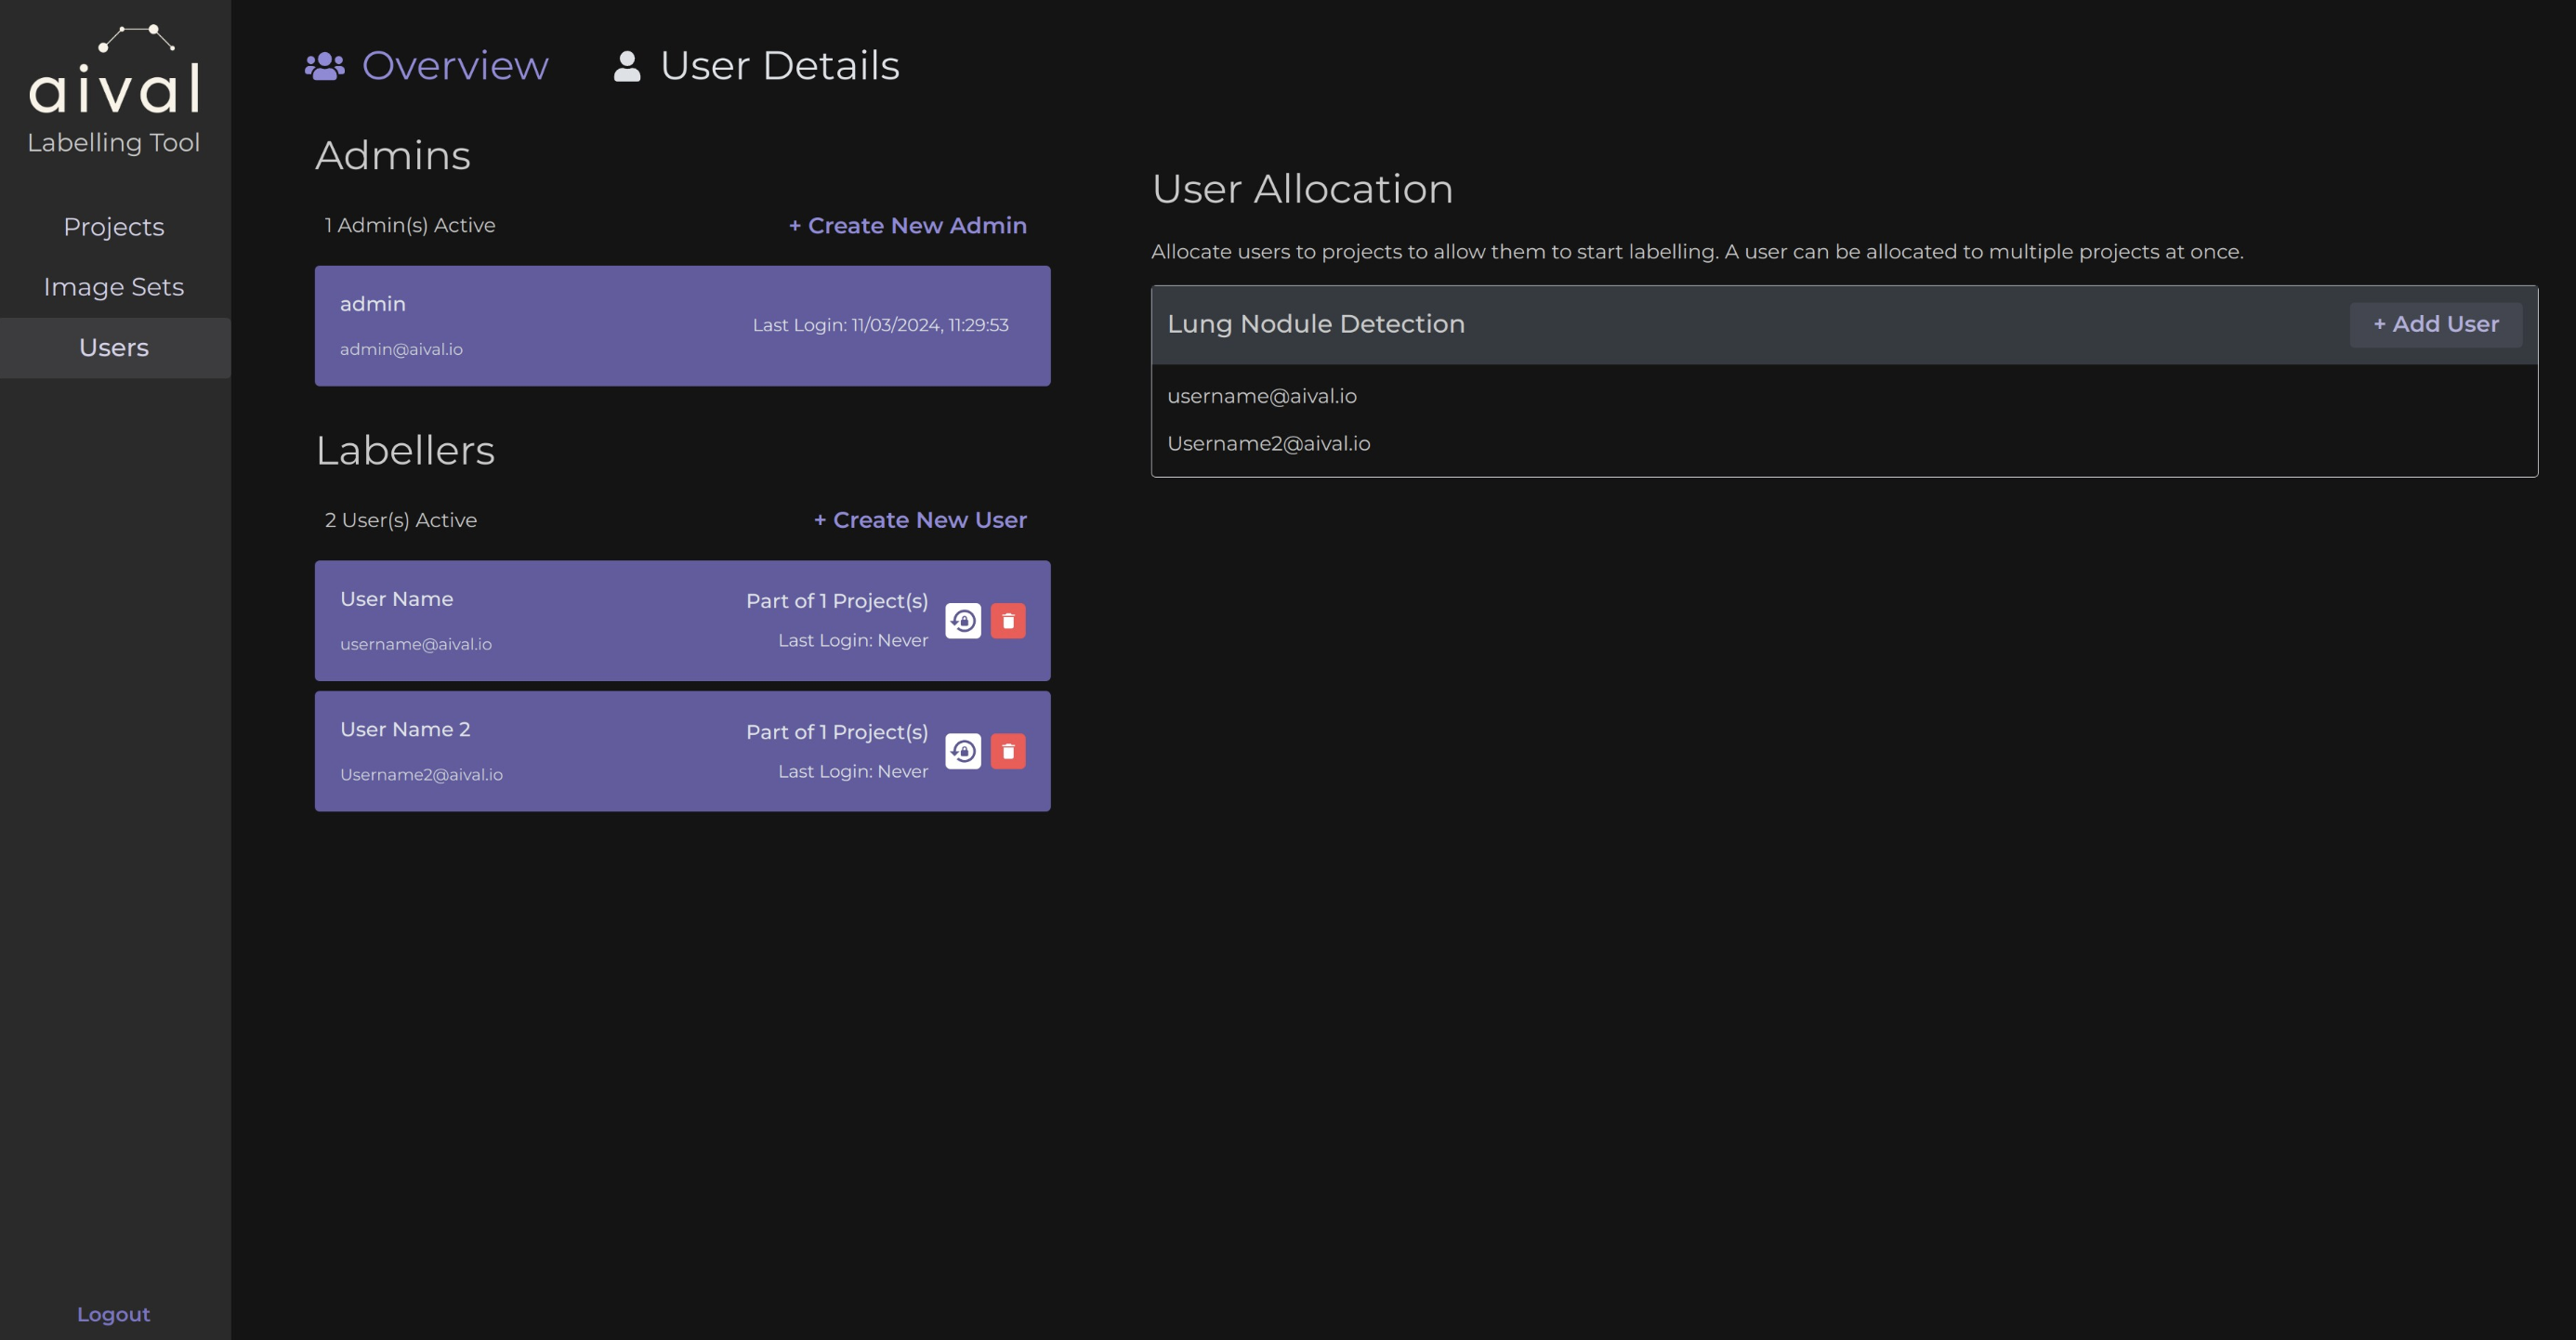
Step 3: Click on 'Add User' in the pop up: To confirm that you would like to add this labeller to the selected project.
Once the labeller has been successfully added to the project they will appear in the specific project User table in the 'Projects' tab.
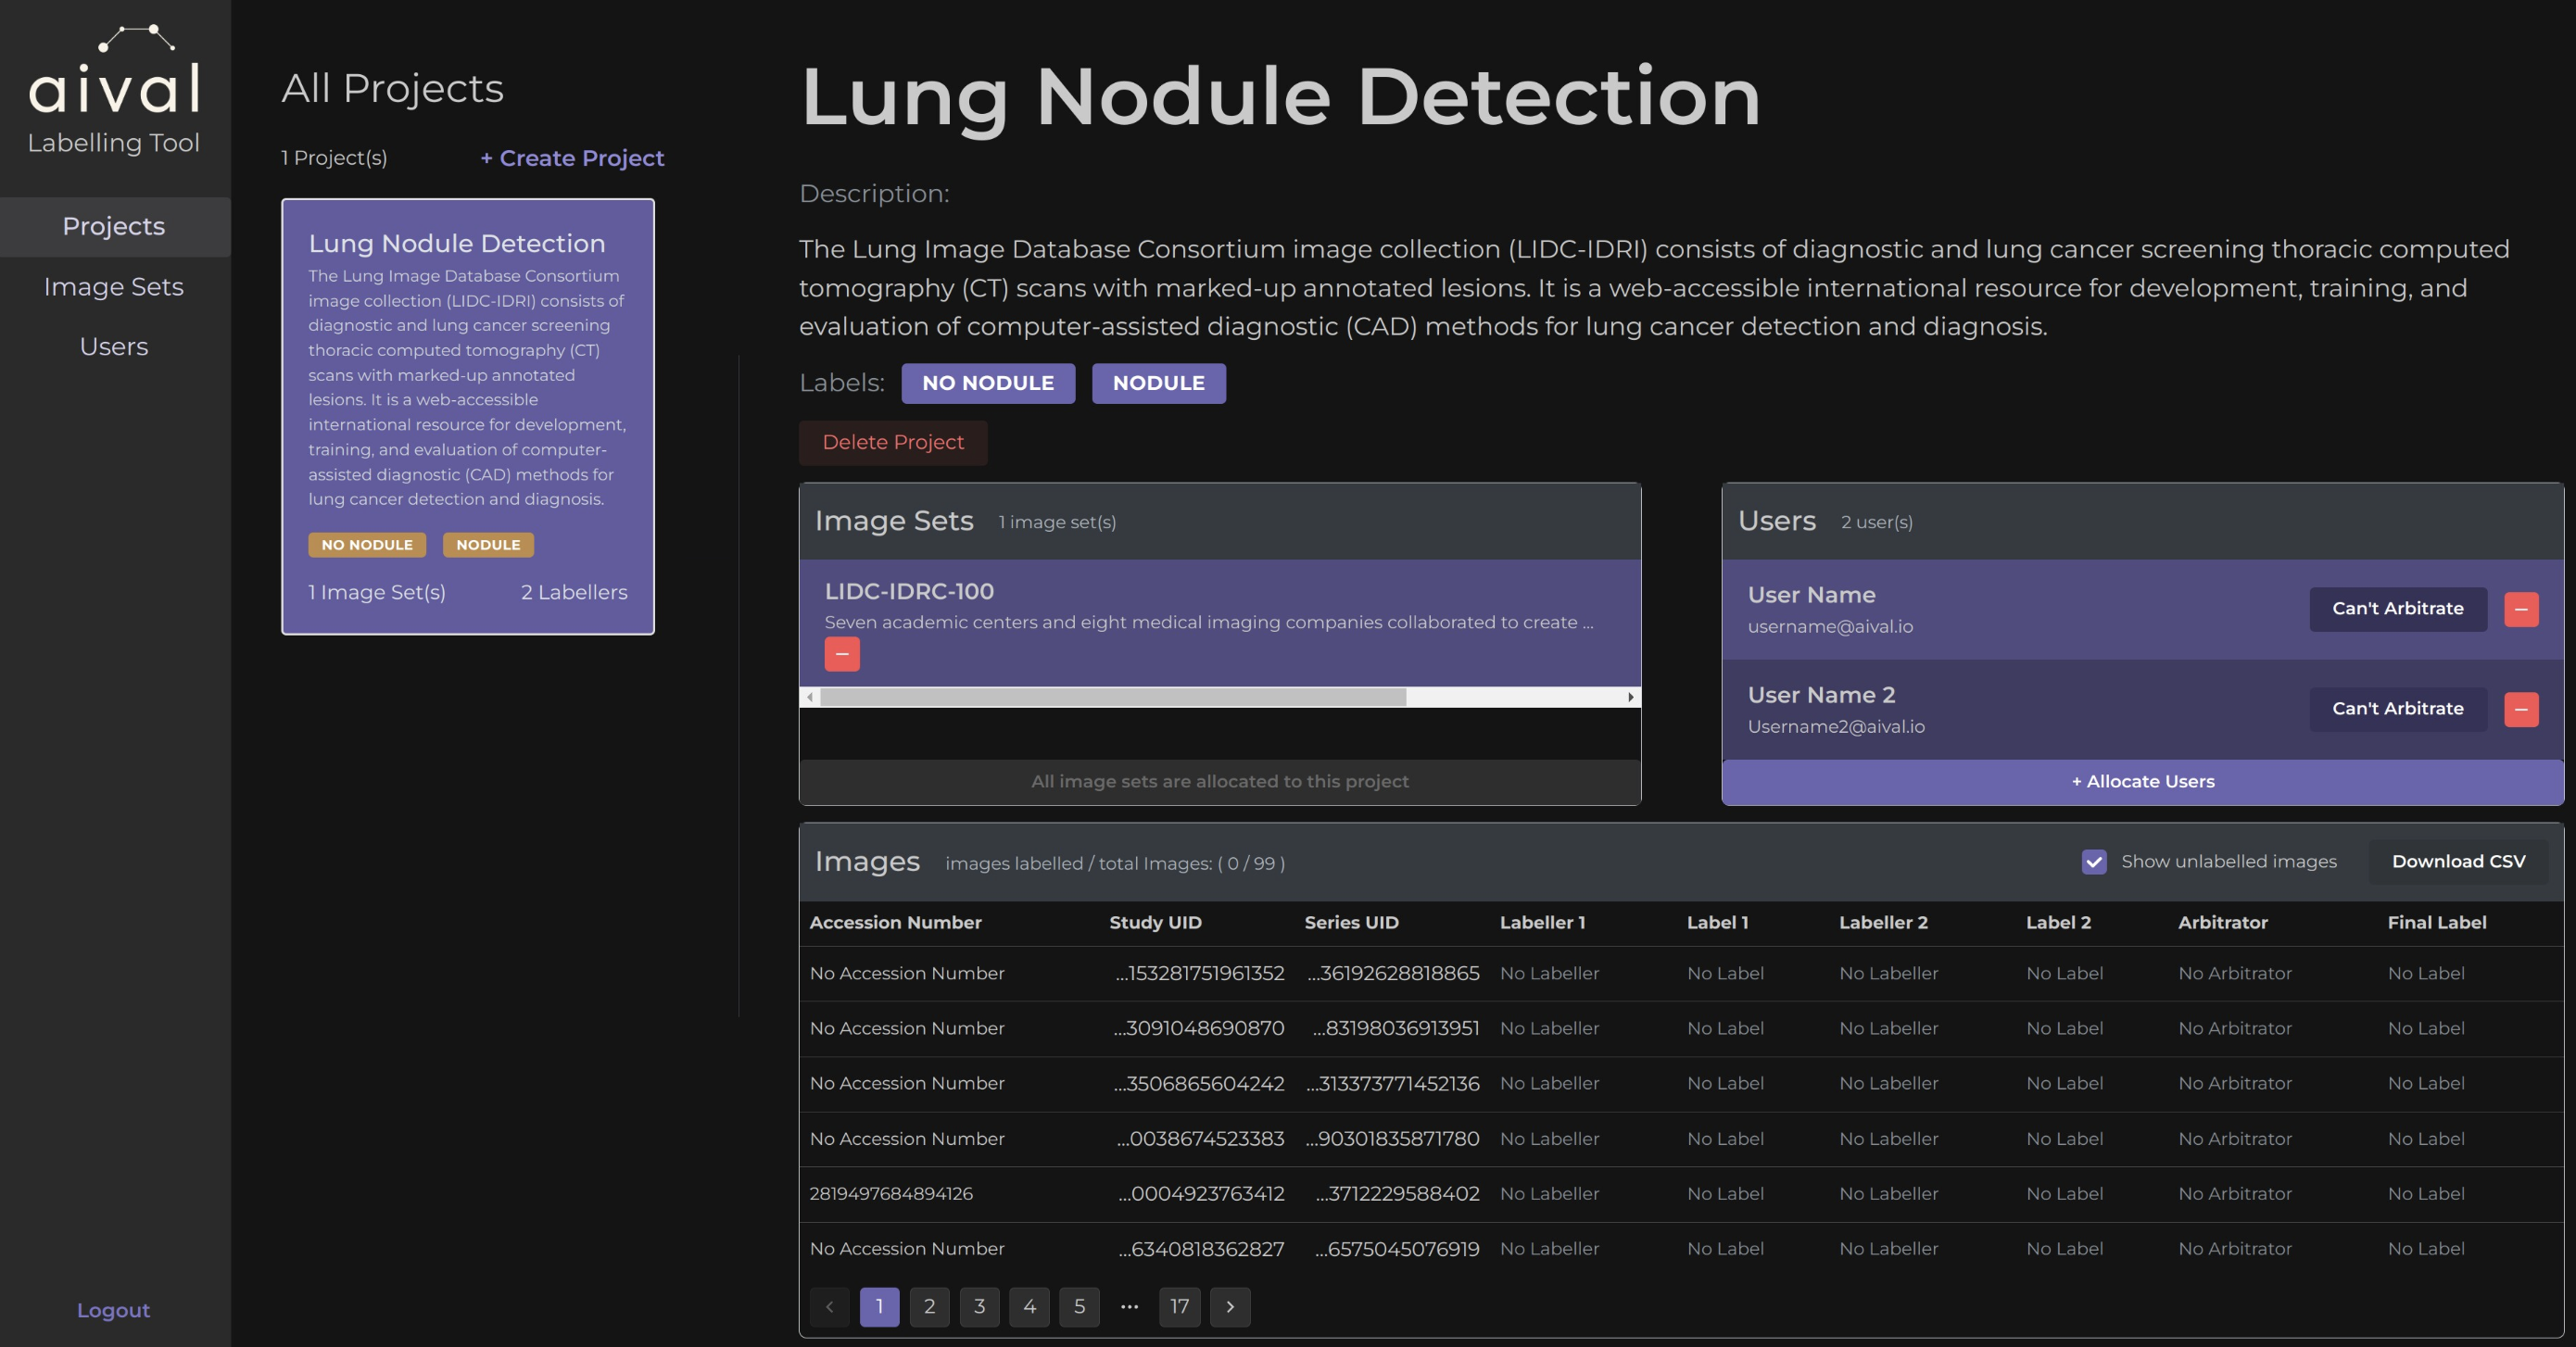
Another way to add an existing labeller is by going directly to the 'Projects' tab, selecting the chosen project by clicking on it and then navigating to the 'Users' table for that project and clicking on 'Allocate Users'. A pop up will appear where you can select your existing labeller to it.