Adding Image Sets to a Project
An image set is a collection of images you wish to use, in one or more of your projects. In order to create an image set, you will require a dataset that follows the input data requirements.
Creating an Image Set for a Project
This section will walk you through the process of adding an image set to your project. Follow these steps to integrate your desired image set.
Step 1: Navigate to the Image Set Tab: This tab will be located as a title on the tab on the left hand side of your screen.
Step 2: Create a New Image Set: Within this page, you will find the 'Create an Image Set' button. Clicking this button will allow you to add the details of an image set into a pop up.
Step 4: Provide Image Set Details: A pop up box will appear prompting you to fill in the details for your new image set.
Title: Give your image set a clear and descriptive title. (Required)
Description: Add any useful information that describes what the image set contains or its purpose in the project. (Optional)
Location: Specify the path to the location of the dataset on your local machine. (Required)
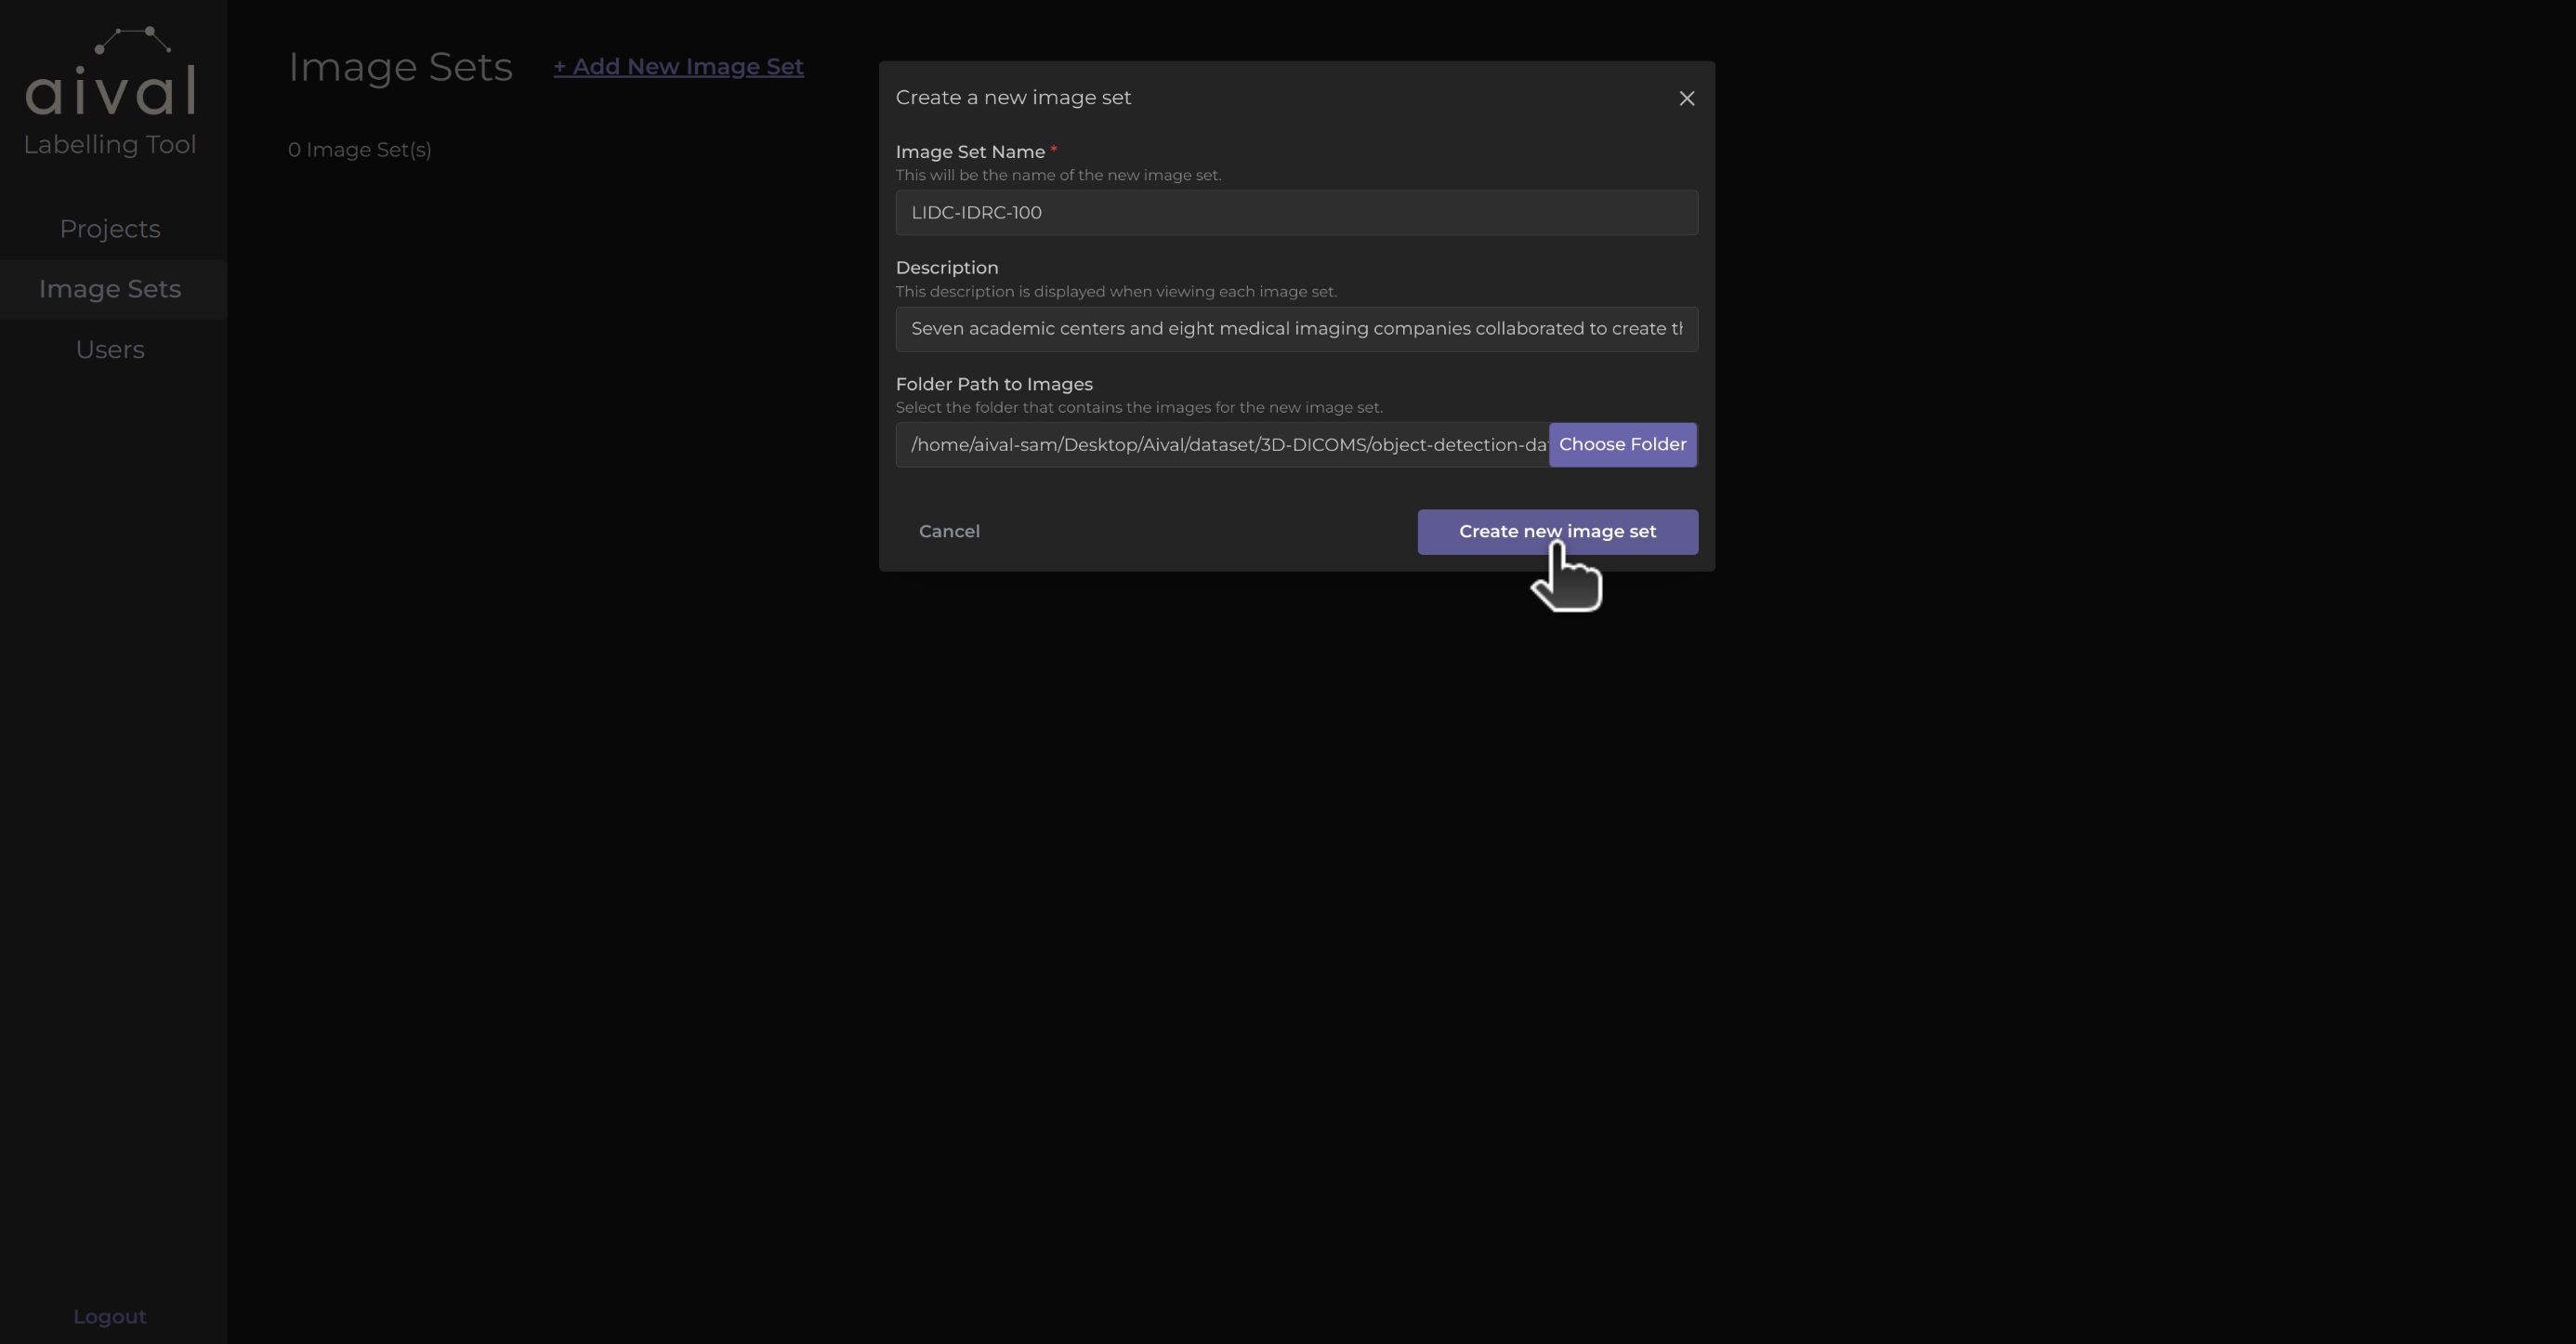
Step 5: Confirm and Upload: Once all the necessary details have been filled in, confirm the information is correct.
After clicking on the 'Create new image set' button a pop up will appear, depending on how big your dataset is this can take some time. However, we can exit the pop up by clicking on the 'X' in the top corner of this box. Once the image set is uploaded it will appear with its title in the image set records.
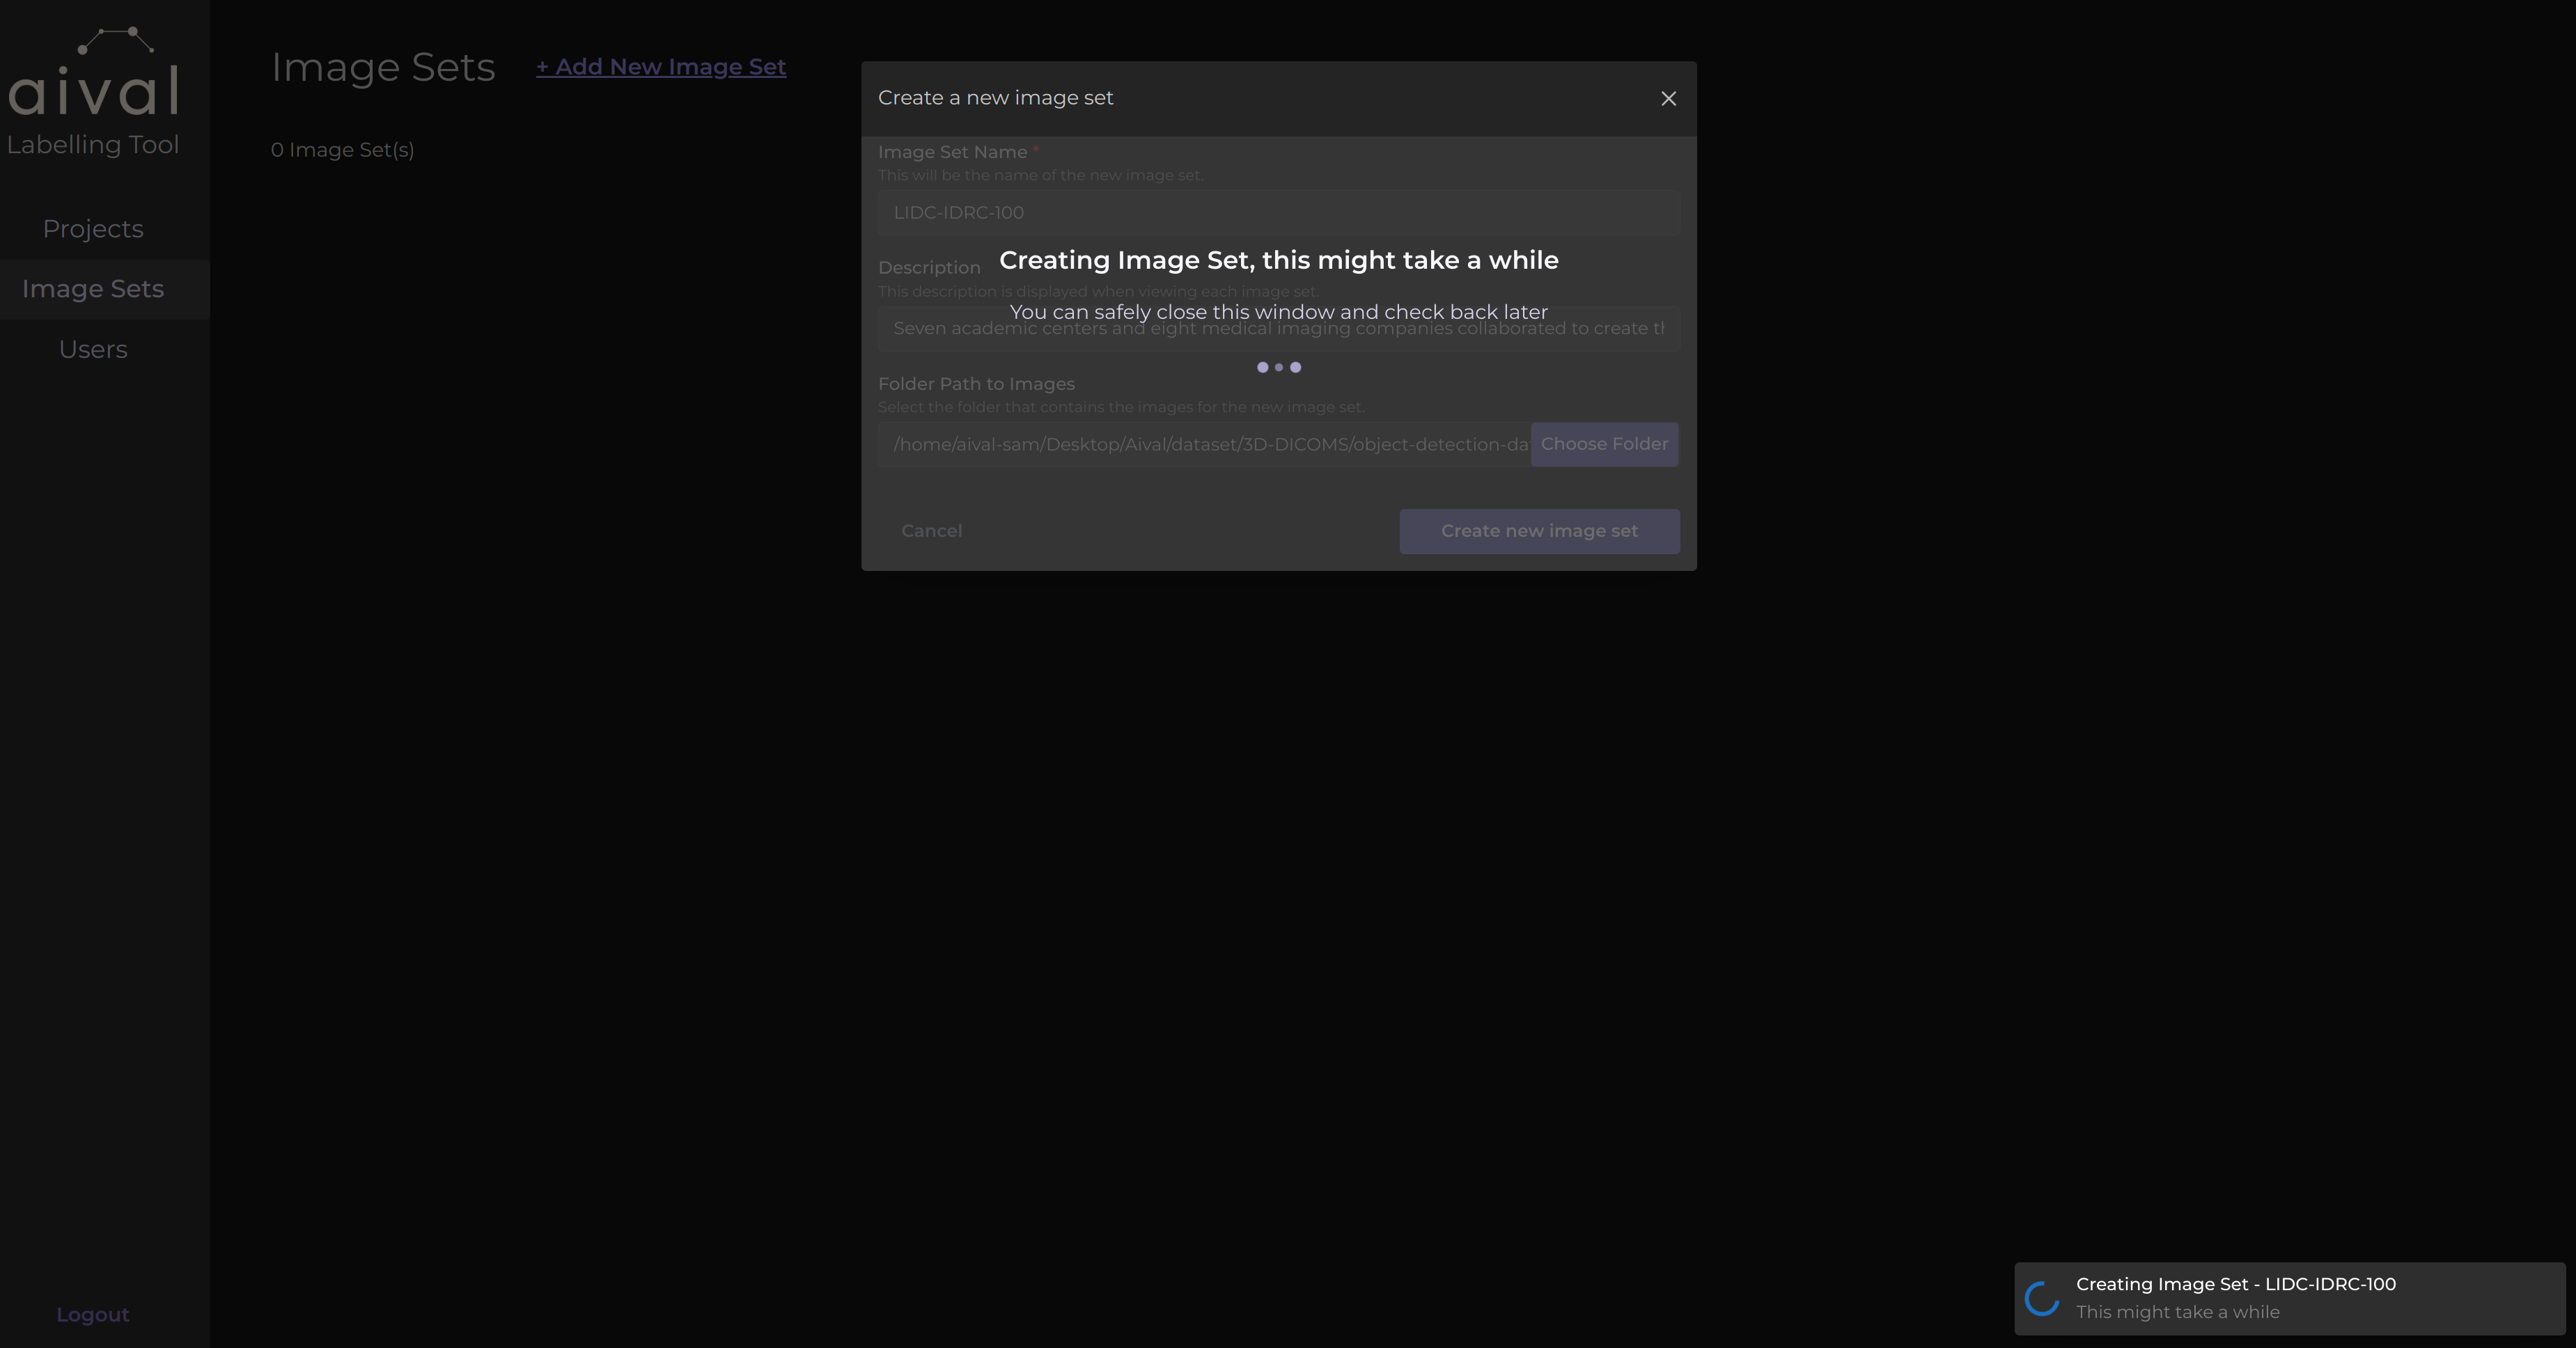
By following these straightforward steps, you will have successfully added an image set to your project and it will appear like in the illustrated image below. This indicates that it is ready to be added to any project.
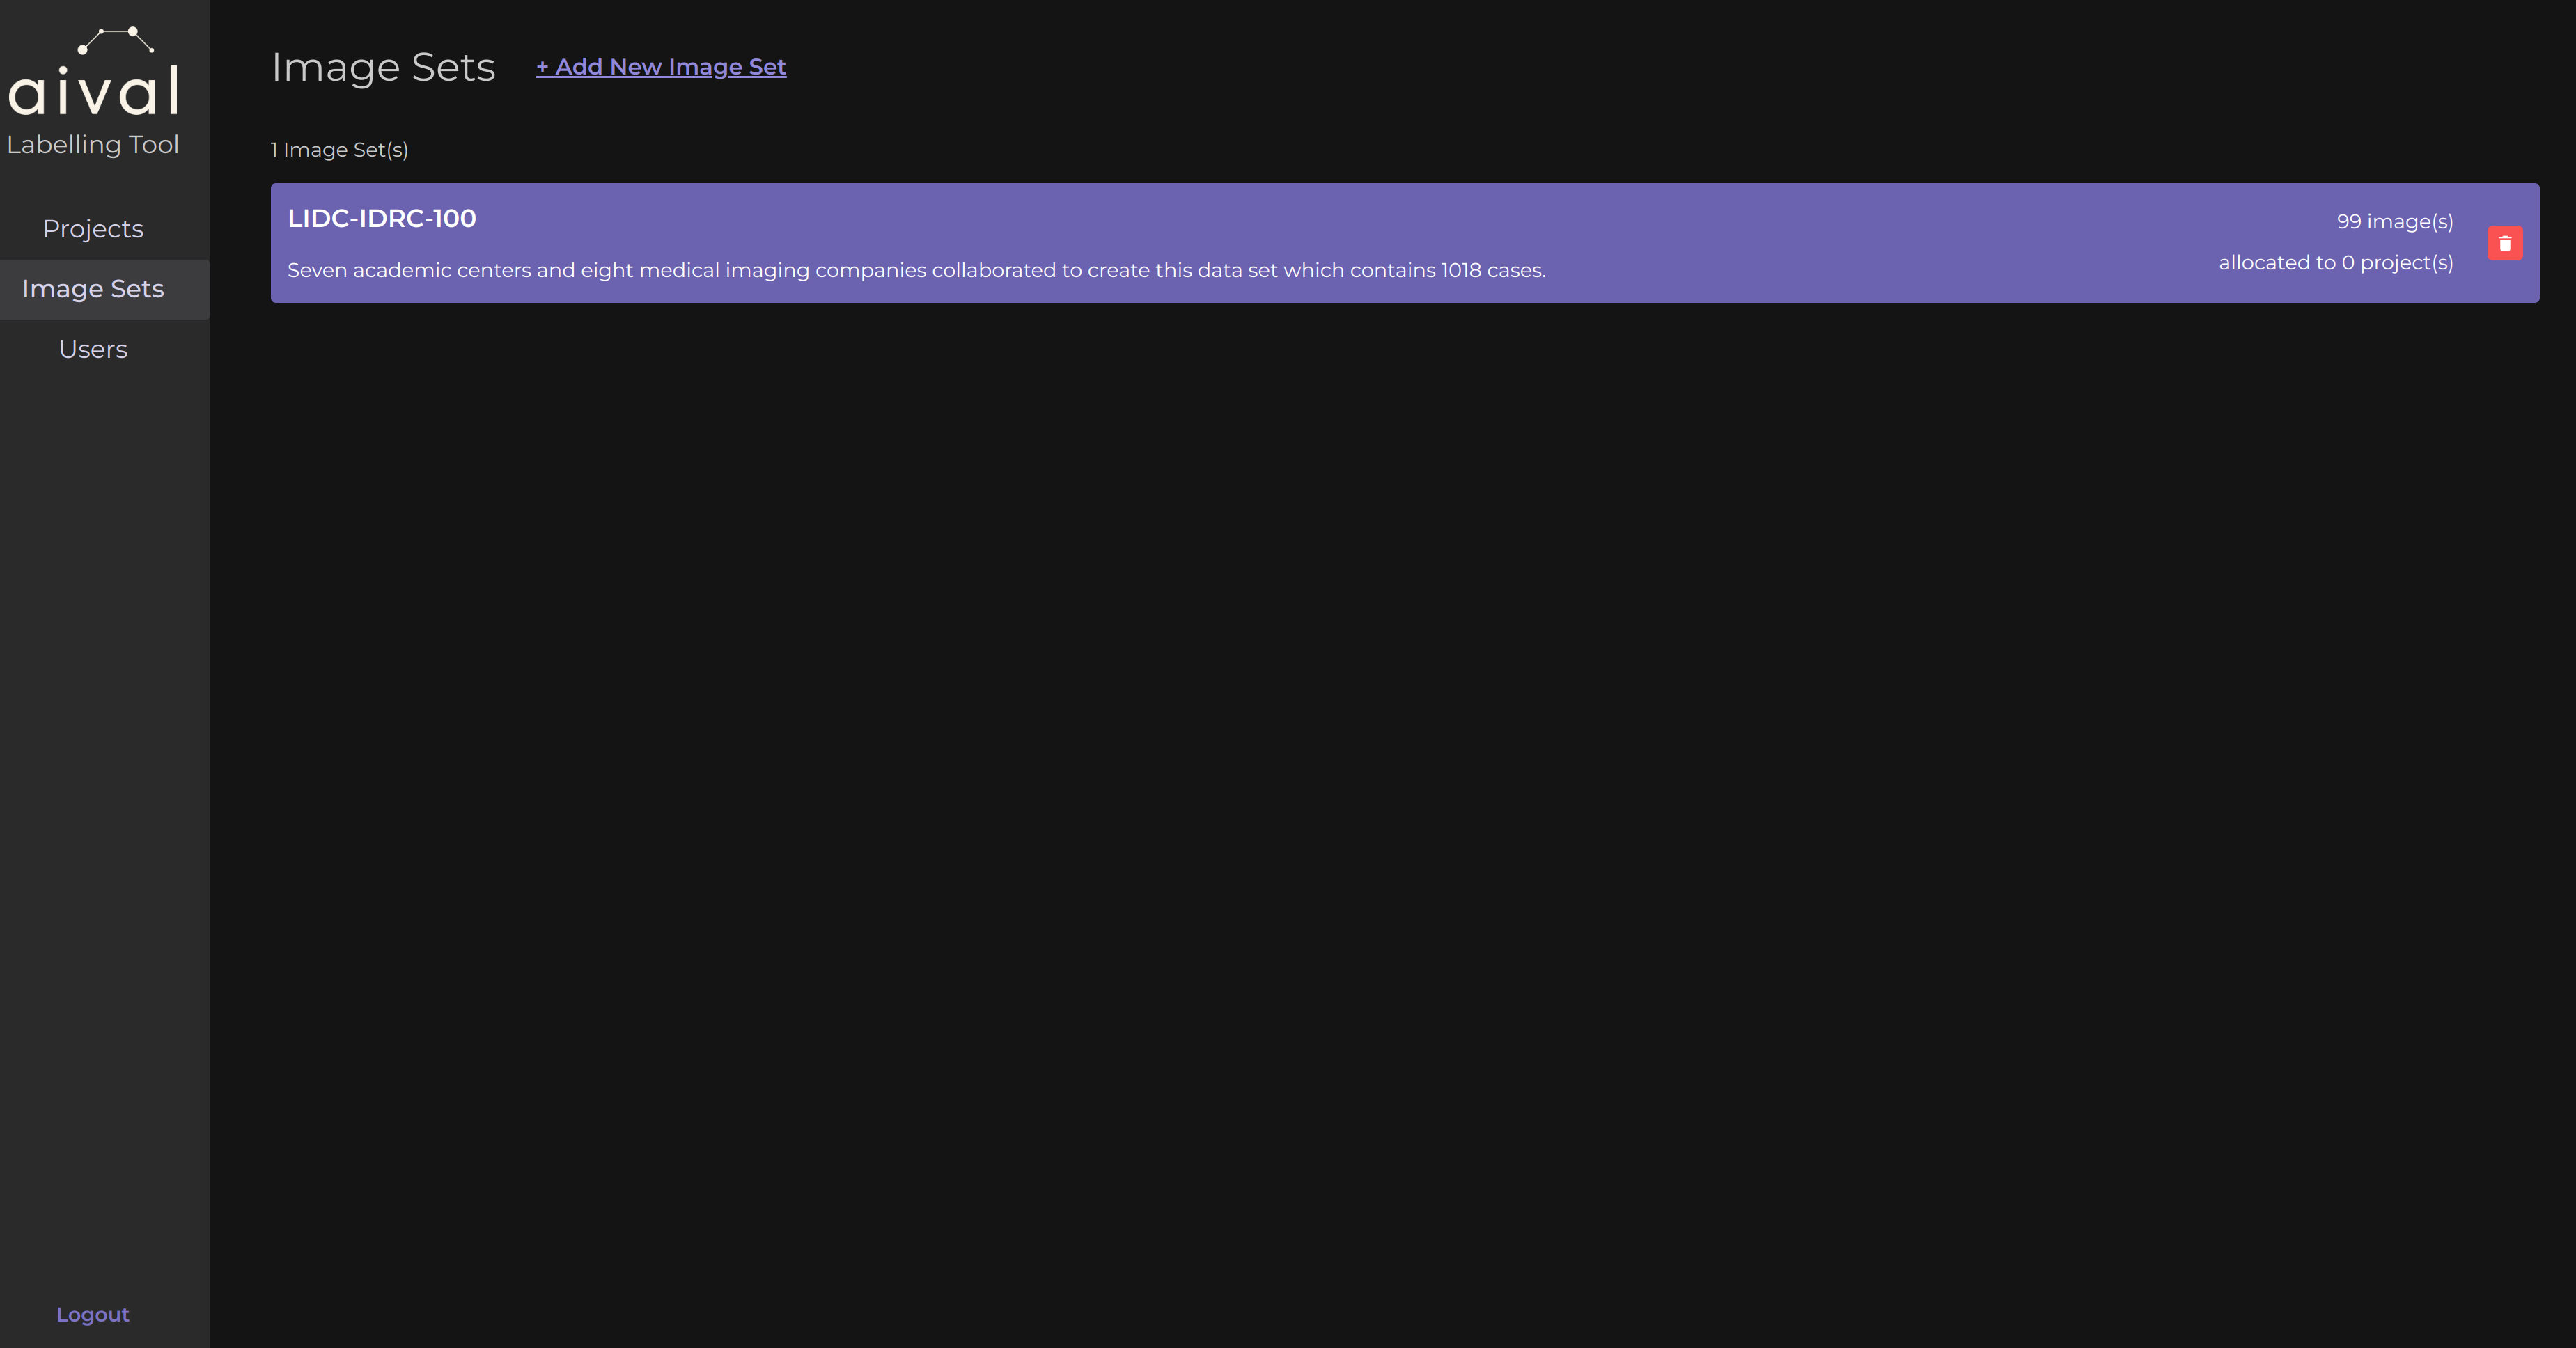
Uploading the Image Set to Your Project
Now that you have created your image set, these next steps will guide you on how to add it to a pre-existing project. If you have not yet created a project, the steps can be found here.
Step 1: Access the Project's Settings: Navigate to the 'Projects' tab and select the project you would like to add the image set to.
Step 2: Add Your Image Set: Click on the 'Allocate Image Sets' button. Select the newly created image set to begin the process of incorporating your chosen dataset into the project.
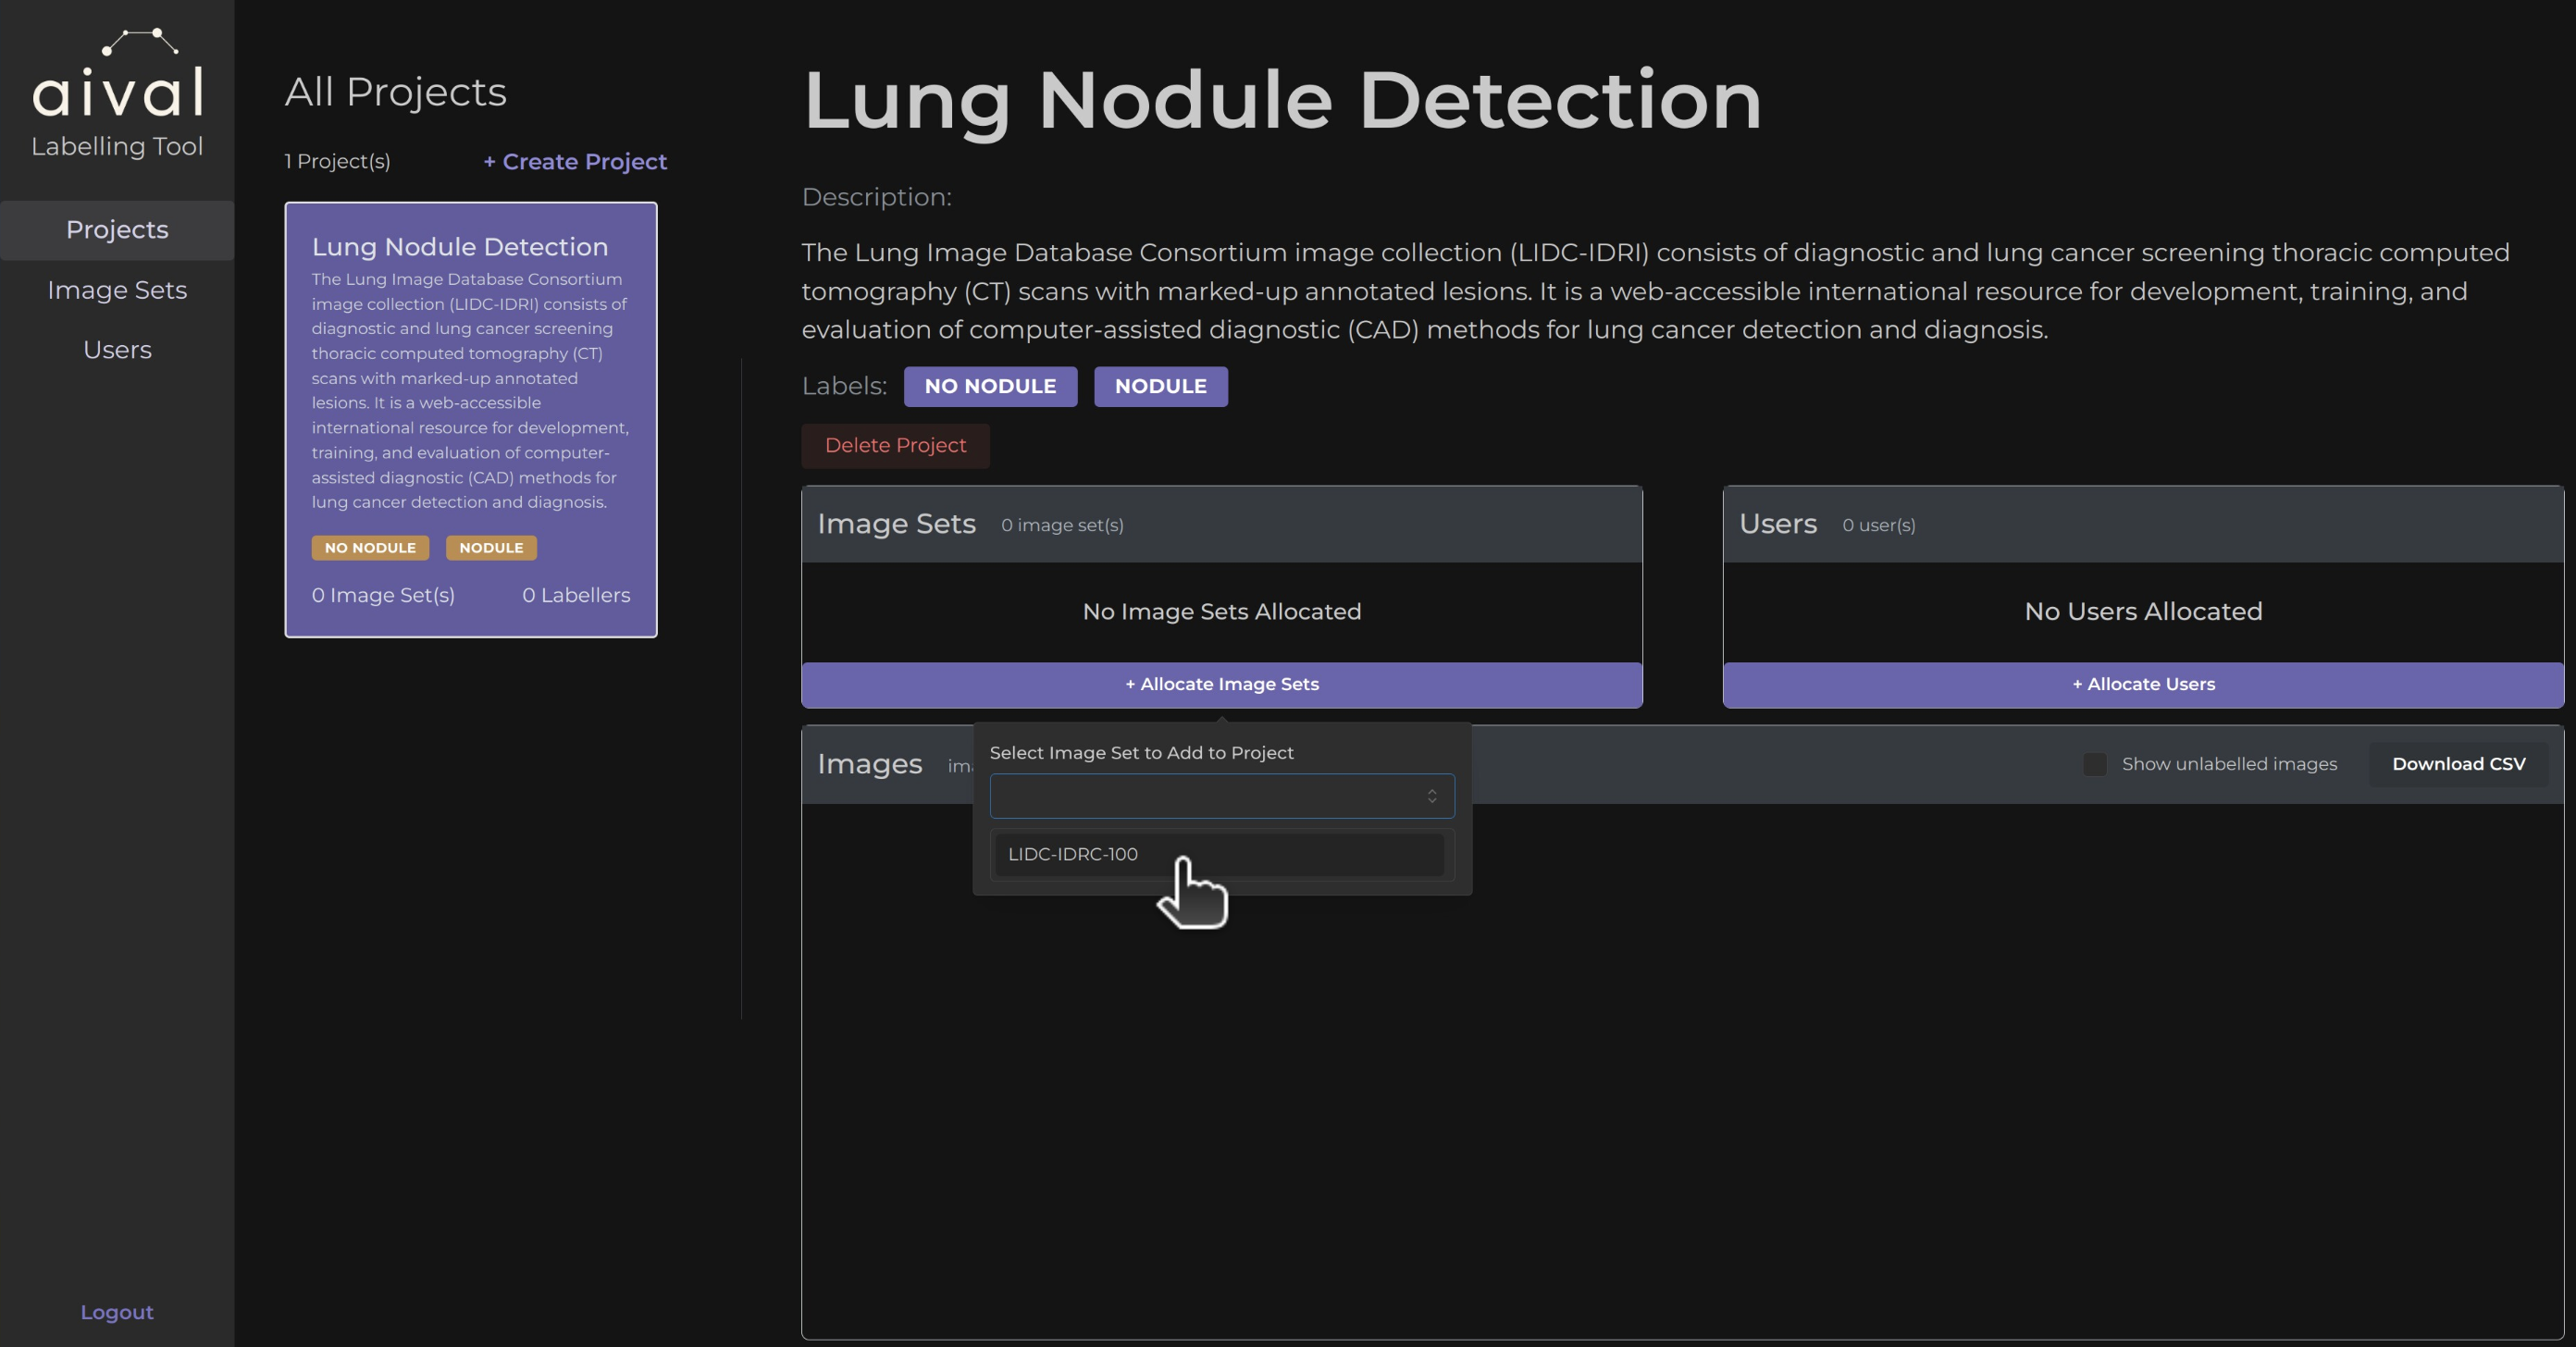
If the button 'Allocate Image Set' is not being displayed under the project's image sets and the text 'All image sets are allocated to this project', this indicates you have added all the image sets that exists to the project already.
If the image set is supported by our product then the image set will be added to the table of this project. If this is your project's first image set then the table will go from empty to being filled up.
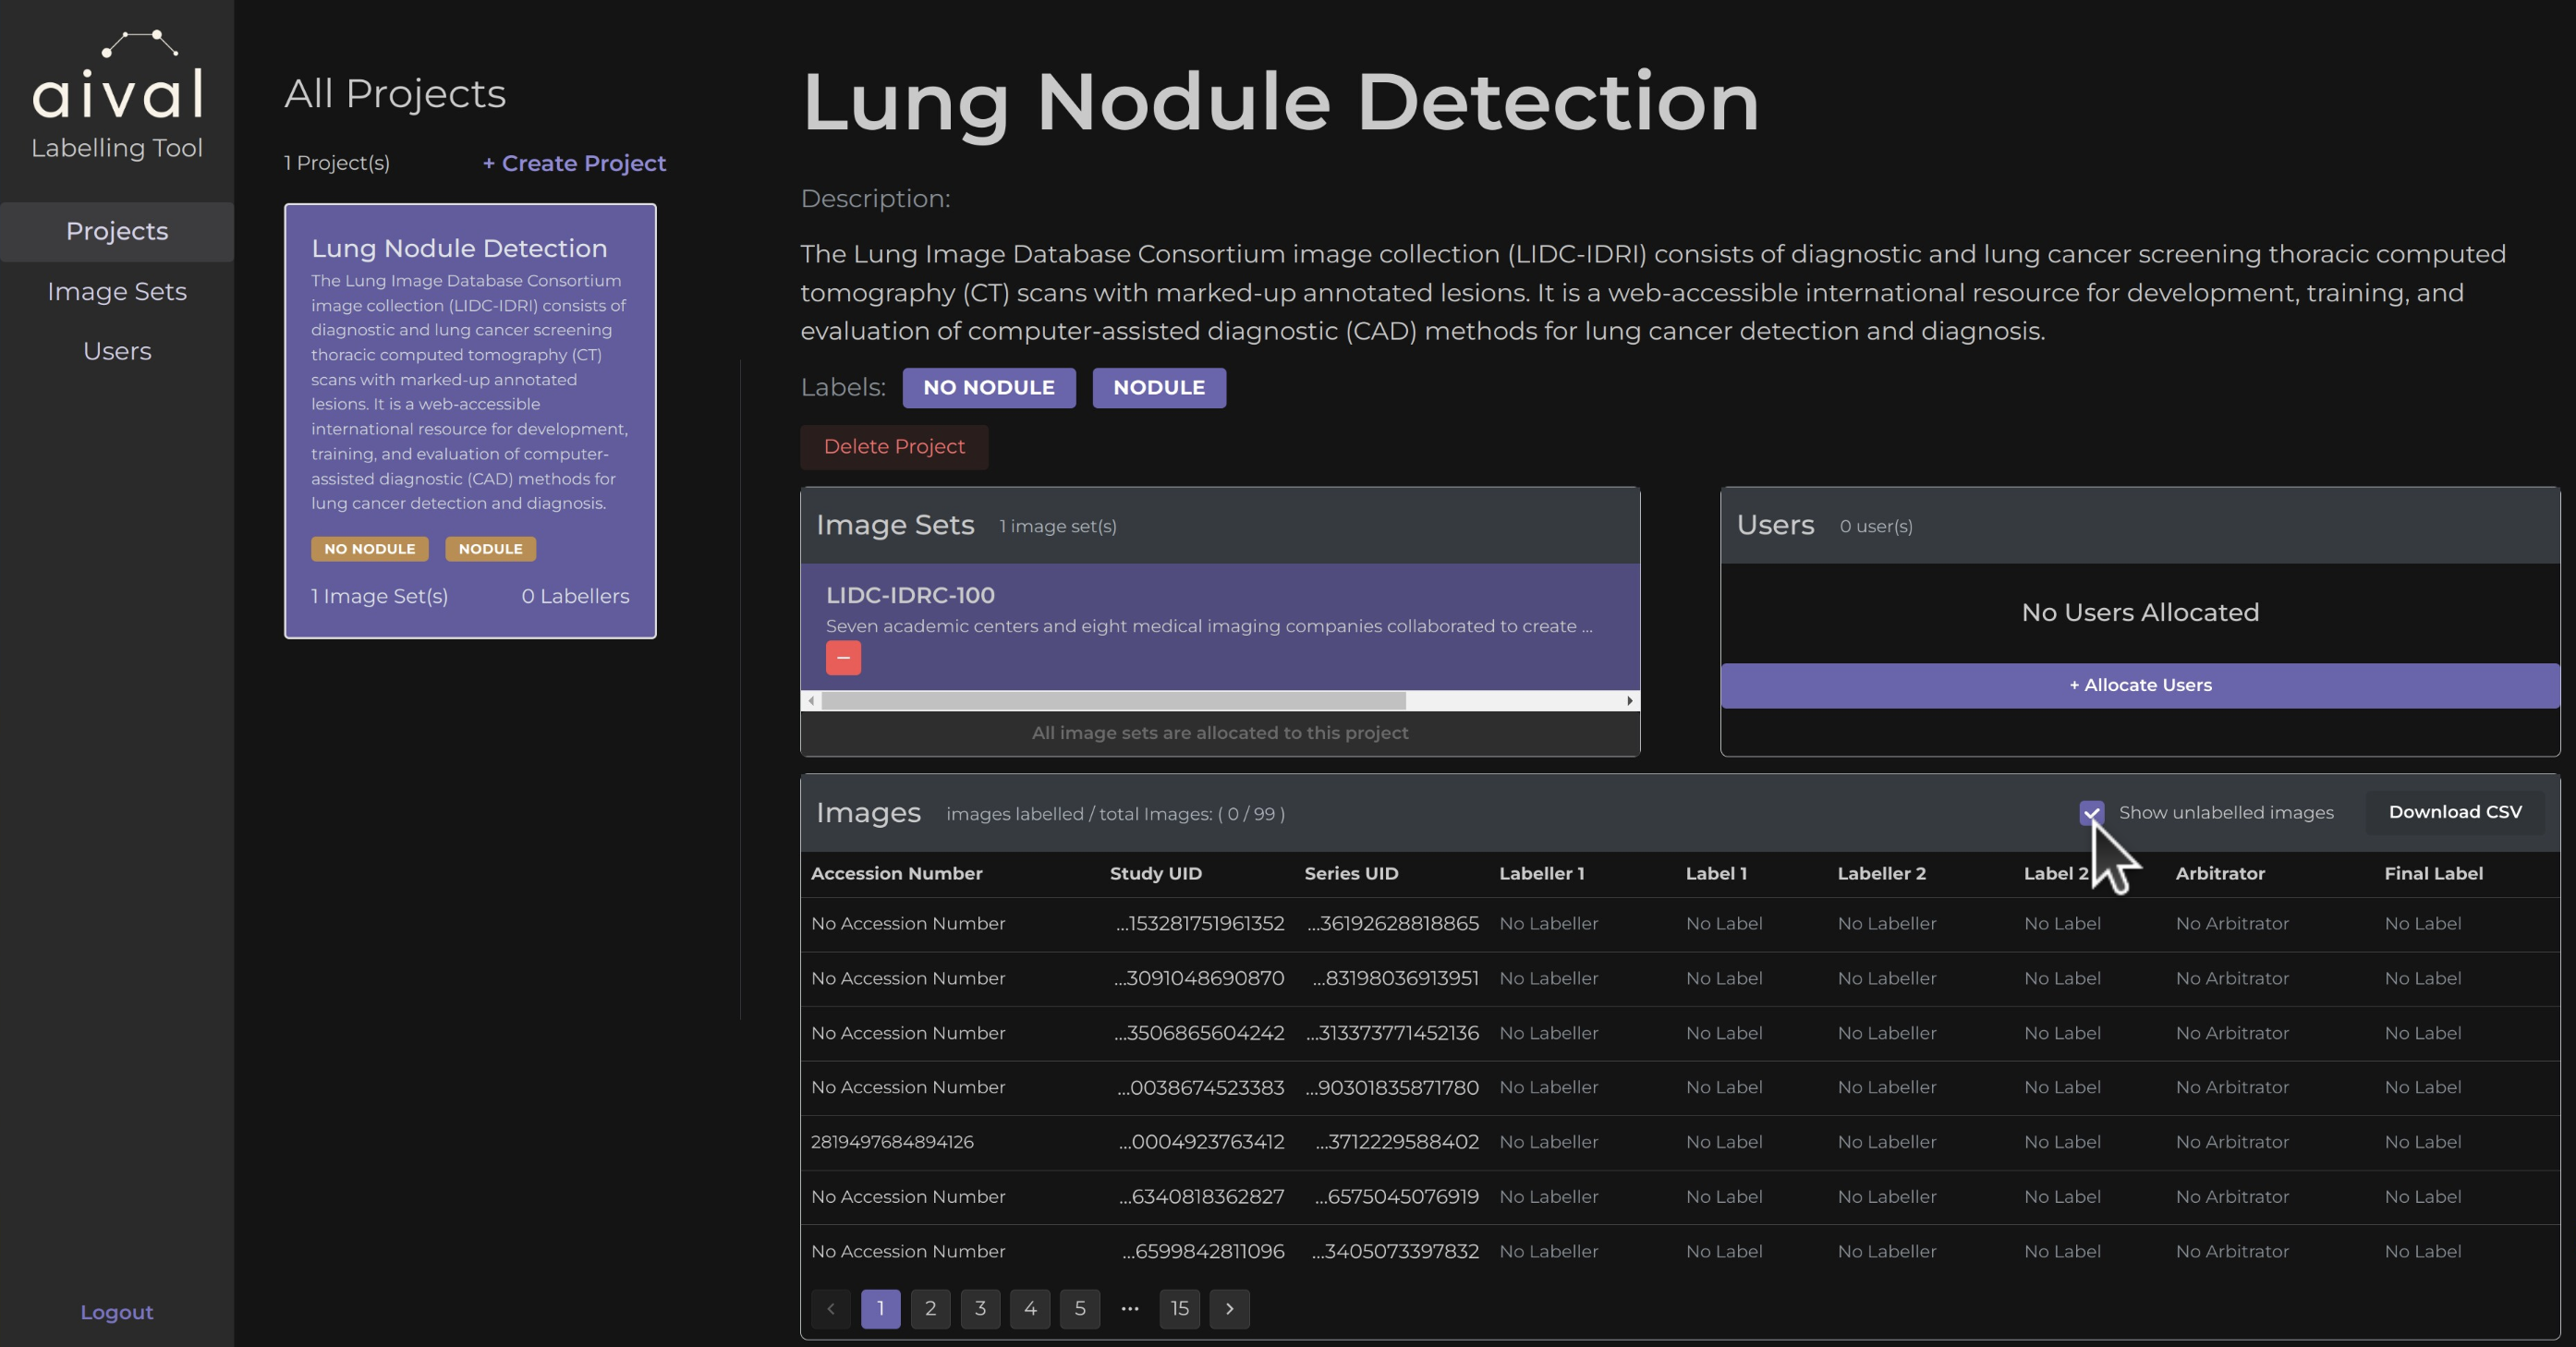
This table to will contain the Accession Number, Study UID, Series UID and Labels by each Labeller, including the indication of an arbitrator label if one was assigned.
Accession Number: A unique identifier assigned to each imaging study upon accessioning. Facilitates the tracking and retrieval of imaging studies within a database or PACS (Picture Archiving and Communication System).
Study UID (Unique Identifier): A globally unique identifier for a specific imaging study. Ensures that each study can be distinctly identified across different systems and institutions.
Series UID: A unique identifier for a specific series within an imaging study. Each series represents a set of images that share a common context, acquired during a single operation of the imaging device.
Labels by Each Labeller: Annotations provided by individual assigned Labellers on the images within a project.
Arbitrator Label: Labels by an assigned Labeller that resolves discrepancies between labels provided by different Labellers.